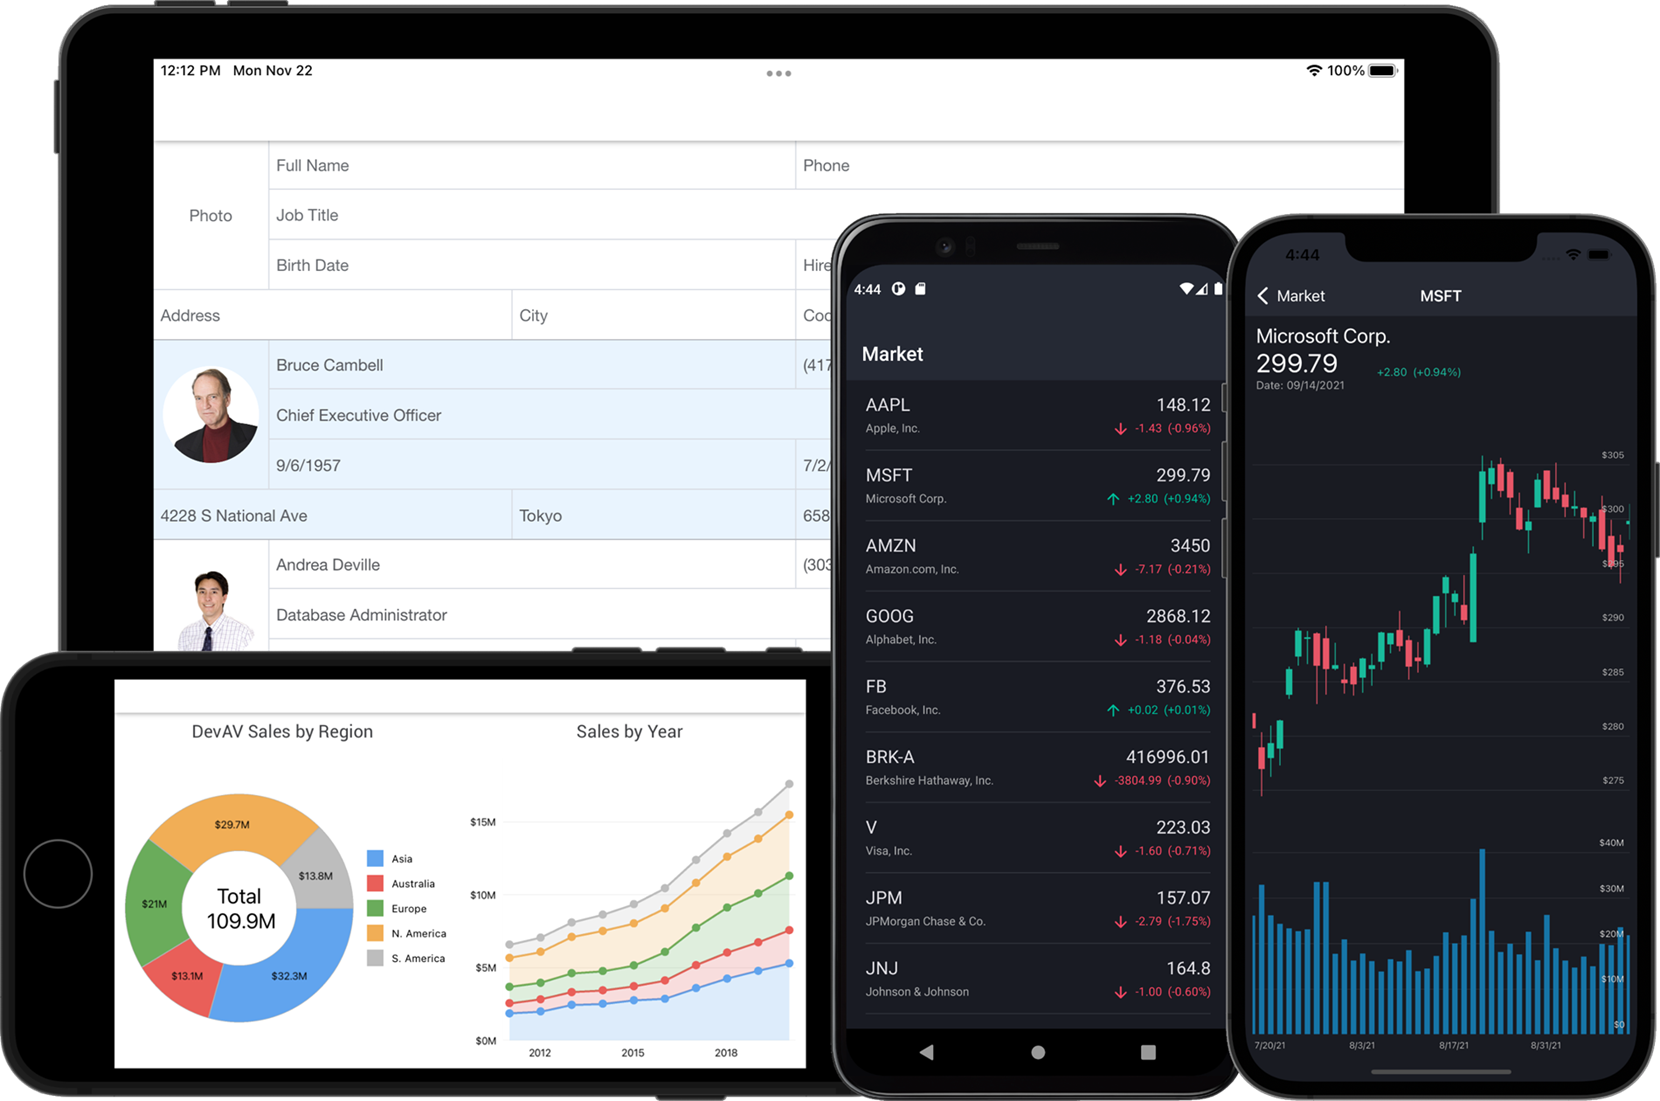
DevExpress Data Grid for .NET MAUI
DevExpress Mobile UI allows you to use a .NET cross-platform UI toolkit and C# to build native apps for iOS and Android.
The DevExpress Mobile UI for Xamarin.Forms and .NET MAUI is free of charge. To learn more about our offer and to reserve your copy, visit Free DevExpress Mobile UI for Xamarin.Forms and .NET MAUI.
Requirements
Please register the DevExpress NuGet Gallery in Visual Studio to restore the NuGet packages used in this solution. See the following topic for more information: Get Started with DevExpress Mobile UI for .NET MAUI.
Documentation
More Examples
- Stocks App
- Data Form
- Data Editors
- Pie Chart
- Scatter Chart
- Tab Page
- Tab View
- Drawer Page
- Drawer View
- Collection View
What's in This Repository
The DevExpress Data Grid for .NET MAUI is a data-aware control designed to present and manage data in a tabular format.
This example allows you to get started with the DataGridView component - bind it to a data source and configure its columns.
Files to Look At
How to Run This Application
- Install a .NET MAUI development environment and open the solution in Visual Studio 2022.
- Register the following NuGet feed in Visual Studio:
https://nuget.devexpress.com/free/api.
If you are an active DevExpress Universal customer or have registered our free Xamarin UI controls, this MAUI preview will be available in your personal NuGet feed automatically. - Restore NuGet packages.
- Run the application on an iOS or Android emulator.
How to Reproduce This Application
The following step-by-step tutorial details how to reproduce this application.
Create a New MAUI Application and Add a Data Grid
Create a new .NET MAUI solution in Visual Studio 22 Preview. Refer to the following Microsoft documentation for more information on how to get started with .NET MAUI: .NET Multi-platform App UI.
Register https://nuget.devexpress.com/free/api as a package source in Visual Studio, if you are not an active DevExpress Universal customer or have not yet registered our free Xamarin UI controls.
Install the DevExpress.Maui.DataGrid package from your NuGet feed.
In the MauiProgram.cs file, call the UseDevExpress method to register handlers for all DevExpress controls:
using Microsoft.Maui;
using Microsoft.Maui.Controls.Hosting;
using Microsoft.Maui.Hosting;
using DevExpress.Maui;

namespace DataGridExample {
    public static class MauiProgram {
        public static MauiApp CreateMauiApp() {
            var builder = MauiApp.CreateBuilder();
            builder
                .UseMauiApp<App>()
                .UseDevExpress()
                .ConfigureFonts(fonts => {
                    fonts.AddFont("OpenSans-Regular.ttf", "OpenSansRegular");
                });
            return builder.Build();
        }
    }
}
In the MainPage.xaml file, use the dxg prefix to declare the DevExpress.Maui.DataGrid namespace and add a DataGridView object to the ContentPage:
<ContentPage xmlns="http://schemas.microsoft.com/dotnet/2021/maui"
             xmlns:x="http://schemas.microsoft.com/winfx/2009/xaml"
             x:Class="DataGridExample.MainPage"
             xmlns:dxg="clr-namespace:DevExpress.Maui.DataGrid;assembly=DevExpress.Maui.DataGrid">
    <dxg:DataGridView>
    </dxg:DataGridView>
</ContentPage>
Create a Data Source
In this example, the grid is bound to a collection of Employee objects - EmployeeData. Create a Model.cs file with the following classes:
using System.Collections.ObjectModel;
using Microsoft.Maui.Controls;
using System;

namespace DataGridExample {
    public enum AccessLevel {
        Admin,
        User
    }

    public class Employee {
        string name;

        public string Name {
            get { return name; }
            set {
                name = value;
                if (Photo == null && !String.IsNullOrEmpty(name))
                    Photo = ImageSource.FromFile(name.ToLower().Replace(" ", "_") + ".jpg");
            }
        }

        public Employee(string name) {
            this.Name = name;
        }
        public ImageSource Photo { get; set; }
        public DateTime BirthDate { get; set; }
        public DateTime HireDate { get; set; }
        public string Position { get; set; }
        public string Address { get; set; }
        public string Phone { get; set; }
        public AccessLevel Access { get; set; }
        public bool OnVacation { get; set; }
    }

    public class EmployeeData {
        void GenerateEmployees() {
            ObservableCollection<Employee> result = new ObservableCollection<Employee>();
            result.Add(
                new Employee("Nancy Davolio") {
                    BirthDate = new DateTime(1978, 12, 8),
                    HireDate = new DateTime(2005, 5, 1),
                    Position = "Sales Representative",
                    Address = "98122, 507 - 20th Ave. E. Apt. 2A, Seattle WA, USA",
                    Phone = "(206) 555-9857",
                    Access = AccessLevel.User,
                    OnVacation = false
                }
            );
            result.Add(
                new Employee("Andrew Fuller") {
                    BirthDate = new DateTime(1965, 2, 19),
                    HireDate = new DateTime(1992, 8, 14),
                    Position = "Vice President, Sales",
                    Address = "98401, 908 W. Capital Way, Tacoma WA, USA",
                    Phone = "(206) 555-9482",
                    Access = AccessLevel.Admin,
                    OnVacation = false
                }
            );
            result.Add(
                new Employee("Janet Leverling") {
                    BirthDate = new DateTime(1985, 8, 30),
                    HireDate = new DateTime(2002, 4, 1),
                    Position = "Sales Representative",
                    Address = "98033, 722 Moss Bay Blvd., Kirkland WA, USA",
                    Phone = "(206) 555-3412",
                    Access = AccessLevel.User,
                    OnVacation = false
                }
            );
            result.Add(
                new Employee("Margaret Peacock") {
                    BirthDate = new DateTime(1973, 9, 19),
                    HireDate = new DateTime(1993, 5, 3),
                    Position = "Sales Representative",
                    Address = "98052, 4110 Old Redmond Rd., Redmond WA, USA",
                    Phone = "(206) 555-8122",
                    Access = AccessLevel.User,
                    OnVacation = false
                }
            );
            result.Add(
                new Employee("Steven Buchanan") {
                    BirthDate = new DateTime(1955, 3, 4),
                    HireDate = new DateTime(1993, 10, 17),
                    Position = "Sales Manager",
                    Address = "SW1 8JR, 14 Garrett Hill, London, UK",
                    Phone = "(71) 555-4848",
                    Access = AccessLevel.User,
                    OnVacation = true
                }
            );
            result.Add(
                new Employee("Michael Suyama") {
                    BirthDate = new DateTime(1981, 7, 2),
                    HireDate = new DateTime(1999, 10, 17),
                    Position = "Sales Representative",
                    Address = "EC2 7JR, Coventry House Miner Rd., London, UK",
                    Phone = "(71) 555-7773",
                    Access = AccessLevel.User,
                    OnVacation = false
                }
            );
            result.Add(
                new Employee("Robert King") {
                    BirthDate = new DateTime(1960, 5, 29),
                    HireDate = new DateTime(1994, 1, 2),
                    Position = "Sales Representative",
                    Address = "RG1 9SP, Edgeham Hollow Winchester Way, London, UK",
                    Phone = "(71) 555-5598",
                    Access = AccessLevel.User,
                    OnVacation = false
                }
            );
            result.Add(
                new Employee("Laura Callahan") {
                    BirthDate = new DateTime(1985, 1, 9),
                    HireDate = new DateTime(2004, 3, 5),
                    Position = "Inside Sales Coordinator",
                    Address = "98105, 4726 - 11th Ave. N.E., Seattle WA, USA",
                    Phone = "(206) 555-1189",
                    Access = AccessLevel.User,
                    OnVacation = true
                }
            );
            result.Add(
                new Employee("Anne Dodsworth") {
                    BirthDate = new DateTime(1980, 1, 27),
                    HireDate = new DateTime(2004, 11, 15),
                    Position = "Sales Representative",
                    Address = "WG2 7LT, 7 Houndstooth Rd., London, UK",
                    Phone = "(71) 555-4444",
                    Access = AccessLevel.User,
                    OnVacation = false
                }
            );
            Employees = result;
        }

        public ObservableCollection<Employee> Employees { get; private set; }

        public EmployeeData() {
            GenerateEmployees();
        }
    }
}
Create a ViewModel.cs file and add a view model class:
using System.Collections.Generic;
using System.ComponentModel;

namespace DataGridExample {
    public class EmployeeDataViewModel : INotifyPropertyChanged {
        readonly EmployeeData data;

        public event PropertyChangedEventHandler PropertyChanged;
        public IReadOnlyList<Employee> Employees { get => data.Employees; }

        public EmployeeDataViewModel() {
            data = new EmployeeData();
        }

        protected void RaisePropertyChanged(string name) {
            if (PropertyChanged != null)
                PropertyChanged(this, new PropertyChangedEventArgs(name));
        }
    }
}
Bind the Grid to Data
In the MainPage.xaml file:
- Assign an EmployeeDataViewModel object to the ContentPage.BindingContext property.
- Bind the DataGridView.ItemsSource property to the employee collection object that the EmployeeDataViewModel.Employees property returns.
<ContentPage xmlns="http://schemas.microsoft.com/dotnet/2021/maui"
             xmlns:x="http://schemas.microsoft.com/winfx/2009/xaml"
             x:Class="DataGridExample.MainPage"
             xmlns:dxg="clr-namespace:DevExpress.Maui.DataGrid;assembly=DevExpress.Maui.DataGrid"
             xmlns:local="clr-namespace:DataGridExample">
    <ContentPage.BindingContext>
        <local:EmployeeDataViewModel/>
    </ContentPage.BindingContext>
    <dxg:DataGridView ItemsSource="{Binding Employees}">
    </dxg:DataGridView>
</ContentPage>
Specify Grid Columns
Do the following to specify a collection of grid columns:
- Create column objects and use the FieldName property to bind each column to a data source field.
- Add columns to the DataGridView.Columns collection in the order you want them to be displayed in the grid.
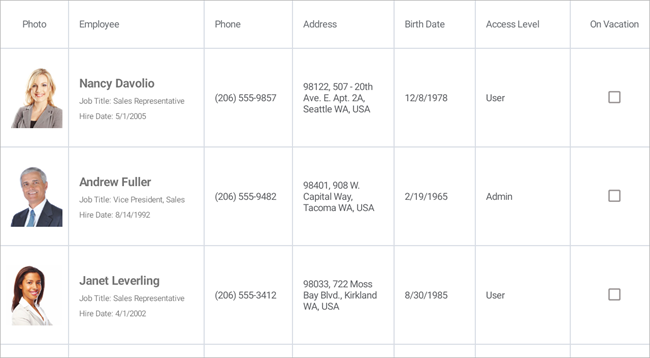
In this example, the grid contains the following columns:
-
Photo (ImageColumn) - displays photos of employees. Add images to a project as embedded resources.
-
Employee (TemplateColumn) - displays names, positions, and hire dates of employees.
Assign a template to the TemplateColumn.DisplayTemplate property to define the appearance of column cells. Each cell contains a Microsoft.Maui.Controls.Grid with three Microsoft.Maui.Controls.Label elements bound to the Name, Position, and HireDate properties of the Employee class.
The CellData object specifies a binding context for a cell template. Its CellData.Value property returns a value of a data field assigned to the column’s FieldName property. In this example, a column cell displays not only this field value but also the values of two more fields. Use the CellData.Item property to access the whole data row object (Employee) and bind its properties to properties of labels defined in the template.
-
Phone and Address (TextColumn) - display phones and addresses of employees. The keyboard for text input appears when a user activates a cell to edit an employee’s phone or address.
-
Birth Date (DateColumn) - displays birth days of employees and allows users to edit dates.
-
Access Level (ComboBoxColumn) - displays employee access level and allows a user to select between predefined values (Admin or User) to change a cell value.
-
On Vacation (CheckBoxColumn) - specifies whether an employee is on leave. This column displays checkboxes in cells to display and manage Boolean values.
Use the DataGridView.EditorShowMode property to specify a gesture that invokes an in-place editor for a cell. The grid automatically defines an editor type depending on the type of a column to which a cell belongs (except for TemplateColumn).
<dxg:DataGridView ItemsSource="{Binding Employees}"
                  EditorShowMode="DoubleTap">
    <dxg:DataGridView.Columns>
        <dxg:TemplateColumn FieldName="Photo" Width="100">
            <dxg:TemplateColumn.DisplayTemplate>
                <DataTemplate>
                    <Image Source="{Binding Item.Photo}" Margin="3"/>
                </DataTemplate>
            </dxg:TemplateColumn.DisplayTemplate>
        </dxg:TemplateColumn>
        <dxg:TemplateColumn FieldName="Name" Caption="Employee" MinWidth="200">
            <dxg:TemplateColumn.DisplayTemplate>
                <DataTemplate>
                    <Grid VerticalOptions="Center" Padding="15, 0, 0, 0" RowDefinitions="Auto, Auto, Auto">
                        <Label Text="{Binding Item.Name}" FontSize="18" FontAttributes="Bold"
                            TextColor="{DynamicResource GridCellFontColor}" Grid.Row="0" />
                        <Label Text="{Binding Item.Position, StringFormat = 'Job Title: {0}'}"
                            FontSize="Small" TextColor="{DynamicResource GridCellFontColor}"
                            Grid.Row="1"/>
                        <Label Text="{Binding Item.HireDate, StringFormat = 'Hire Date: {0:d}'}"
                            FontSize="Small" TextColor="{DynamicResource GridCellFontColor}"
                            Grid.Row="2" />
                    </Grid>
                </DataTemplate>
            </dxg:TemplateColumn.DisplayTemplate>
        </dxg:TemplateColumn>
        <dxg:TextColumn FieldName="Phone"
                        MinWidth="130" VerticalContentAlignment="Center" />
        <dxg:TextColumn FieldName="Address"
                        MinWidth="150" VerticalContentAlignment="Center" />
        <dxg:DateColumn FieldName="BirthDate"
                        MinWidth="120" DisplayFormat="d" VerticalContentAlignment="Center"/>
        <dxg:ComboBoxColumn FieldName="Access" Caption="Access Level"
                            MinWidth="140" VerticalContentAlignment="Center"/>
        <dxg:CheckBoxColumn FieldName="OnVacation"
                            MinWidth="130" VerticalContentAlignment="Center"/>
    </dxg:DataGridView.Columns>
</dxg:DataGridView>
Enable Drag-and-Drop
The DataGridView supports drag-and-drop operations and allows users to reorder rows. Users should touch and hold a data row and then drag and drop the row to another position.
To enable drag-and-drop operations, set the AllowDragDropRows property to True.
<dxg:DataGridView ItemsSource="{Binding Employees}" EditorShowMode="DoubleTap" AllowDragDropRows="True"/>


