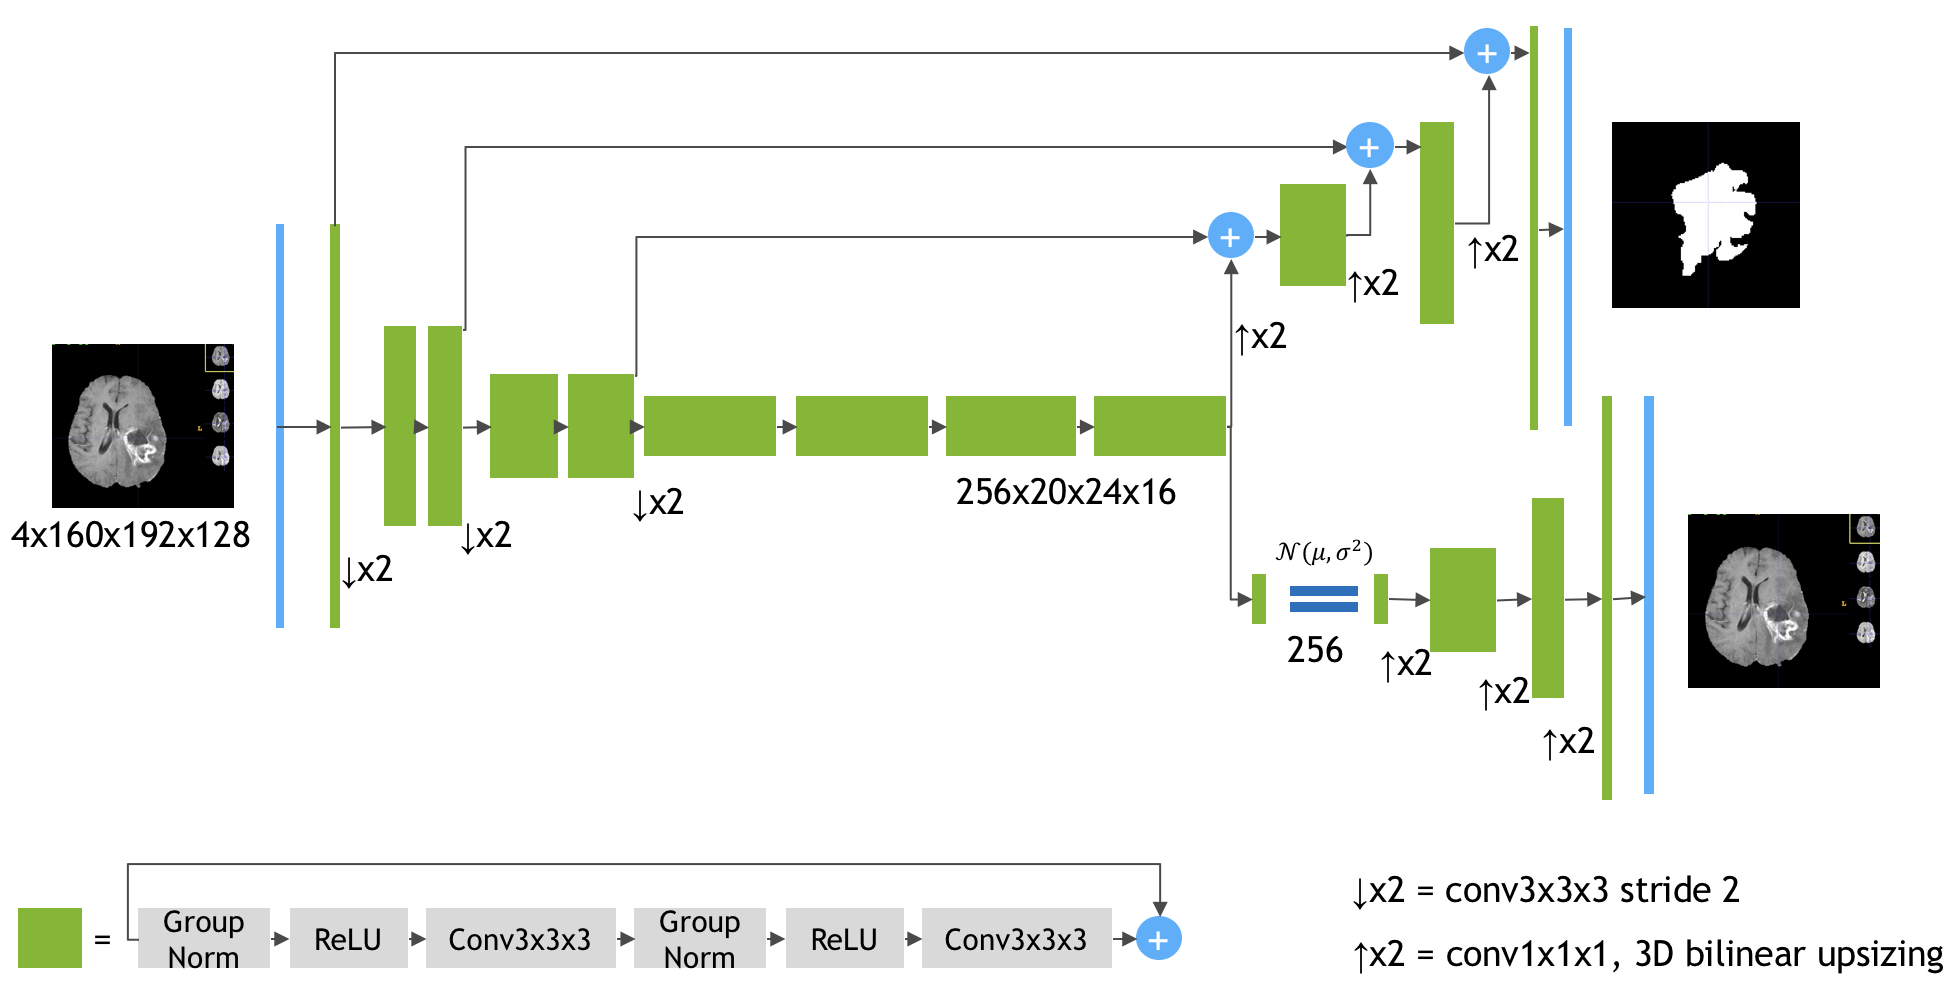
Source: https://arxiv.org/pdf/1810.11654.pdf
Keras implementation of the paper 3D MRI brain tumor segmentation using autoencoder regularization by Myronenko A. (https://arxiv.org/abs/1810.11654). The author (team name: NVDLMED) ranked #1 on the BraTS 2018 leaderboard using the model described in the paper.
This repository contains the model complete with the loss function, all implemented end-to-end in Keras. The usage is described in the next section.
-
Download the file
model.pyand keep in the same folder as your project notebook/script. -
In your python script, import
build_modelfunction frommodel.py.from model import build_model
It will automatically download an additional script needed for the implementation,
group_norm.py, which contains keras implementation for the group normalization layer. -
Note that the input MRI scans you are going to feed need to have 4 dimensions, with channels-first format. i.e., the shape should look like (c, H, W, D), where:
c, the no.of channels are divisible by 4.H,W,D, which are height, width and depth, respectively, are all divisible by 24, i.e., 16. This is to get correct output shape according to the model.
-
Now to create the model, simply run:
model = build_model(input_shape, output_channels)
where,
input_shapeis a 4-tuple (channels, Height, Width, Depth) andoutput_channelsis the no. of channels in the output of the model. The output of the model will be the segmentation map generated by the model with the shape (output_channels, Height, Width, Depth), where Height, Width and Depth will be same as that of the input.
Go through the Example_on_BRATS2018 notebook to see an example where this model is used on the BraTS2018 dataset.
You can also test-run the example on Google Colaboratory by clicking the following button.
However, note that you will need to have access to the BraTS2018 dataset before running the example on Google Colaboratory. If you already have access to the dataset, You can simply upload the dataset to Google Drive and input the dataset path in the example notebook.
If you encounter any issue or have a feedback, please don't hesitate to raise an issue.
- Added an example notebook showing how to run the model on the BraTS2018 dataset.
- Added a minus term before
loss_dicein the loss function. From discussion in #7 with @woodywff and @doc78. - Thanks to @doc78 , the NaN loss problem has been permanently fixed.
- The NaN loss problem has now been fixed (clipping the activations for now).
- Added an argument in the
build_modelfunction to allow for different no. of channels in the output.


