This is a remote control web application server for home appliances.
This project is primarily for testing and practical use of the MQTT-based device bridge and control processor for the residential central air conditioner manufactured by Toshiba Carrier Corporation (indoor unit: NTS-F1403Y1 equipped with MCC-1403 PC board), no other devices are currently supported.
It is built on top of the Django web application framework and uses Django Channels for real-time WebSocket communication between the server and user clients.
Communication between the Django Channels and the HA devices (currently just one air conditioner) is handled by a MQTT-Django bridge included as a custom django-admin command.
The device bridge implementation for the Toshiba air conditioner that works with this project is here.
For the Toshiba air conditioner, a control processor that handles binary packets to control the indoor unit is implemented separately and included in this project as a submodule.
The web application of this project is designed to work as a Progressive Web App (PWA) as well as a normal website. For the site to work as a PWA, it is necessary to run the site over HTTPS.
This project uses the following packages as Docker Compose services:
- Nginx as a web server to serve static files and as a proxy for the Django application (Service: nginx)
- Uvicorn and Gunicorn for the ASGI-compliant application server (Service: app)
- Django-Q to execute scheduled commands (Service: django-q)
- Redis as a backend for Django Channels and Django-Q (Service: redis)
- Mosquitto as a MQTT broker (Service: mosquitto)
- HTTPS-PORTAL to run the site over HTTPS using a certificate provided by Let's Encrypt (Service: tlsgw)
Other services in the docker-compose.yaml:
- bridge: MQTT-Django bridge
- worker: Channels worker to run the MqttConsumer
- tapp: Packet processing server for Toshiba air conditioner (NTS-F1403Y1)
- Linux machine with Docker Engine installed
The project has been tested to work on the following environment:- x64 PC running Ubuntu 20.04
- Docker Engine 23.0.1
- Docker Compose plugin v2.16.0
git clone --recursive https://github.com/burrocargado/django-home-appliances-webappor
git clone https://github.com/burrocargado/django-home-appliances-webapp
cd django-home-appliances-webapp
git submodule update --init --recursiveBefore configuration, it is necessary to build the image defined in the service "app".
To build the images, create an empty file config/tlsgw.env, without this file the build will fail.
touch config/tlsgw.env
docker compose build- Prepare TLS certificates for the MQTT broker and clients.
(Refer to the documentation for OpenSSL or other tools.)- Create a Certificate Authority (CA) to sign certificates. The CA certificate is available once the CA is prepared, save as
cacert.pemin the config directory. - Generate a server certificate and private key for the MQTT broker. Sign the certificate with the CA and save the signed certificate and key to the config directory as
broker.crtandbroker.key, respectively. - Generate two pairs of a client certificate and private key for the bridge and the processor, sign for the certificates with the CA and place the signed certificates and keys in the config directory as
bridge.crt,bridge.key,tapp.crt,tapp.key. You should also generate a certificate and key for the device implementation (toshiba-aircon-mqtt-bridge) and sign the certificate with the same CA.
- Create a Certificate Authority (CA) to sign certificates. The CA certificate is available once the CA is prepared, save as
- Mosquitto
-
Create a password file
-
Copy
config/mosquitto.passwd.exampletoconfig/mosquitto.passwd. -
Edit the file to include at least three username:password pairs for the bridge, processor, and the device. It is a good idea to copy the file to a safe place before hashing the passwords in the next step, so that you can reference the plain passwords later.
-
Hash the passwords in the file:
./hash_mqtt_passwd.sh
-
-
Create
config/mosquitto.aclwith reference to theconfig/mosquitto.acl.example. -
The main Mosquitto configuration file
mosquitto.confis located in the mqtt directory. Edit it as needed.
-
- Django and packet processor
- Create
config/django_env,config/bridge.confandconfig/tapp_mqtt.confwith reference to the example files stored in the config directory. You can generate a key string for DJANGO_SECRET_KEY in the django_env file using thegen_django_secretkey.shscript.
- Create
- HTTPS-PORTAL
- Edit
config/tlsgw.envreferencingconfig/tlsgw.env.example.
For the HTTPS-PORTAL to work in staging or production mode, the Docker service "tlsgw" must be accessible by the officially registered FQDN through the ports 443 (TLS) and 80 (HTTP) exposed to the Internet. I'm using HAProxy to route incoming traffic to the tlsgw ports. The FQDN should be configured inconfig/tlsgw.env. You should also configure your local DNS server so that the FQDN points to the local private IP address of the server, otherwise the client address detected by the Django will be replaced by the global IP address assigned by your ISP and WHITE_LISTED_RANGES will not work.
- Edit
docker compose up -dTo create a superuser with access to the admin page, run the command:
docker compose run --rm app python3 manage.py createsuperuserOpen https://server.domain.tld/hawebapp/ with a web browser. If you wish, install the application as a PWA.
If you are accessing the application from the local network defined as WHITE_LISTED_RANGES in django/secrets/env, no user authentication is required. Otherwise, login is required.
User accounts are created from the admin page https://server.domain.tld/hawebapp/admin/.
Internationalization is implemented with Japanese translation.
If the browser language is set to Japanese in the preferences, the site will be displayed in Japanese.
Web accessibility implementation is incomplete or incorrect.
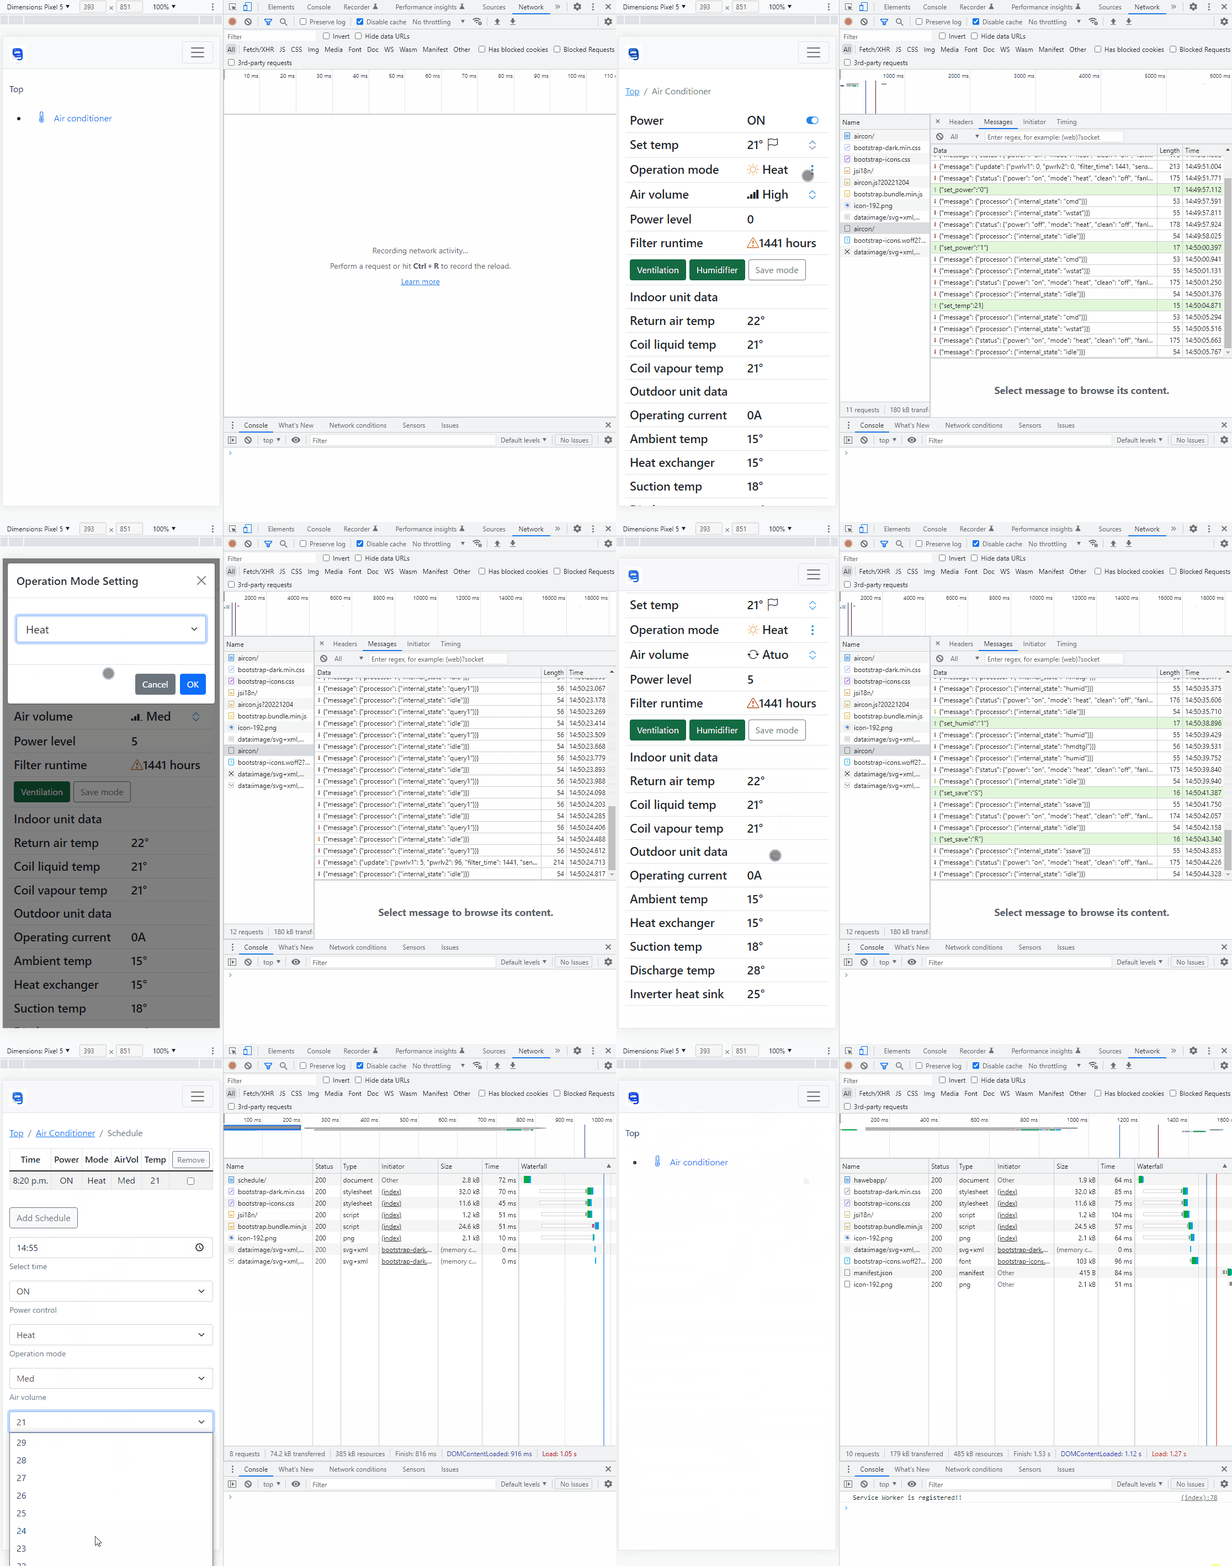
Screen shot of the Chrome browser with the developer tool accessing the application:
