Bedirhan Ziran ELBAN -----> bzelban92@gmail.com
Meriç LOMLU --------------> mericlomlu@gmail.com
Merve Nur TELLİ ----------> mervetelli0@gmail.com
OUTLINE
- Abstract
- Introduction
- Problem Statement
- Why Is This Project Worth Doing
- Objectives of the Project
- Scope of the Work
- Literature Survey
- Risk Analysis
- Methodology
- Prepare Statement
- System Architecture
- Mask R-CNN Training Module
- CNN Hand Detection Module
- Hand Distance Estimation Module
- Hand Depth Estimation Module
- Oscilator Module
- Result and Discussion
- Conclusion
- References
These days, solutions that are based on Computer Vision and Neural Network made life easier, also they are opening new doors to Human-Machine Interfaces. With Neural Networks, low-cost consumer cameras are not a problem anymore CNN to get input as a command and the need for computational power is less than before. Those improvements have shown that recreating a unique instrument is viable. In the music industry, there are fewer works that are using Computer Vision and Neural Network as an input device. With the power of Neural Network, a cheap, monocular RGB camera is a solution to our work. Theremin.AI aims to show a way to input in a different way, without touching any hardware. Also, our main approach is showing an input way that opens a dimension to artists and developers.
_ Keywords-- hand detection, hand depth estimation, distance estimation, computer vision, synthetic oscillation, convolutional neural network, human-machine interface _
Theremin (or Thermenvox, or Aetherphone) is an analog instrument that is classified as Hornbostel-Sachs 531.1 (Electrophone), invented by a Russian scientist named Léon Theremin. It is also creating a sound but the invention is different from other instruments. Without touching or hitting any keys, strings, or percussive elements, the player must use a different interface to create a sound.
In the system, antennas are designed to operate the instrument as an interface that creates electric fields. The instrument has two Antennas that are differently positioned. One is horizontally and the other is vertically positioned on the system. The horizontal antenna controls the Amplitude or Volume and the vertical antenna controls the Pitch or Frequency. The sound of the instrument is based on electronic oscillators. To create an oscillator sound, it uses a specified resonant circuit that specializes to sense objects and it's resonance value. Objects are used as capacitors to create an analog signal. Also, the output sound is most likely a fretless instrument.
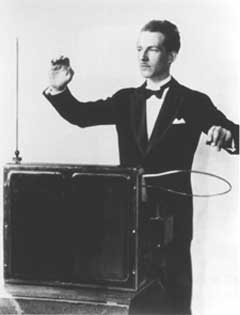
Figure 1: Léon Theremin, plays with his Theremin [1].
After the invention of Theremin, there is an inherited idea of "Gesture-Controlled" sound synthesis and created instruments such as TheremUS [2], Laser Koto [3], and Steim's BigEye [4]. Our project, Theremin.AI not going to be in that hyper instrument list, we planned to recreate the instrument that can create synthetic oscillation sounds by using a single, moderate RGB camera, with specialized neural network algorithms to catch hands and compute them in three dimensional way then creates a sound in real-time with that data within a playable latency (below 15 ms of input-to-sound reaction speed) also can be chained with the effect stomp-boxes. We inherited the idea of "Gesture-Controlled" sound synthesis and wanted to show a way to use this idea on Digital Audio Workstations, Artists, and Sound Designers. For example, with the ChucK language [5], there is a new way to create sound from different peripherals to make music.
Today's technological development speed shows us that controlling systems with different ways are sometimes more useful and make room for the creativity of artists. In time, there were too many attempts to control software or generation of sound to make music like tons of MIDI workstations, analog Euro racks, samplers, randomizers, gyroscopic controllers, etc. But there is not a Theremin like "Gesture-Controlled" device in the industry. That made us step into that field.
Also, in the industry, there are machine learning and deep learning solutions made with Digital Signal Processing, like Kemper Profiling [7], but there is no "Gesture-Controlled" input using those solutions.
In daily life, there are so many uses of Neural Network solutions, like weather forecasting, identifying cancers in early stages in medicine, currency exchange rates in finance, etc. Also, there are many projects in the field of Hand Detection, Hand Gesture Detection, and Sign Language. Most of them are specialized to control short commands, real-time tracking, motion capture. Those solutions are made to make life easier.
Capturing and getting inputs from Gestures can be used in projects that can eliminate many limitations on the physical interfaces. Right now, many of us think it's unhygienic to use touchable devices, due to the pandemic. On the other hand, one important characteristic of touchless interfaces will be gesture functionality. Limited availability of studies and projects are created for the musical industry. Theremin.AI opens a new dimension to instrument players and developers with the usefulness of Computer Vision and Neural Network.
Theremin.AI is a system that will have three parts. The first part is about utilizing a single, monocular RGB camera to get vision. We want to position the camera below input hands. After getting a vision, in the second part, we need to detect and calculate the positions of the hands in real-time. This part is going to be our main aim. After detection of the hand, we have to send hand visions to two different Neural Networks (NN) to calculate the Height of the AmplitudeHand (Left Hand) and Position of the PitchHand for the horizontal vector. Calculating the Height of the AmplitudeHand is the "Challenge" of our project because we have to calculate an accurate depth with a non-specialized, simple RGB camera to get AmplitudeParameter. For this part, we have to create a fast and accurate NN to calculate the depth of AmplitudeHand. Then we will limit the AmplitudeParameter then send it to the oscillation part. Also, the other simultaneous part will calculate the Distance of the PitchHand. The distance is limited by virtual boundaries. This time the specialized NN part will create and send PitchParameter concerning virtual boundaries. That PitchParameter also will be sent to the oscillation part of the system.
Finally, the oscillation part is the output part. In this part, we will use AmplitudeParameter and PitchParameter and create a simple oscillation signal as output. Parameters will be processed using two different algorithms that scale with the two-octave frequencies and a listenable amplitude.
As written above, we aim to achieve a new input solution using Computer Vision and Neural Network Techniques. Also, we wanted to prepare our work to publish in a reputable Academic Journal and after the pandemic, we wanted to show our works to the IEEE and digitIZmir conferences. In the future, we may port the system to the modern Digital Audio Workstations as a plug-in or a plug-and-play MIDI controller hardware to use for everyone.
In the project, using Computer Vision to get input from the user. From a single RGB camera, the system gets input from two hands. After that, to recognize hands, the usage of neural networks will be our first work to start. Convolutional Neural Networks (CNN) are used heavily to recognize hands. There are so many CNN works made in the past by groups and researchers are doing "Arms Race" in this field. After getting hands as input, we need to create a simultaneous system that can define the hand positions in real-time with Neural Networks. This will be our main aim to compute an accurate calculation. We will work both of the hands in a single real-time vision. Then we will create a basic synthetic oscillation signal like the original Theremin. These days, most of the modern Theremin's created by different companies, like the Moog Theremin series [7], are using multiple oscillation signals to create compound and different sounds. We wanted to show an accurate output, no point to design cool synthesizer sounds in the scope of this work.
We searched for an article written by the Audio Engineering Society about making a Theremin [1] in a different way, made by project-specific hardware to achieve a hyper-instrument version of the Theremin prototype using UltraSound technology.
There are too many projects about detecting hands and depth estimation, mostly they have worked on Stereoscopic or RGB-D cameras or not real-time. We surveyed only the way they used, not the hardware. One is HandyDepth: Example-based Stereoscopic Hand Depth Estimation using Eigen Leaf Node Features [8]. This article is about calculating the hand pose estimation from a cheap, stereo video recording peripheral. In this work, they tested Random Forest Tree, Distance Transform, and Eroded techniques and they choose Random Forest for accuracy. Then they used the Eigen Leaf Node technique to get an accurate hand depth estimation. This is a machine learning project. Another article is Hand PointNet: 3D Hand Pose Estimation using Point Sets [9]. This time, researchers used 3D hand images to create an estimated clustered hand simulation in three dimensions. Also, they created more accurate fingertip examples in the project. With Hand PointNet, users can create three-dimension clustered hand simulation with two dimension hand images.
Then we find some interesting and useful articles for our Theremin.AI. The first one is Learning to Estimate 3D Hand Pose from Single RGB Images [10]. This research is about Sign Language. To achieve this, they worked on two-dimension RGB images, also they got a two-thirds accuracy score to create words from hand pose. They contributed a large dataset with key points for the field.
Then GANerated Hands for Real-Time 3D Hand Tracking from Monocular RGB [11] article we worked on. This article is interesting to us because they wanted better accuracy scores than Zimmermann and Brox's Estimated 3D Hand Pose from Single RGB Images to work. In this work, their start point is the failure of monocular RGB cameras. They used kinematic model insertion to estimate the skeleton of the hand. They used multiple techniques and architecture to make calculations. 3D Hand Shape and Pose Estimation from a Single RGB Image [12] research are interesting to us. They used a monocular RGB camera to calculate hand pose and shape then they created a three-dimension artificial hand with Graph Convolutional Neural Network. Also, this research achieved accurate scores like works that are using RGB-D cameras. They focused on Chebyshev Spectral Graph CNN to create a polygonal hand simulation.
Then we surveyed Estimating 3D Hand Pose from a Cluttered Image [13]. In this work, researchers used two different cluttered images of tolerant techniques. They used the Chamfer Distance Model to get a pattern of hand and they matched with the calculations. This work made to visualize palm, fingers, and joints with different colors also achieved a fast and accurate score.
Finally, there is a CNN Based Posture-Free Hand Detection [14] article. They used Convolutional Neural Network-based work without posture and sensitive data concern. Also, the interesting part is, they compared two different libraries and performance. Their benchmarking libraries are CUDA and TensorFlow. Also, they have great results with a 4th Generation Mobile Intel i7 CPU without using any enthusiastic Graphics Processing Unit like Nvidia Titan X. The literature survey we did here is only a part of our study. We filtered what we need in the future.
There are few risks possible that can cause us to fail for this project. The greatest risk above them is the camera position and choosing a specific camera. For example, if we use a FOV camera like a fish-eye lens or locate the camera in the wrong position, it can cause pixel stretching for the image and we might not get accurate results. There is a risk of getting fast and hand recognition and getting accurate hand depth values. We need boundaries for accurate hand depth values. Our equipment may be insufficient for this project. Finally, there is always the risk of going beyond the scope of the project. In other words, we can deviate from our goal. For the last two risks if they are happening we make a mistake somewhere. Our plan B is listed as follows:
Camera Position and Specific Camera: Through trial and error we can find the right position and the right camera. For example, position the camera below AmplitudeHand or PitchHand, etc.
Hand Recognition and Accurate Hand Depth and Distance: We can train the NN more or we can change our dataset.
Going Beyond the Scope: We can go back to our original purpose. A quick recap or seek more works in the field.
Our first approach was making a literature survey, details of it are in section 3. We researched academic papers that are closer to our project idea. We then decided to focus on the CNN Based Posture-Free Hand Detection [14] article, because in our case that article was the closest one to ours. We tried to reach its creators for their dataset but we could not get a positive response. So we decided to create our own dataset. Details for creating our own dataset are given in section 4.1.
Then we decided to use Mask R-CNN because we thought that when the camera sees hands from the bottom side, the borders of Mask R-CNN could help us to calculate distance more accurately. But then we met with another tool and decided to use this tool, again mentioned in section 4.1.
Also, we started to think about prototyping. We thought that we can use the Coral Accelerator but we do not have a budget so we gave up this idea with the plugin idea. After that, we gave it a try with Raspberry Pi 3B+[15], on an Entry-Level laptop without GPU Acceleration. The results of the laptop were acceptable, we got a maximum of 14 fps. More information about this can be seen in section 5.
On the other hand, we are trying to gain performance test results with a raspberry camera and laptop camera. We will compare these results with each other. We will set up the Tensorflow library and test videos for our project.
Data preparation can be one of the most important steps in a machine learning project because each dataset must be different and specific. So we decided to create our own data set instead of using a standard dataset. Most machine learning algorithms require data to be formatted in a very specific way, so datasets often require some preparation before they can obtain useful information. We can start with questions like ”What kind of data should we collect?”, “How much data do we need?”.
Large amounts of data and diversity are required for machine learning algorithms to work as intended. The diversity can help each procedure to guarantee a totally good machine learning: diversity of the training data ensures that the training data can provide more discriminative information for the model, diversity of the learned model (diversity in parameters of each model or diversity among different base models) makes each parameter/model capture unique or complement information and the diversity in inference can provide multiple choices each of which corresponds to a specific plausible local optimal result.
Image of hands is important in our Project, we created our data sets from hands. We took videos of our own hands to create hand datasets then we made these videos into frames in the blender. program. We first resized the framed photos with the code we wrote to bring them into a format that we can test.
But why do we need resizing? An answer to this question is simply given by this quote[16]. “ Resizing images is a critical preprocessing step in computer vision. Principally our machine learning models train faster on smaller images. An input image that is twice as large requires our network to learn from four times as many pixels, and that time adds up. Moreover, many deep learning model architectures require that our images are the same size and our raw collected images may vary in size.”

Figure 2: Code for Resizing
We labeled them finally after sizing to create our dataset. We used the labelMe [17] tool for this. Also, we used the semantic segmentation method while labeling the images. Semantic segmentation, or image segmentation, is the task of clustering parts of an image together that belong to the same object class. It is a form of pixel-level prediction because each pixel in an image is classified according to a category.

Figure 3-4: Labeling in labelMe
Since we ran out of dataset, we will code the image augmentation module for data augmentation. The reason for data augmentation is to ensure the diversity and increase of the data set available. If the model is supported with enough data, it can make more accurate predictions that are to say the more dataset means a more successful model. It is beneficial to generate new data by using the original data available. We will make the data augmentation by processing the existing images with various techniques. These techniques can be methods such as rotation, cropping, scaling.
In an article we found, the importance of data augmentation was clearly explained with examples[18]. They assess a few strategies for preparing data augmentation with regards to improving the exhibition of a Convolutional Neural Network (CNN) in the area of fine-grain airplane characterization. They referred to randomizing training images as improving performance.
The following figure shows an augmentation sequence that might be useful for many common experiments. It blurs and also changes the contrast as well as brightness.

Figure 5: Image Augmentation Script
In the preparation of the implementation, we designed a system that includes four modules and two hardware to run our project. Also, aside module that trains our model with respect to the dataset we made. To understand the implementation, the system partially interacts with the world. Gets data from the World and creates listenable sound to the World. Then Hand Detection, Position Estimation, Sound Synthesis jobs are done by the software side of the implementation. Definition of the Modules and Hardware are:
This Module will train our model by the dataset we created with LabelMe. Training Module uses the images we labeled and label parameters of the images exported as .json files. The model which we trained with this Module will be used at CNN HAND DETECTION MODULE.
Usage of this module is a one-time process to use our dataset before running in the system. The model that we trained with this module will be ready to use with TensorFlow Libraries. If the trained model from our dataset isn’t reliable for the system, we may need to find another ready-to-train Hand Datasets from other sources.
This Module is assigned to detect and send the data to two different modules. The detection will be done by the Mask R-CNN technique with respect to our trained model. Also, this Module will recognize the position of the hands as RIGHT HAND and LEFT HAND to send proper data to the HAND DISTANCE ESTIMATION MODULE and HAND DEPTH ESTIMATION MODULE.
The data separation task will be done and tailored to send as if a hand is RIGHT-MOST-SIDE the data will send to HAND DISTANCE ESTIMATION, and if a hand is LEFT-MOST-SIDE the data will send to HAND DEPTH ESTIMATION MODULE.
The data for the HAND DISTANCE MODULE is a single pixel position of the RIGHT-MOST-PIXEL of the RIGHT HAND on the video stream that Convoluted and extracted by CNN HAND DETECTION MODULE to make a calculation. Also, the data for the HAND DEPTH ESTIMATION MODULE is a total number of Convoluted Pixels will be sent continuously by CNN HAND DETECTION MODULE.
This Module limits and stops the feed if the total hand count is more than two and less than two. This also controls unwanted data creation to handle further system crashes, miss calculations, and CPU overloading, because this module is going to be the most power-hunger module in the system we designed.
This Module only gets RIGHT-HAND DATA from CNN HAND DETECTION MODULE and makes an estimation between our imaginary boundary and the hand. The optimal boundary width going to be found when testing the system with respect to the camera position.
The estimation will be calculated from Convoluted Hand Image’s RIGHT-MOST-PIXEL. With that estimation, the Module will calculate a frequency value by the estimation defines as PITCHVALUE and sends the data to the OSCILATOR MODULE.
This Module only gets LEFT-HAND DATA from CNN HAND DETECTION MODULE and makes a depth estimation by the area artificially created by CNN HAND DETECTION MODULE. After calculating the estimation, the Module will initialize an amplitude value and sends the AMPLITUDEVALUE data to the OSCILATOR MODULE.
The incoming data from the CNN HAND DETECTION MODULE is going to be the total number of Convoluted Pixels of LEFT HAND. We will find a way to calibrate and an algorithm to set the amplitude range in an optimal way. This value going to be found when testing the system.
This Module gets AMPLIDUTEVALUE and PITCHVALUE as oscillation parameters, then calculates a continuous, smooth Sine Wave sound by using Fourier Transform Algorithms as a result by using the speaker of the system. For the implementation, we will just use a simple sound to show our result, but for the prototyping, we want to use combined, modern synthesized sounds like Analog Theremins.
For this module, we will modify and use a Python Script that one of us created before as a Tone (Pitch) Generator[20]. But the modification must be designed as continuous and can handle NULL values for not returning random noise and we do not apply any Attack-Decay-Sustain-Release (ADSR) and Filter algorithms for the purpose of the project. Also, OSCILATOR MODULE’s design may differ in the future for a perfect output.
Hardware is a Monocular RGB camera that streams the real-time data from outside of the CNN HAND DETECTION MODULE of the system and a speaker that creates the sound of what we estimated from hands by OSCILATOR MODULE.
The basic flow chart for Theremin.AI can be seen in figure 2 down below.

Figure 6: Theremin.AI Flow Chart
For the sake of feasibility, we tested some of our devices to see the performance if we want to use an ARM machine to prototype our system. We choose to test the hardware with a basic image classification algorithm with Quantized Classification Model and the same Python Environment and TensorFlow Lite libraries by only using CPU power. Our choice of hardware is a Raspberry Pi 3B+ and a Thinkpad E490. Detailed Specs are Below:
Raspberry Pi 3B+ Specs:
CPU: A53/ARMv8 Quad-Core SoC 1,4GHz 64bit
RAM: 1GB LPDDR2 SDRAM
Camera: Pi Camera rev1.3
Graphics: OpenGL ES 1.1, 2.0
Thinkpad E490 Specs:
CPU: Intel i5-8265U Quad-Core 8 Thread 1,60GHz (w/ Turbo 3,90GHz) 64bit
RAM: 16GB DDR4-2400
Camera: Integrated Webcam
Graphics: Intel UHD Graphics 620
There are two different reasons to choose this hardware. The first reason is, the Thinkpad’s CPU performs nearly the same as the i7-4700HQ CPU[19], comparison of CPU benchmarks shown in Figure 6, which used in CNN Based Posture-Free Hand Detection[14] research and if we want to build a small, portable, easy-to-use prototype how the ARM machines perform for this situation or do they fit well.

Figure 7: Benchmark scores between i7-4700HQ versus i5-8265U
As a result of benchmarks, Thinkpad E490 handles the test well with near-zero latency and smooth 12-13 Frames Per Seconds (Figure 10-11). On the other hand, Raspberry Pi 3B+ isn’t performed well for the test (Figure 7-8-9). The results are more than 1500 Milliseconds latency and only 1 Frame Per Second with a broken vision (Not enough computation power to refresh the frame, which makes two different frames as one to show and process ). Also, most of the classifications are miss calculated. Results and CPU usages are below.


Figure 8-9-10: Raspberry Pi 3B+ Classification Benchmark Results


Figure 11-12: Thinkpad E490 Classification Benchmark Results
With these results, we understand that combining Computer Vision with Machine Learning Applications need intense processing power even in the most optimized way. This test environment is also about classification but isn’t Mask R-CNN, which means the benchmark results may differ after we apply our model and modules. This is a preliminary study and with this study, we understand that, before the prototyping stage, the hardware choice can be a milestone for the project, also some problems may appear and some solutions can change in the future.
In this study, we wanted to create a Theremin-like instrument that takes gestures as input. The reason we are doing this project is we wanted to combine the advancing technology with Theremin and create something new undone before. With this idea, we wanted to touch everyone’s souls because music heals the soul. Theremin.AI can be used by anyone who has a monocular RGB camera, without touching anything, just by their gestures.
So we decided to use Convolutional Neural Network-based work with the RGB camera. The hand detection method will be provided with an RGB camera in our project. We will continue our way in the project with the python environment and the TensorFlow library. While creating our dataset, we used a blender to frame the videos we shot, and then we made ready the image classification in the pictures with the semantic segmentation method in the label tool. While creating the dataset, we also tested some of our devices for performance. We saw the shortcomings of the hardware we used to test it. We will continue to experiment to get the best performance we want for the prototyping.
We focused on obtaining accurate results by applying our method to various benchmarks. In future work, we will start implementing our method and see new results. When we reach the result we want after our first implementation, we will try prototyping for mobile devices. It will be a more realistic approach and more doable for Theremin.AI.
Of course, it will be toilsome to perform an application that has been undone before. If you want to see the construction of this unique project and follow the steps, you can find our reports, tests, discussions, dataset and works on Github as Theremin.AI [21]
[1] Léon Theremin. (2016) Engineering and Technology History Wiki [Online]. Available: https://ethw.org/Leon_Theremin
[2] A. F. M. Gomes, D. Albuquerque, G. Campos, J. Vieira. (2009) TheremUs: the Ultrasonic Theremin
[3] M. Masaoka. (2006) Lazer Koto [Online]. Available: https://futuremusic.com/2006/11/22/miya-masaoka-invents-the-laser-koto/
[4] Steim. Big Eye. [Online] Available: http://www.steim.org/steim/bigeye.html
[5] G. Wang. (2008) The ChucK Audio Programming Language: A Strongly-timed and On-the-fly Environ/mentality.
[6] Kemper [Online]. Available: https://www.kemper-amps.com/profiler/overview#a-profiling
[7] Moog Theremin Series [Online]. Available: https://www.moogmusic.com/synthesizers?type=52
[8] R. R. Basaru, G. G. Slabaugh, C. Child, A. Alonso. (2016) HandyDepth: Example-based Stereoscopic Hand Depth Estimation using Eigen Leaf Node Features
[9] L. Ge, Y. Cai, J. Weng, J. Yuan. (2018) Hand PointNet: 3D Hand Pose Estimation using Point Sets
[10] C. Zimmermann, T. Brox (2017) Learning to Estimate 3D Hand Pose from Single RGB Images
[11] F. Mueller, F. Bernard, O. Sotnychenko, D. Mehta, D. Casas, C. Theobalt. (2018) GANerated Hands for Real-Time 3D Hand Tracking from Monocular RGB
[12] L. Ge, Z. Ren, Y. Li, Z. Xue, Y. Wang, J. Cai, J. Yuan. (2019) 3D Hand Shape and Pose Estimation from a Single RGB Image
[13] V. Athitsos, S. Sclaroff. (2003) Estimating 3D Hand Pose from a Cluttered Image
[14] R. Adiguna, Y. E. Soelistio. (2018) CNN Based Posture-Free Hand Detection
[15] Raspberry Pi Foundation (2009) RaspberryPi 3B+ [Online]. Available: https://www.raspberrypi.org/products/raspberry-pi-3-model-b-plus/
[16] Joseph Nelson (2020) You Might Be Resizing Your Images Incorrectly. Available: https://blog.roboflow.com/you-might-be-resizing-your-images-incorrectly/#:~:text=Resizing%20images%20is%20a%20critical,and%20that%20time%20adds%20up.
[17] K. Wada. [Online]. Available: https://github.com/wkentaro/labelme
[18] R. Mash, B. Borghetti, J. Pecarani. (2016) Improved Aircraft Recognition for Aerial Refueling through Data Augmentation in Convolutional Neural Networks
[19] User Benchmark (2011) Intel Core i7-4700HQ versus Intel Core i5-8265U [Online]. Available: https://cpu.userbenchmark.com/Compare/Intel-Core-i7-4700HQ-vs-Intel-Core-i5-8265U/2728vsm566107
[20] B. Z. Elban. (2020) Synthetics [Online]. Available: https://github.com/bzelban/Synthetics/blob/master/generator.py
[21] B. Z. Elban, M. Lomlu, M. N. Telli. (2020) Theremin.AI [Online]. Available: https://github.com/MerveTelli/Theremin-AI