roslaunch tracking_lib track_classify_low.launch
The parameter name is 'yaw_Lidar_GPS' and is located at the bottom line of the file below.
/root/rootfs/noetic_ws/src/LidarY1/src/perception/libs/tracking_lib/config/calibration.yaml
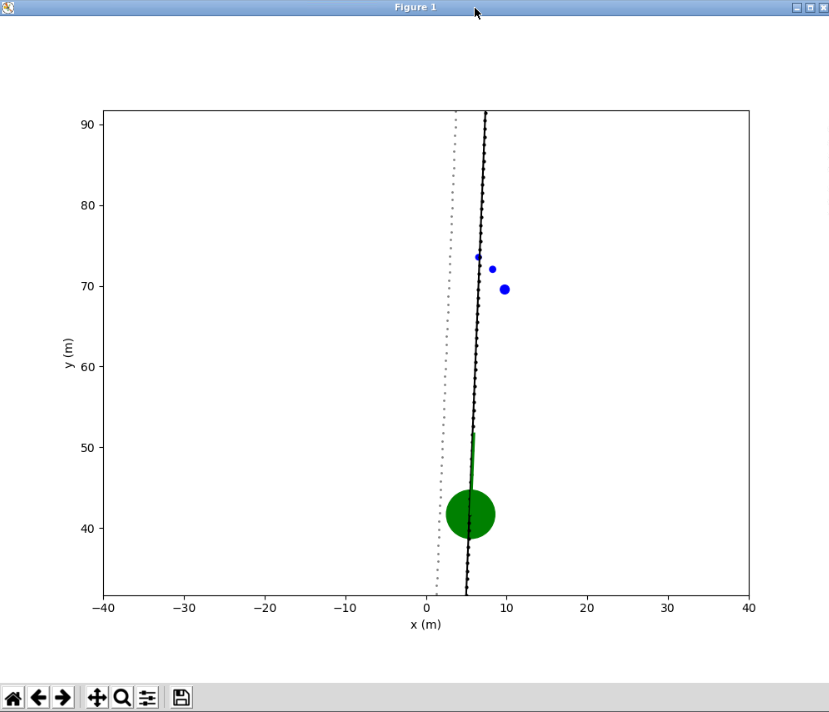
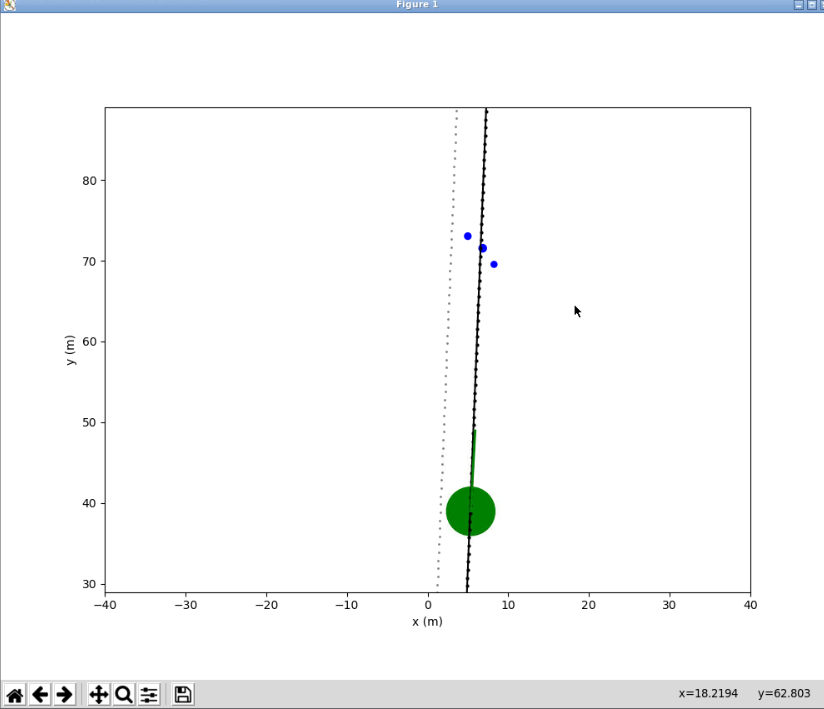
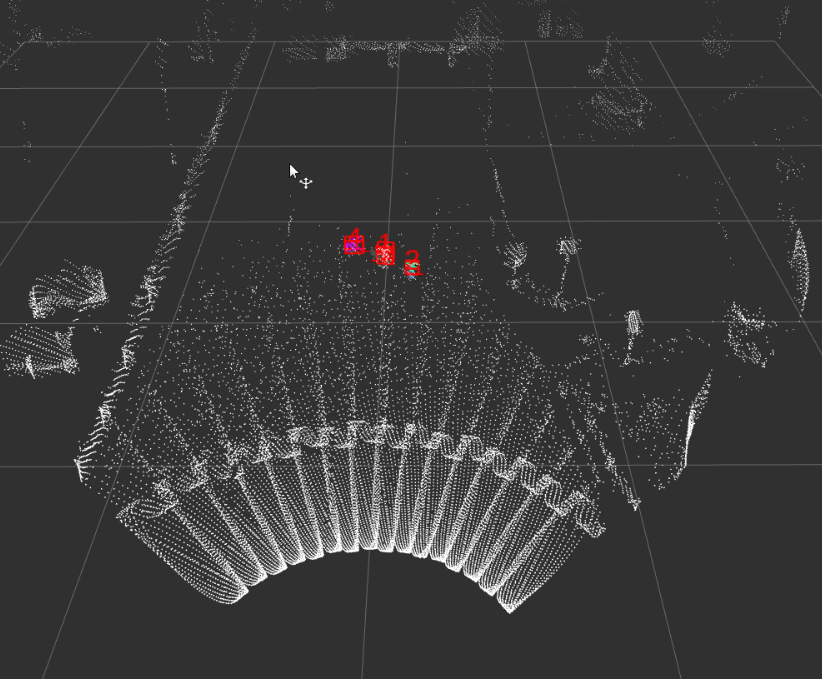
This parameter correct the difference between the heading directions of Lidar and GPS. To tune this parameter, check Fengzhi's waypoints and obstacles visulization window. If the traffic cone at the center of the lane appears at the left side way points, we need to tune this parameter smaller (can be negative) and vice versa. This parameter usually locate between [-3,3] degrees.
The figures below illustrate how to tune this parameter. In the first picture, the yaw is too small and the center cone is right to the way points. After increase is by 3 degree, the cone is move back to the lane center.
The parameter names are 'utm_left_margin' and 'utm_right_margin' and is located at the bottom line of the file below.
/root/rootfs/noetic_ws/src/LidarY1/src/perception/libs/tracking_lib/config/tracking.yaml
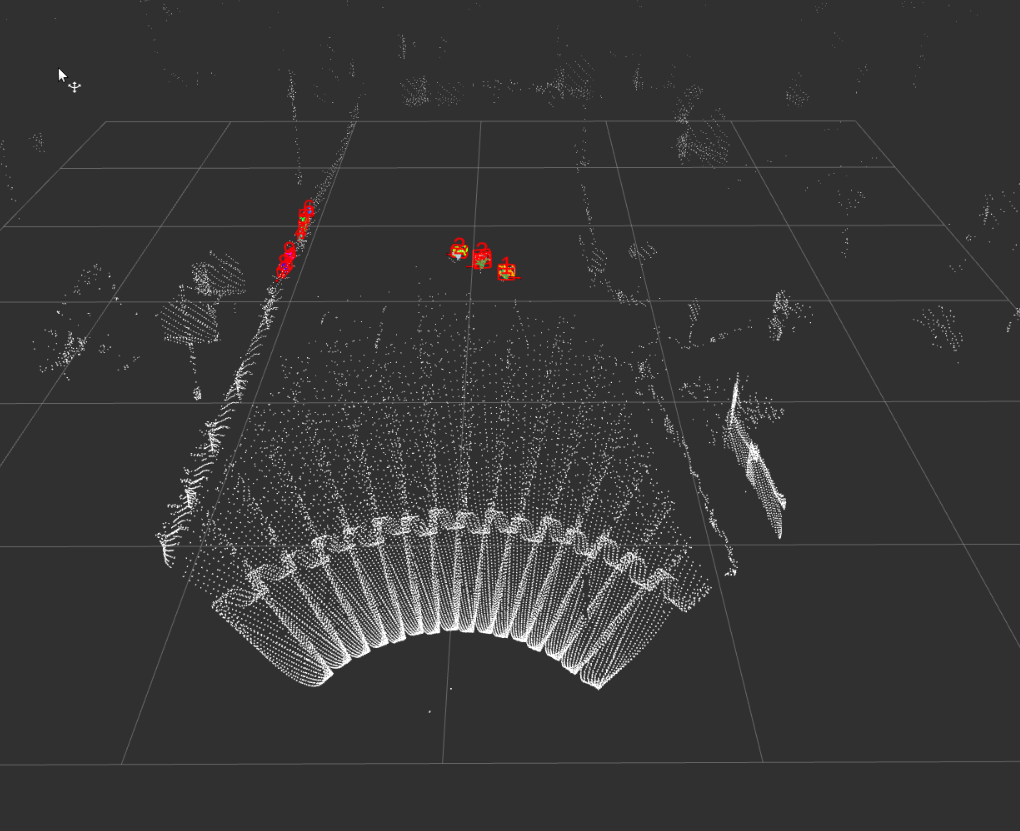
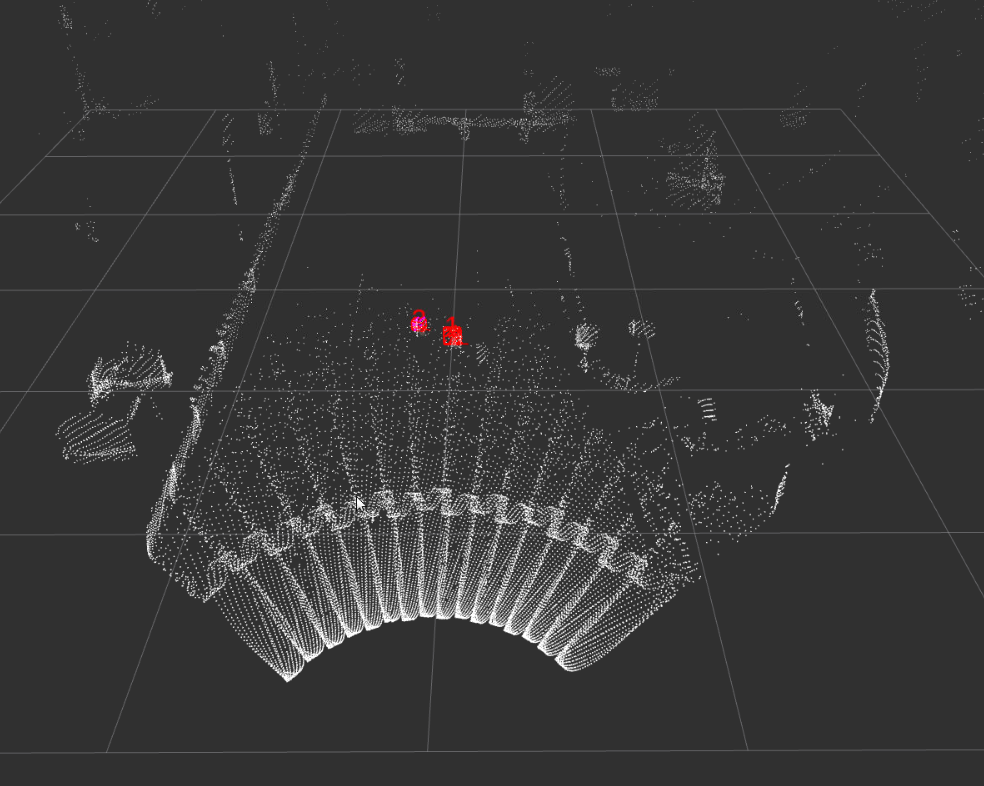
Object detection only output objects between to boundaries of the highway. Boundaries are lines chosen on the google map. Margins move the boundaries in the left-right (easting) direction. For both left and right boundary, positive margins move the boundary inward and include less objects, while negative margins move the boundaries outwards and see more object. These parameters are in meters and are usually with [-2,2] meters.
The following picture show the case where left margin is too small. We include extra objects on the left side.
The following picture show the case where right margin is too large. We are missing the right most traffic cone.
The following picture show the case where both left and right margin are good.
This repository is created by following the README of https://github.com/AutoLidarPerception/tracking_lib.
Use the following command to build the packge,
catkin build -DCMAKE_BUILD_TYPE=Release
Note that without the flag -DCMAKE_BUILD_TYPE=Release, the code will slow down drastically.
To run the ros node with all clustering, tracking and classification functions, use the command
roslaunch tracking_lib track_classify.launch
A docker image containing the all codes and a test rosbag can be downloaded using the command below,
sudo docker pull cyqian97/track-portable
After the download is done, three terminals are required to run the demo.
First the following command to start a docker container,
xhost + && sudo docker run --name test-track -e DISPLAY=$DISPLAY -v /tmp/.X11-unix:/tmp/.X11-unix:ro -it cyqian97/track-portable
then in the docker, run roscore.
First run the following command to enter the same docker container,
sudo docker exec -it test-track zsh -c "source /opt/ros/noetic/setup.zsh && zsh"
then start the ros nodes,
source devel/setup.zsh
roslaunch tracking_lib demo.launch
First run the following command to enter the same docker container,
sudo docker exec -it test-track zsh -c "source /opt/ros/noetic/setup.zsh && zsh"
then play the rosbag,
rosbag play /dataset/TAMU/TAMU-2022-02-17/2022-02-17-18-12-35.bag
sudo apt-get update sudo apt-get install python3-catkin-tools python3-osrf-pycommon
mkdir track1
cd track1
mkdir -p src/common
mkdir -p src/perception/libs
cd src/common
git clone https://github.com/cyqian97/common_lib.git libs
cd ../perception/libs
git clone https://github.com/cyqian97/roi_filters_lib.git roi_filters
git clone https://github.com/cyqian97/object_builders_lib.git object_builders
git clone https://github.com/cyqian97/segmenters_lib.git segmenters
git clone https://github.com/cyqian97/feature_extractors_lib.git
git clone https://github.com/cyqian97/tracking_lib.git
cd ../../..
catkin build -DCMAKE_BUILD_TYPE=Release
First clone the repository,
cd src
git clone https://github.com/cyqian97/kitti_ros.git
Install a few packages and run catkin. Do not use a venv! Otherwise different pythons will be used and that will mess things up.
python3 -m pip install -r kitti_ros/requirements.txt
python3 -m pip install empy
python3 -m pip install catkin-pkg
python3 -m pip install pyyaml
python3 -m pip install numpy -U
python3 -m pip install pykitti
catkin build -DCMAKE_BUILD_TYPE=Release
Download the synced data and the calibration files from Kitti website. Refer to the README file in kitti_ros repository for the data folder structure and how to specify the data path.
In the workspace folder, run source devel/setup.zsh in all terminals.
In terminal 0, run roscore.
In terminal 1, run roslaunch segmenters_lib demo.launch.
In termical 2, run sudo chmod 777 /dev/input/event2. Note that the device id for the keyboard can vary between different computers, one can used
/dev/input/by-id
ls -l
to find the correct id, sometimes it does not list the keyboard, at which time one can also try cat /proc/bus/input/devices. The variable 'keyboard_file' in 'kitti_player.lauch' should also be modified correspondingly, or one can specify it in the roslaunch command.
After configuring the keyboard access, we then run roslaunch kitti_ros kitti_player.launch keyboard_file:="/dev/input/event3" . In this terminal, one can use the keyboard to control the how the data is played. Right arrow key plays the next frame and space key starts continuous playing.
In docker, the keyboard input seems not work. Therefore, I add an "continuous" mode so that the kitti file will keep play once the roslaunch kitti_ros kitti_player.launch command is executed.
A node to filter the ground plane and publish the filtered points are added, to use it, simply run
roslaunch tracking_lib demo_gpf.launch
Because of the current pcl 1.10 requirs c++14 and above, we need to change all
## Compile as C++11, supported in ROS Kinetic and newer
add_compile_options(-std=c++11)
#add_compile_options(-std=c++14)
to
## Compile as C++11, supported in ROS Kinetic and newer
#add_compile_options(-std=c++11)
add_compile_options(-std=c++14)
Problem also occurs when compiling /$CATKIN_WS/src/perception/libs/segmenters/src/don_segmenter.cpp, simply change the following code starting at line 105
for (; iter != clusters_indices.end(); ++iter) {
    PointICloudPtr cluster(new PointICloud);
    pcl::copyPointCloud<PointN, PointI>(*don_cloud_filtered, *iter,
                                        *cluster);

    cloud_clusters.push_back(cluster);
}
to
    for (const pcl::PointIndices & indices : clusters_indices) {
        PointICloudPtr cluster(new PointICloud);

        pcl::PointCloud<pcl::PointNormal> cloud_in = *don_cloud_filtered;
        pcl::PointCloud<pcl::PointXYZI> cloud_out = *cluster;

        // Allocate enough space and copy the basics
        cloud_out.points.resize (indices.indices.size ());
        cloud_out.header   = cloud_in.header;
        cloud_out.width    = std::uint32_t (indices.indices.size ());
        cloud_out.height   = 1;
        cloud_out.is_dense = cloud_in.is_dense;
        cloud_out.sensor_orientation_ = cloud_in.sensor_orientation_;
        cloud_out.sensor_origin_ = cloud_in.sensor_origin_;

        // Iterate over each point
        for (std::size_t i = 0; i < indices.indices.size (); ++i) {
            pcl::copyPoint (cloud_in.points[indices.indices[i]], cloud_out.points[i]);
        }

        cloud_clusters.push_back(cluster);
    }
following the tutorial AutoLidarPerception/segmenters_lib#15.
For the kitti_ros package, more things need to be modified.
In the forked repository, the grammar of print and exception has been adapted to python3.
The package thread needed to be renamed to _thread.
'numpy' needs to be updated.
Some sys.path.append need to be added for python to find the packages.
The dot . needs to be added to as form .package import classname in the user-defined package 'utils' to avoid recursive import.
Function name of kitti.get_oxts_packets_and_poses needs to be changed to kitti.load_oxts_packets_and_poses in 'kitti_player.py'.
