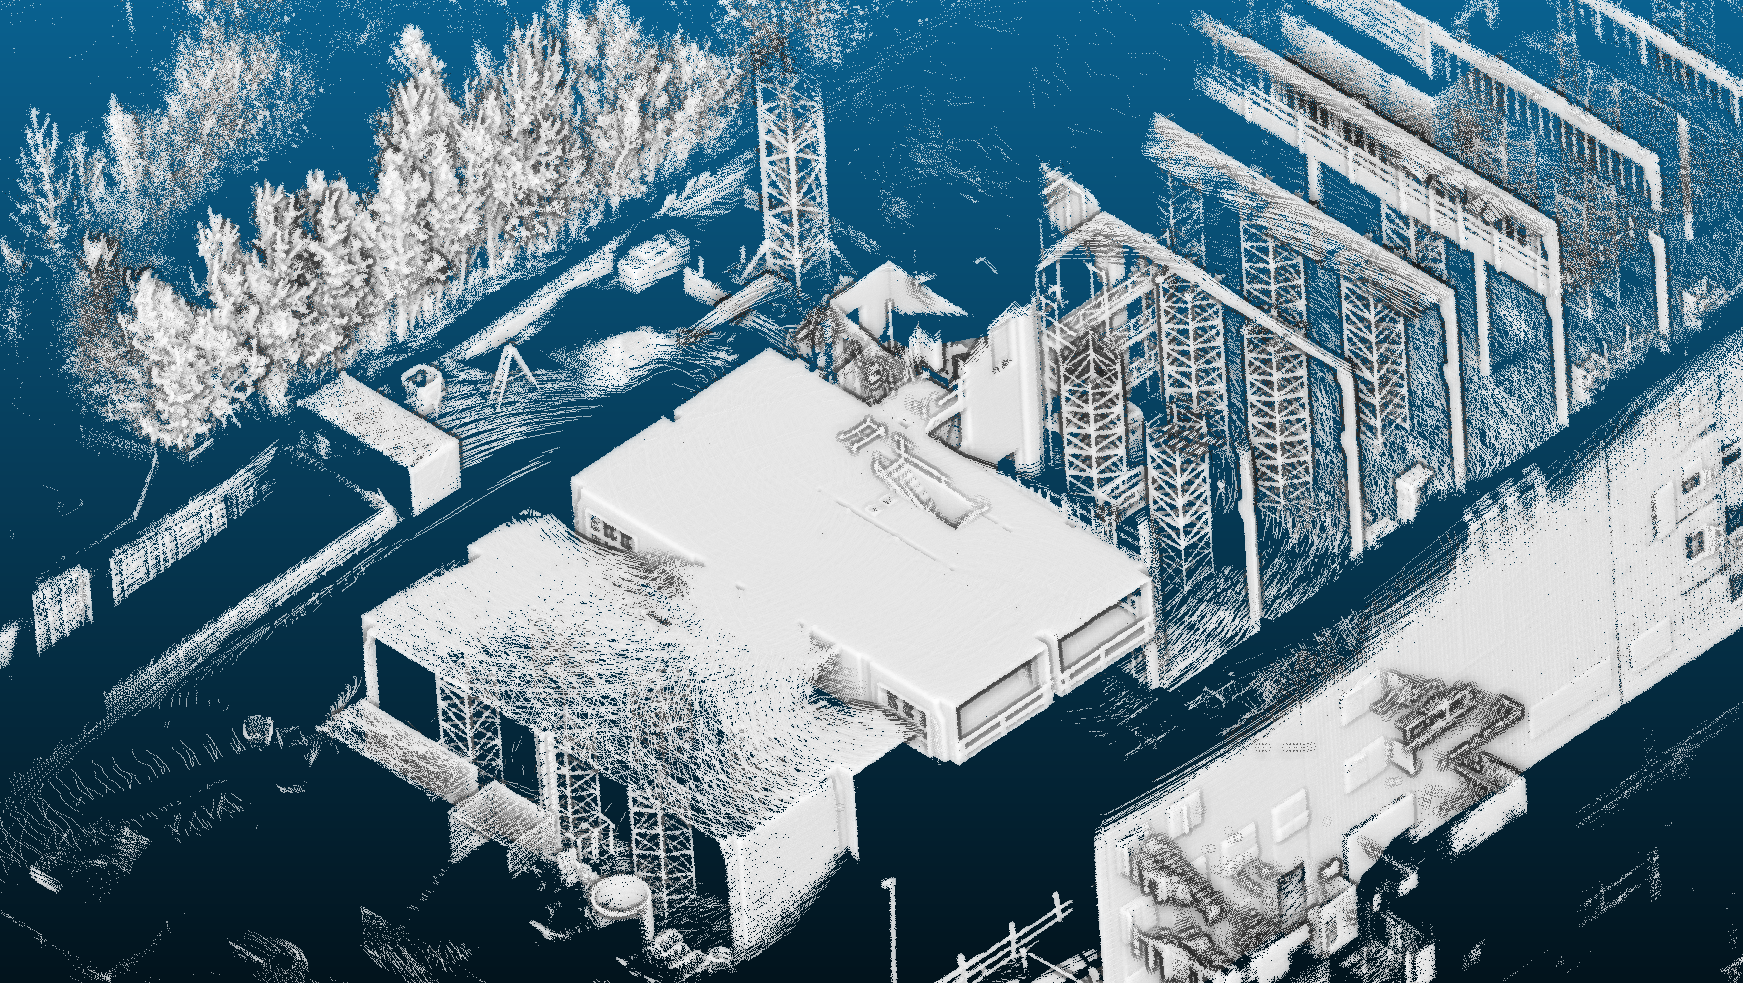
This package is used to transform point clouds from rosbags using poses from a pose file into a common coordinate frame and save them as a .pcd file. The grid size and the maximum number of points of the resulting global point cloud can be set by parameters. It is sufficient if poses are provided at 10 Hz, for example. The times between the poses are interpolated. Here Barycentric Rational interpolation is used for the translations and slerp for the orientations.
Fig.1 - Resulting dense point cloud of sequence Exp04 Construction Upper Level of the Hilti-Oxford Dataset.Input: Rosbags with LiDAR data (PointCloud2-Messages) and a Pose.txt file in TUM format
Output: Dense point cloud as .pcd file in the same frame
The package can work with LiDAR data from the following manufacturers (the ROS drivers must be configured in such a way that time stamp and ring id are provided for each point):
- Ouster
- Hesai
- Velodyne
- Robosense
- Livox
Info for Livox-LiDARs: To process point clouds from Livox LiDARs please record your data using the livox_ros_driver2 and configure it to provide the points as PointCloud2-Messages in the PointXYZRTLT format. Attention: Currently there is a bug in the livox_ros_driver2. The README states that the timestamps per point are in seconds, but they are actually in nanoseconds. Therefore, a sensor configuration with the name "livoxXYZRTLT_ns" is provided in this repo. For the case that the bug is fixed promptly and the timestamps are then available in seconds, an configuration "livoxXYZRTLT_s" is also provided.
If no timestamp per point is provided, "unknown" can be set and a timestamp based on the message header stamp is calculated.
The package was developed with the following packages:
- Ubuntu 20.04
- ROS Noetic
- Eigen 3.4.0
Compatibility with other Ubuntu/ROS/Eigen versions should be possible, but has not been tested.
Instructions for installing ROS Noetic can be found here.
Unfortunately, Eigen 3.4.0 is not available via apt package management on Ubuntu 20.04. You can download the latest Eigen version from here and follow the instructions.
You can also use the provided shell script, that will update your Eigen version to 3.4.0 on Ubuntu 20.04:
sh helpers/updateEigenUbuntu20.04.sh
mkdir catkin_ws
cd catkin_ws && mkdir src && cd src
git clone https://github.com/davidskdds/dense_cloud_creator.git
cd .. && catkin_make
The settings are defined in config/dense_cloud_settings.yaml.
The software processes the data directly from the Rosbag, there is no need to run "rosbag play ...". The path to the Rosbag must be specified to process the data.
A Rosbag path could look like this:
bag_dirs: "/home/user_name/recording.bag"
Several Rosbags can also be processed directly one after the other. To do this, the rosbag names are separated by spaces:
bag_dirs: "/home/username/recording1.bag /home/username/recording2.bag"
Attention: The path to a Rosbag or the Rosbag file name must not contain a space character
This directory defines which pose file is used to transform to point to the map frame. The poses inside the file must be in TUM format:
timestamp tx ty tz qx qy qz qw
This parameter defines, where the resulting dense point cloud is saved as "DensePointCloud.pcd". It is recommended to use home directory (or another folder within home directory) to prevent permission issues. The parameter could be set like this:
result_dir: "/home/USERNAME"
Regarding the LiDAR the sensor type {"hesai","ouster","robosense","velodyne","unknown"} and the lidar_topic must be specified in the .yaml file.
If the provided poses in pose_file_dir are not defined w.r.t. the LiDAR frame, a static extrinsic transform can be applied.
To control the density and to limit the maximum size of the resulting point cloud two parameters are provided:
grid_size: controls the point density of the resulting cloud
max_num_points: defines the maximum number of points of the resulting point cloud
source devel/setup.bash
roslaunch dense_cloud_creator dense_cloud_creator.launch
After the package is started, RViz opens and displays the progress of the processing.
