PlanarTrainer is an open source Computer Vision (CV) tool for finding, matching and selecting and then saving selected features from a training image to a database (currently just flat YAML, JSON and XML files). It also supports testing pose algorithms using matched features. As the name would suggest, it is targeted mostly at planar feature matching, although it does support right clicking keypoints to save manually measured 3D information, or to load correspondences between 3D coordinates in a training image with image locations in a query image using a text file (see also PnPTrainer for a similar type application for 3D pointcloud to 2D feature selection, although the UI still requires some work. )
-
Open training and query images using the relevant options in the File menu. The images may also be specified on the command line with the -t and -q options.
When loading the images a metadata file with the same basename in YAML format is also searched for in the same directory containing further metadata on the image (although its not required). In particular the camera calibration parameters can be specified in this file fx (focal length x), fy (focal length y), cx (projection center x) and cy (projection center y) eg fx: 1479.83. See TangoCamera or OpenCameraAR for examples of applications creating such metadata files (which also include Android gravity vector and other orientation sensor data). The camera calibration can also be loaded from a standalone YAML file using the Open Calibration File menu option. Having said that, the camera calibration is mostly used for pose calculation, although it can also be stored in the database for the training image when it is saved. Also note the camera calibration values are based on the image resolution used during calibration, so if the image resolution changes the calibration values need to be scaled or the camera needs to be re-calibrated at the new image size.
-
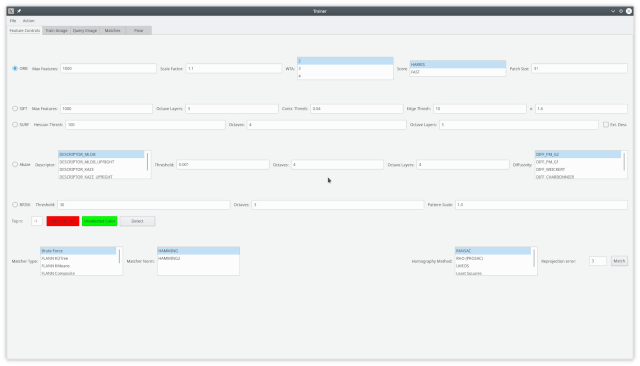
Select a feature detector from the Feature Detection tab. Several options specific to each feature detector may also be amended, although in many cases some specific knowledge of the detector may be required. Note SIFT and SURF will only be available if compiled with a version of OpenCV which contains non-free (patented) contributions. Press the Detect button or press Ctrl-D to perform the detection (you can also change the color of the circles representing selected and unselected keypoints before pressing Detect.)
-
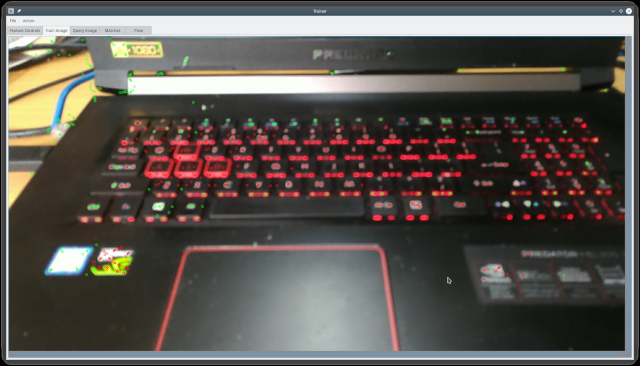
The Train Image tab allows selection of detected keypoints, for example you can select co-planar keypoints to save for the training image as its currently much easier for manually created intelligences to recognise coplanarity in images compared to artificial intelligences. Selection is done by mouse dragging. The default action if no key is pressed while dragging is to toggle selection. If Shift is pressed while dragging then unselected keypoints are selected but selected points are left as is. If Ctrl is pressed then all points in the drag region are deselected. Selected keypoints are a different color from unselected ones; by default red versus green. (Linux KDE users: See KDE Forums for a solution (systemsettings -> application style -> widget style -> configure -> windows' drag mode -> drag windows from titlebar only) if attempting a mouse drag drags the window instead - a really stupid default in some KDE distributions). The image is scrollable so large images can be scrolled using scrollbars or the mouse wheel (vertical scroll).
-
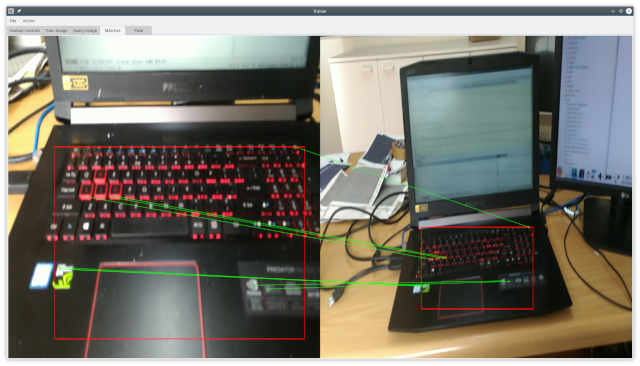
Perform matching by pressing the Match button in the Feature Detect tab or pressing Ctrl-M. The Feature Detect tab also contains some match specific setting such as the matcher type, norm (norm options automatically update depending on whether the detector descriptor is bit based) and the homography method. After performing the match the match result is shown in the Match tab. If there are "bad" keypoints which consistently give bad matches then they can be deselected in the Train tab and a new match can be performed.
- The pose tab can be used to test pose calculation. You may want to add a pose algorithm to the source for pose testing. See src/pose/Pose.hh for a generic pose interface, although a pose factory interface is probably still required to make the pose independent of the ImageWindow source. As mentioned previously 3D coordinates can be added per keypoint by right clicking (hand-eye coordination may be required here as the radius for detecting a keypoint in the right click code is quite small). Alternately its possible to ignore keypoints altogether and associate 3D coordinates in the train image with pixel locations in the query image by loading a file with a .3d extension in the File -> Load 3D Matches option. The file has the format x,y,z -> u,v eg 0,0,0 -> 1082,549. After successfully loading the file the query tab image will contain labels for the match at each matched point in the query image (TODO: Add option to select points in query image, enter the 3D coordinates and allow saving the .3d file).


