- This project is a modification of this project: https://github.com/dualvim/WebServer_ESP32CAM_Sensors_MQTT
- In the former project, an ESP8266 board read some sensors and an ESP32-CAM board receved these data via MQTT protocol.
- This project uses the ESP-NOW protocol to send data from one ESP32 board to another.
- This project uses two boards with ESP32 SoC:
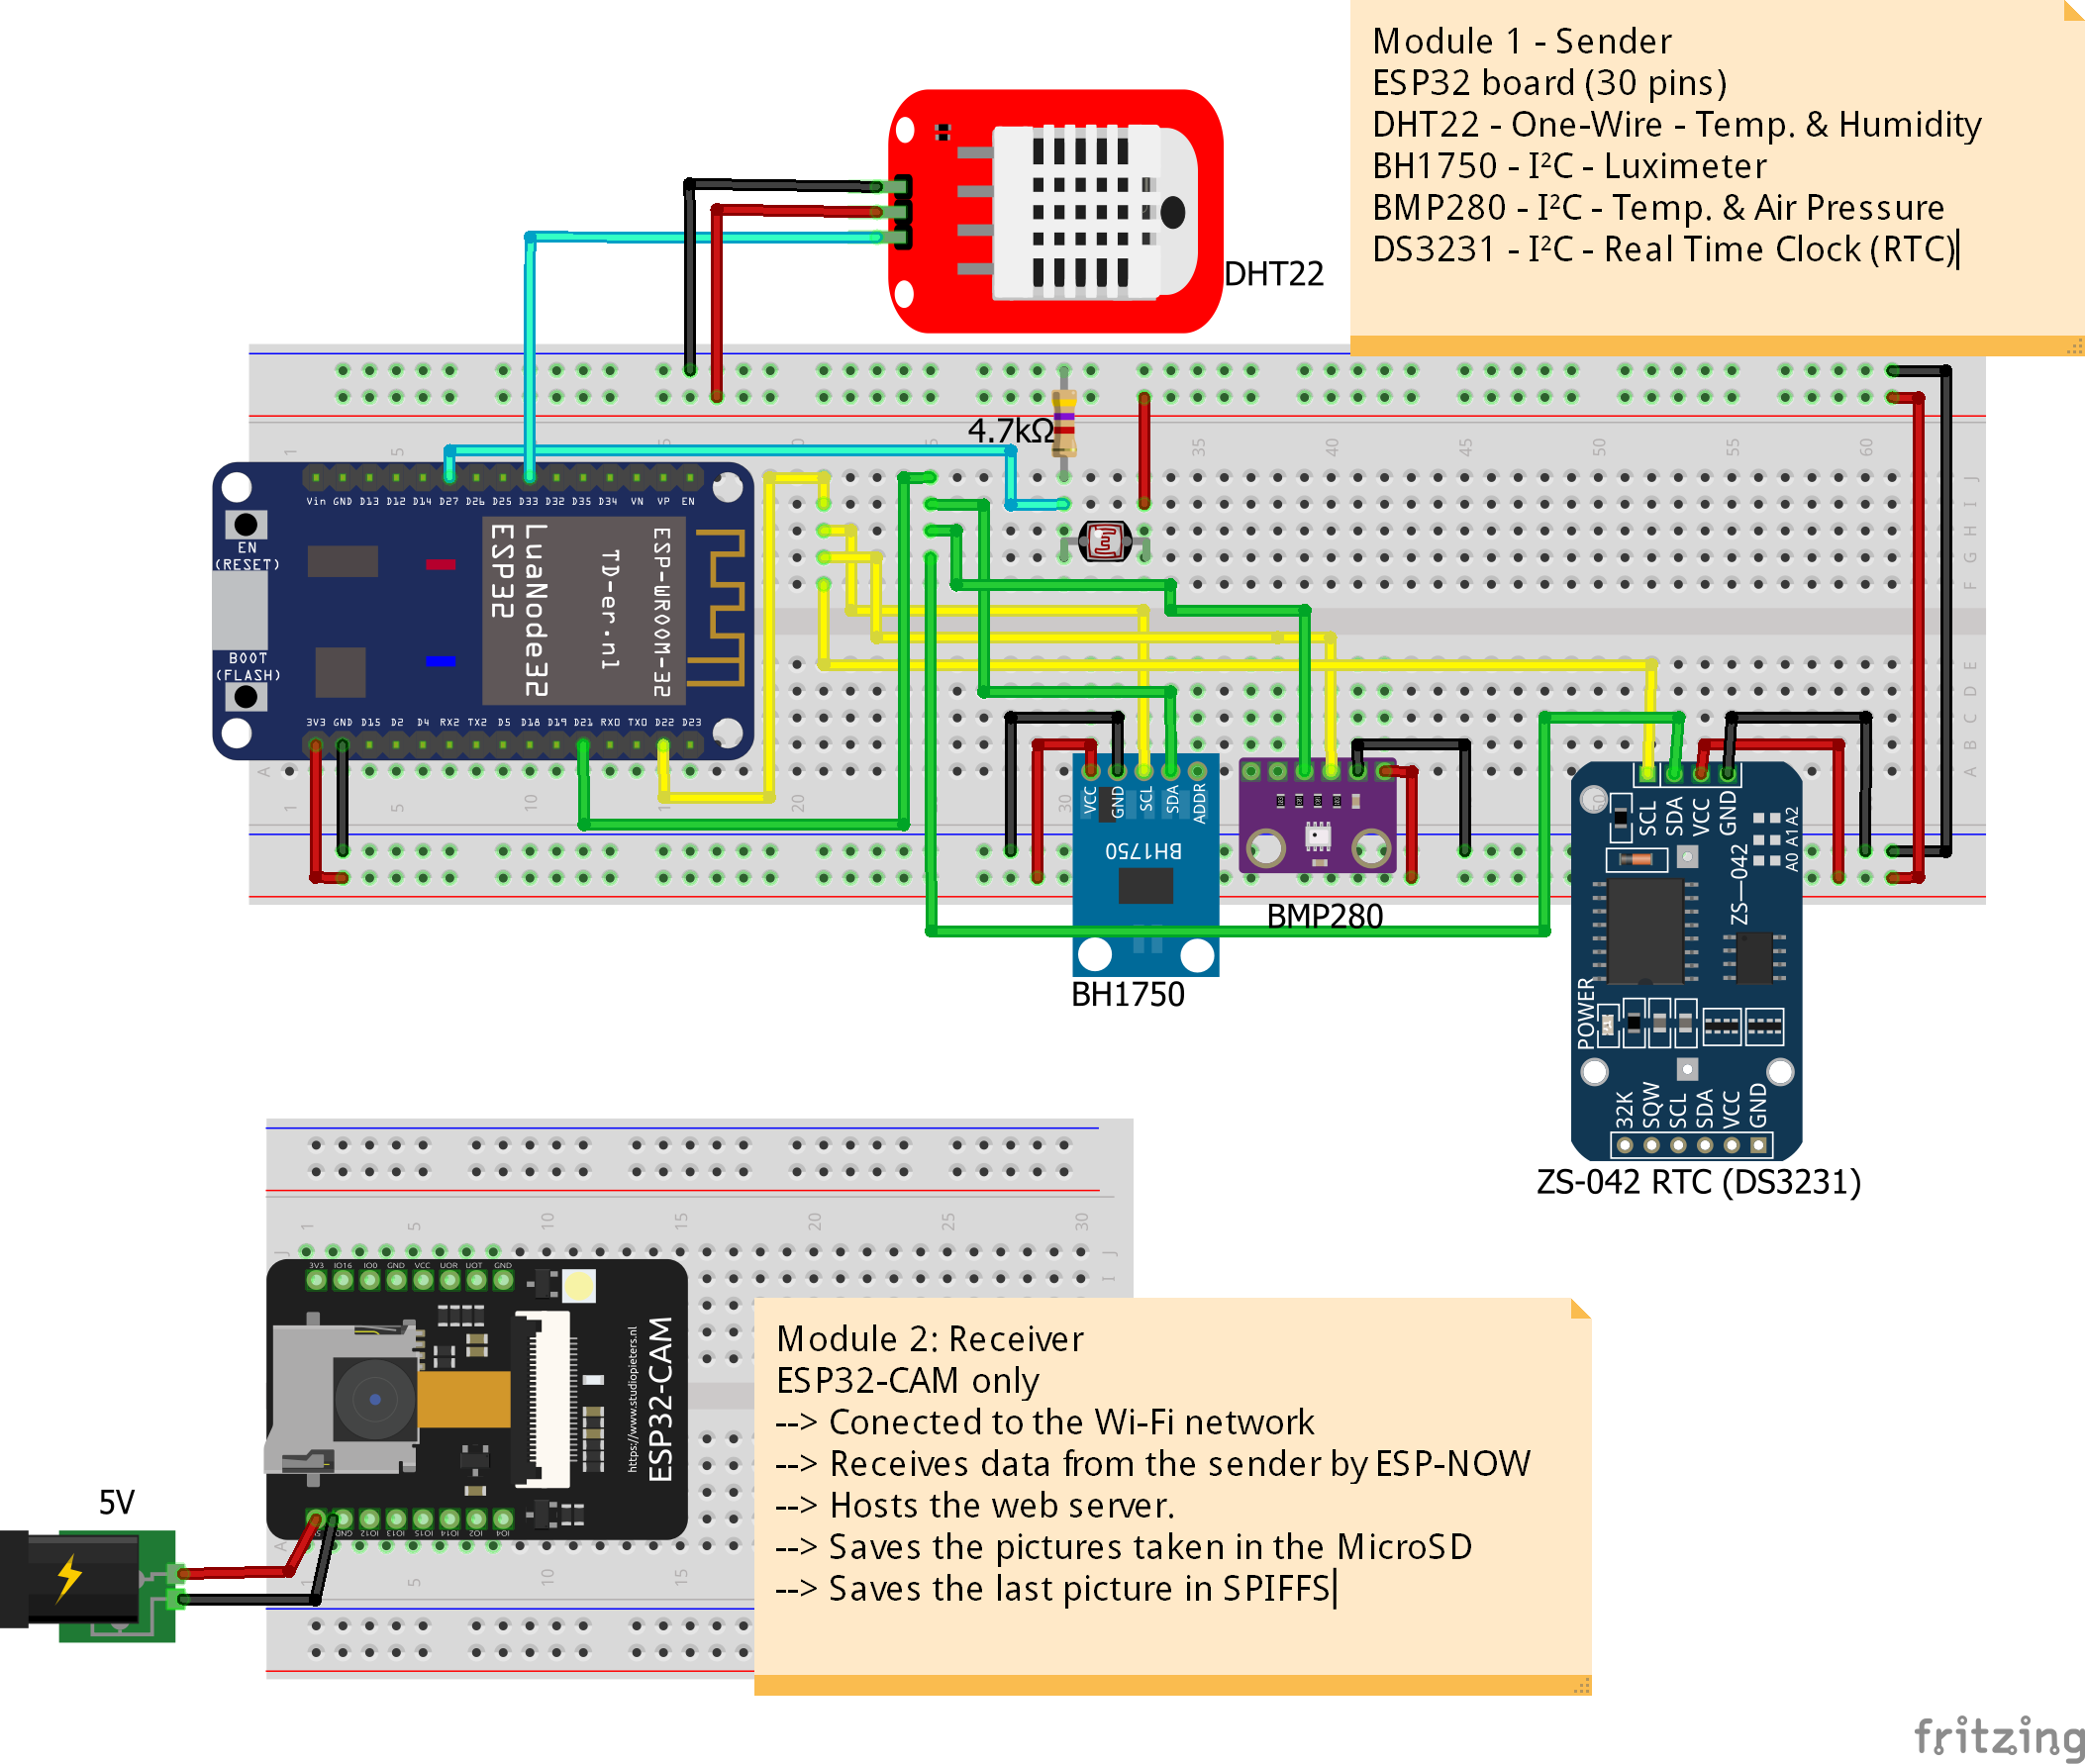
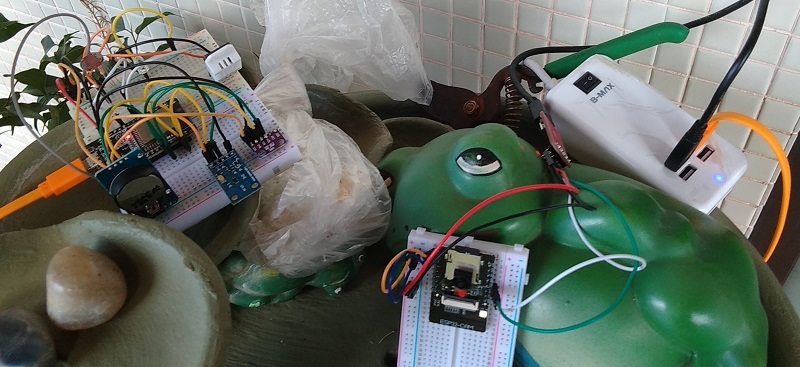
- Module 1: NodeMCU with ESP-WROOM-32/ESP-32S
- Module 2: ESP32-CAM, which includes an OV2640 camera module and a MicroSD card module.
- The NodeMCU ESP32 board is connected to some sensors - temperature, air pressure, humidity, light and Real Time Clock (RTC) - and it sends the values read in these sensors to an ESP32-CAM board.
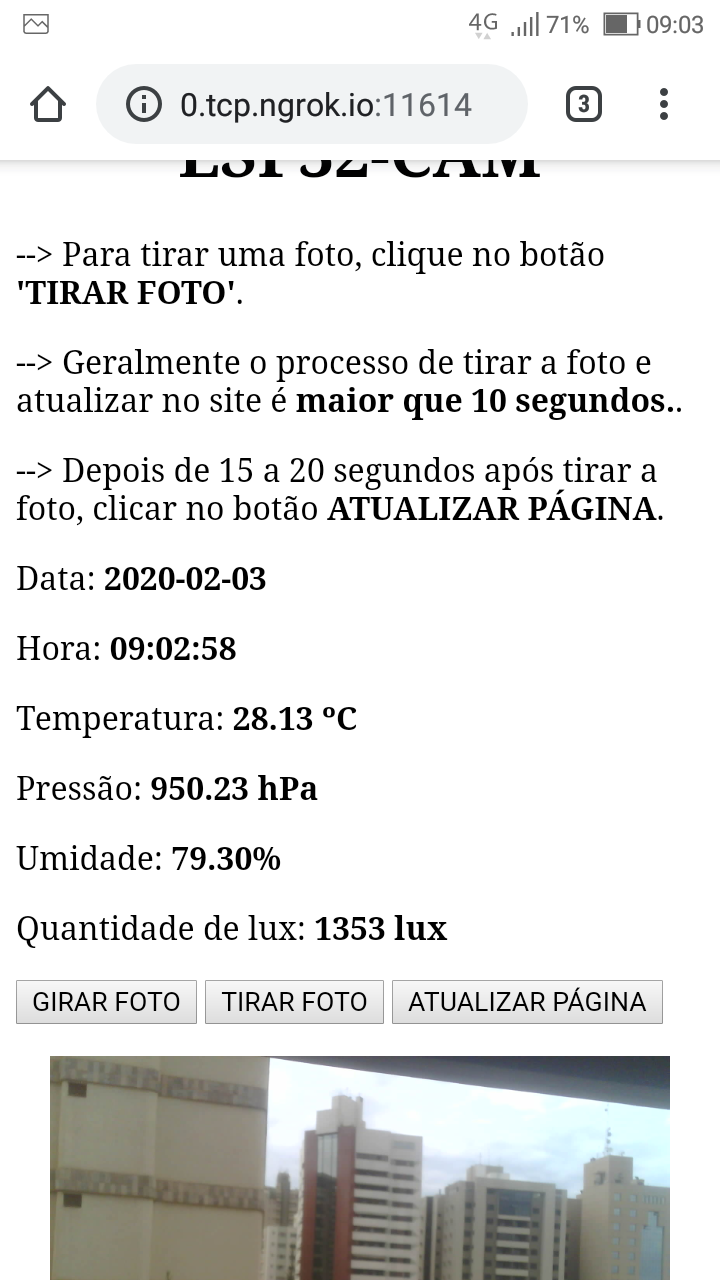
- The ESP32-CAM board hosts a web server which shows the last picture taken by the camera (saved in the SPIFFS) and the values received from the first board.
- The Wi-Fi module in this board works on the
WIFI_AP_STAmode which combines the modes Station (WIFI_STA) and Soft Access Point (WIFI_AP). - It creates an Soft Access Point, where the other ESP boards connects to.
- Also, it is connected to a Wi-Fi network with internet connection.
- The Wi-Fi module in this board works on the
- With this configuration, the web server hosted in the board can be accessed by two different manners:
- 1 - Over a device (computer, cell phone etc.) connected on the same Wi-Fi network, by typing the IP address of the web server.
- 2 - By redirecting the IP address of the web server to the internet. Here, I use the services from NGROK.
- This project was built over many ideas presented in many posts published by Rui Santos and Sara Santos in the Random Nerd Tutorials (https://randomnerdtutorials.com/) and in the book-course "Learn ESP32 with Arduino IDE", written by the same authors.
- Many parts of the code written for the ESP32-CAM board where taken from this post: https://randomnerdtutorials.com/esp32-cam-take-photo-save-microsd-card/
- The (excellent) posts about the ESP-NOW protocol are:
- The scripts here use the protocol ESP-NOW only with ESP32 boards. I tried these scripts with an ESP8266 but it didn't work.
- The ESP-NOW protocol ALSO works with the ESP8266, but with other resources (which I don't know yet).
- The ESP-NOW is used for data transference between two or more ESP boards, and, of course, is available only in Espressif (company which developed the ESP-NOW, the ESP8266 and the ESP32) devices.
- This project uses a One-Way Connection between the two ESP32 boards.
- The NodeMCU board reads the sensors and SENDS the data to the ESP32-CAM board.
- The ESP32-CAM board RECEIVES the data from the NodeMCU and publish the received data in the web server.
- The web server hosted in the ESP32-CAM is redirected to the internet using the services from NGROK (https://ngrok.com/).
- NodeMCU ESP32 board - x1
- ESP32-CAM board - x1
- ZS-042 RTC module (with the DS3231 RTC) - x1
- DHT22 sensor (temperature and humidity) - x1
- BMP280 sensor module (temperature and air pressure) - x1
- BH1750FVI light sensor module - x1
- Light Dependent Resistor (LDR) - x1
- FTDI programmer FT232RL or CP2101 based (to send the sketch to the ESP32-CAM and/or use as power supply) - x1
- MicroSD card - x1
Script_01_Adjust_DS3231_Time: Its only function is to adjust the date and time in the RTC module.Script_02_ESP32_ESPNowSender: Sketch sent to the NodeMCU ESP32 (the SENDER in this project).Script_03_ESP32CAM_ESP-NOW_WebServer: Sketch sent to the ESP32-CAM (the RECEIVER in this project).
- Changes in the RECEIVER sketch:
- 1 - Set the Wi-Fi mode to AP+STA mode (Soft Access Point and STAtion).
- 2 - Create a Soft Access Point.
- 3 - Connect to your Wi-Fi network.
void setup(){
	/* Code before the ESP-NOW initialization */

	// Set the Wi-Fi mode to AP+STA
      WiFi.mode(WIFI_AP_STA);

	// Create the Soft Access Point
      Serial.print("Creating the soft-AP...");
	WiFi.softAP(<SSID AP>, <PASSWORD AP>, <CHANNNEL AP>, 1);

	// Connect to the Wi-Fi Network
      WiFi.begin(<YOUR SSID>, <YOUR PASSWORD>);


	/* Initialize the ESP-NOW and subsequent code in setup() */
}
- Changes in the SENDER sketch:
- 1 - Set the Wi-Fi mode to STA mode (Station).
- 2 - Connect to the Soft AP of the RECEIVER module, using the same procedure to connect to any other Wi-Fi network.
void setup(){
	/* Code before the ESP-NOW initialization */

	// Set the Wi-Fi mode to STA
      WiFi.mode(WIFI_STA);

	// Connect to the Soft Access Point
      WiFi.begin(<SSID AP>, <PASSWORD AP>);


	/* Initialize the ESP-NOW and subsequent code in setup() */
}
- Link to access the Web Server on the internet: http://0.tcp.ngrok.io:11614/
- This address changes everytime the NGROK service is called.
- This address is only valid for 2020-02-03.
- Here is shown some important images of the project. More images are available in the folder
Images.
- More information about Fritzing in: https://fritzing.org/home/


