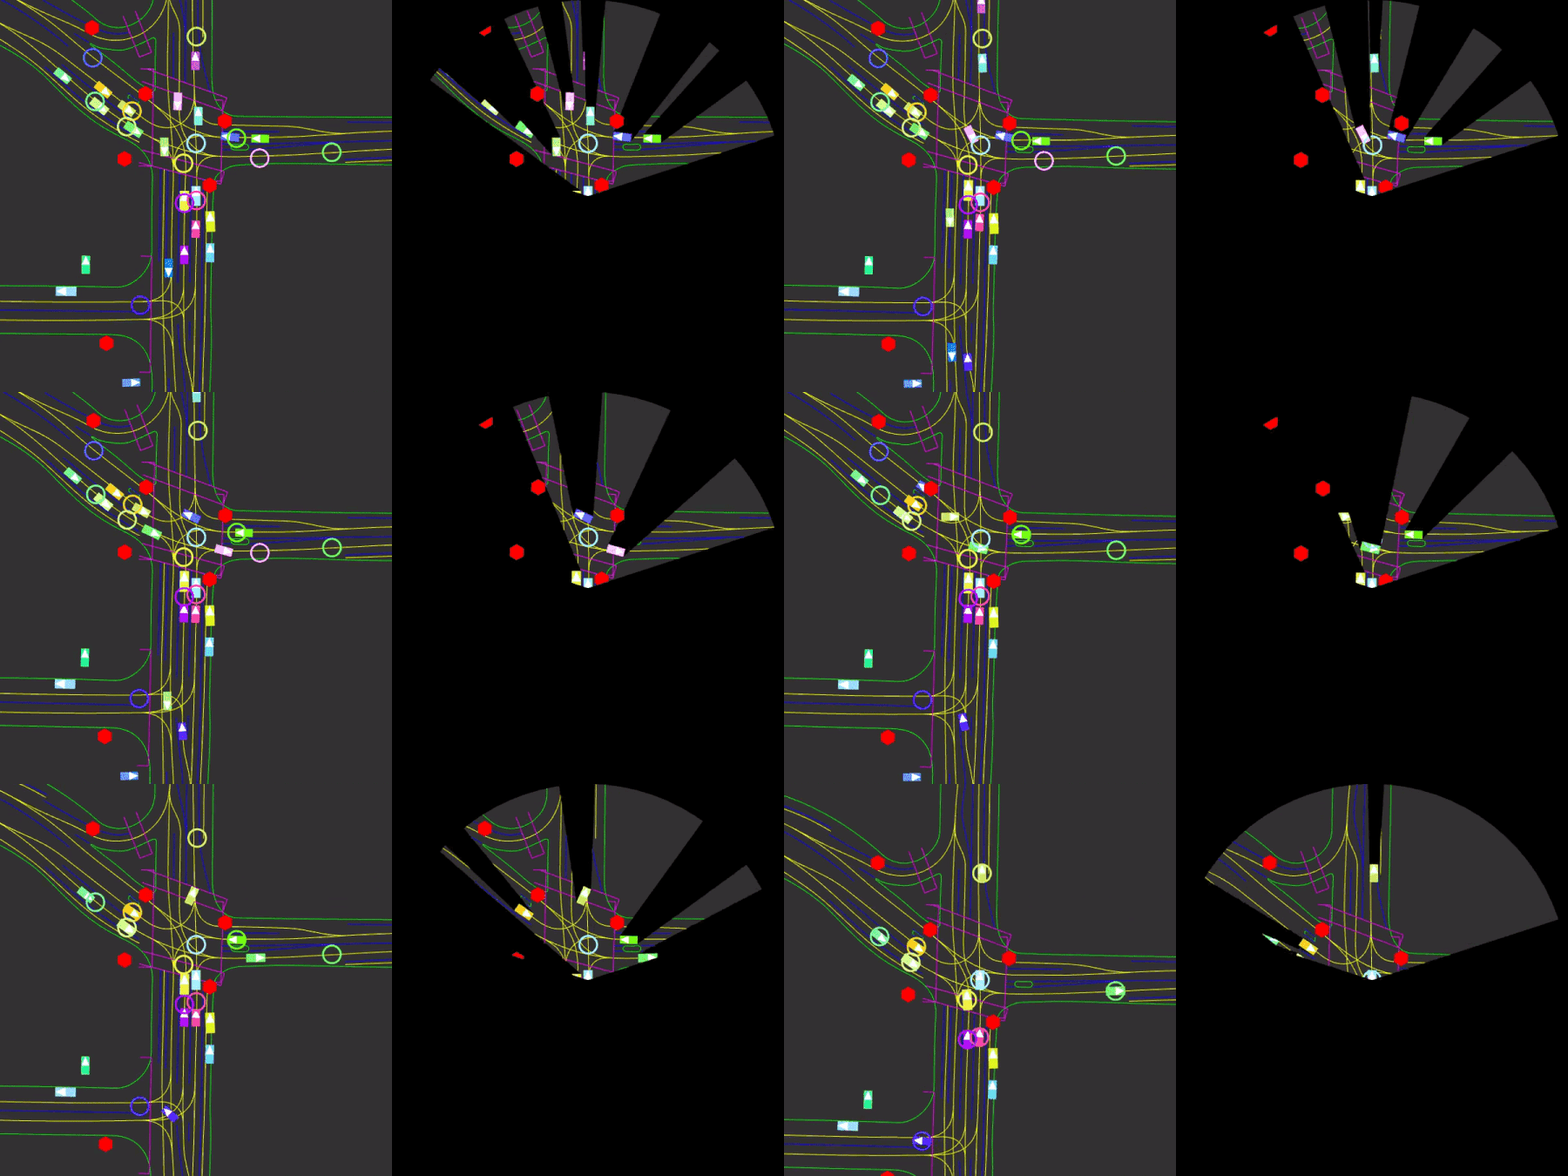
Nocturne is a 2D driving simulator, built in C++ for speed and exported as a Python library.
It is currently designed to handle traffic scenarios from the Waymo Open Dataset, and with some work could be extended to support different driving datasets. Using the Python library nocturne, one is able to train controllers for AVs to solve various tasks from the Waymo dataset, which we provide as a benchmark, then use the tools we offer to evaluate the designed controllers.
Using this rich data source, Nocturne contains a wide range of scenarios whose solution requires the formation of complex coordination, theory of mind, and handling of partial observability. Below we show replays of the expert data, centered on the light blue agent, with the corresponding view of the agent on the right.
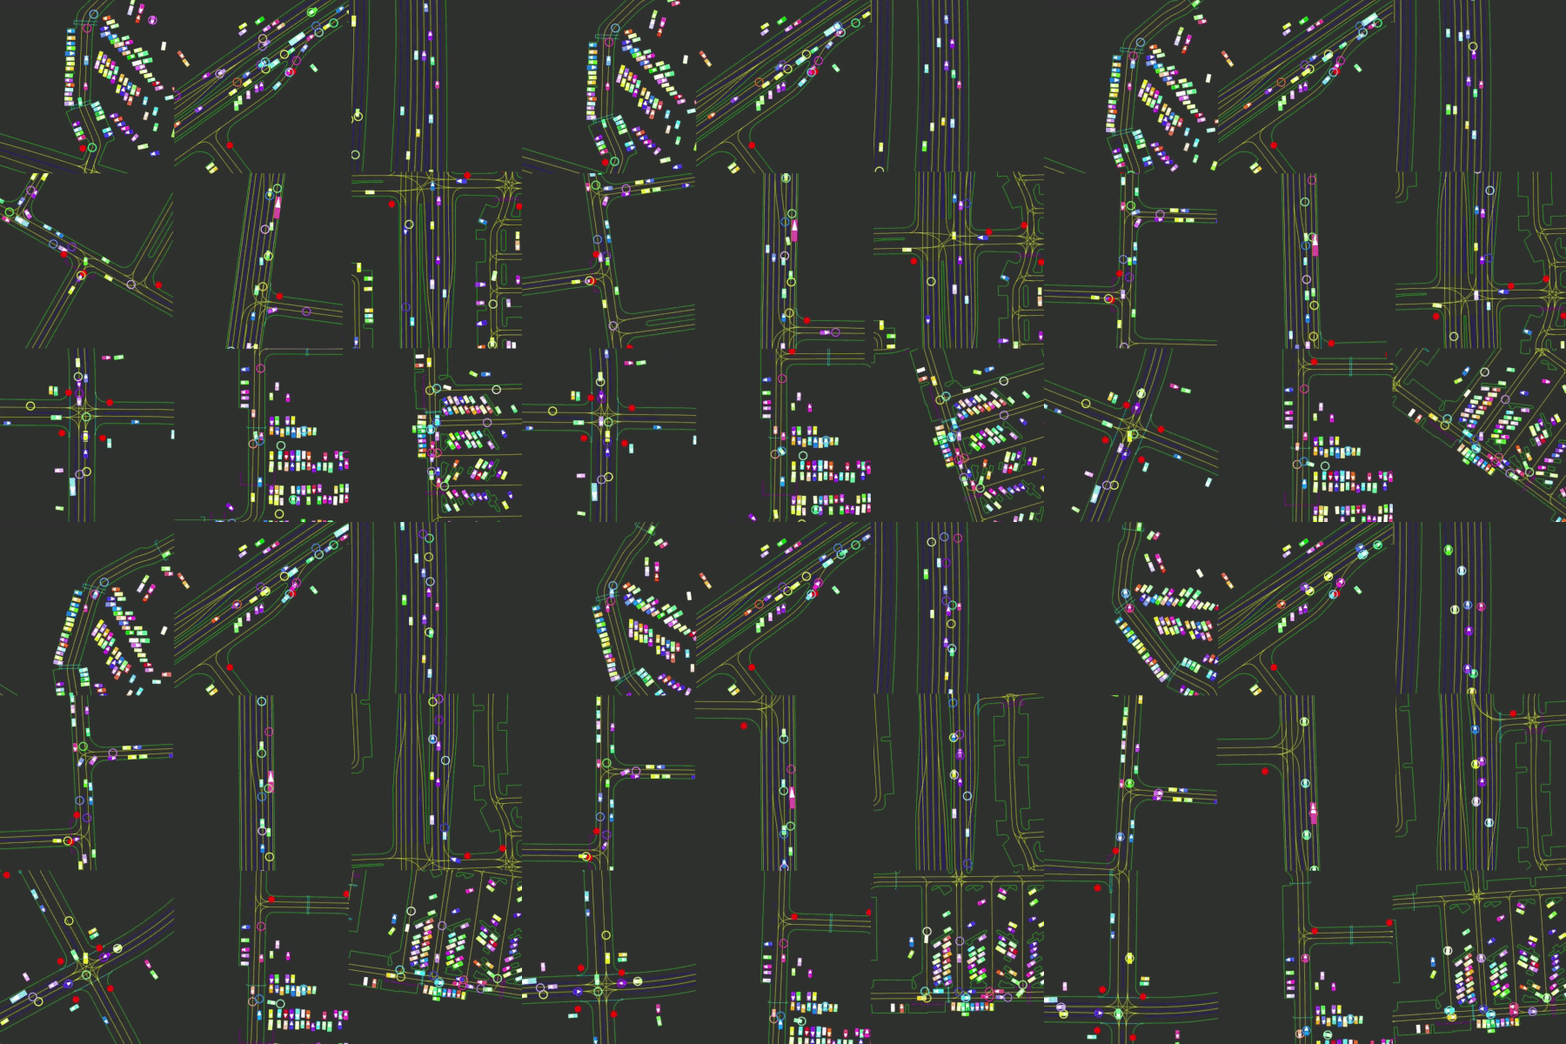
Nocturne features a rich variety of scenes, ranging from parking lots, to merges, to roundabouts, to unsignalized intersections.
The corresponding paper is available at: https://arxiv.org/abs/2206.09889. Please cite the paper and not the GitHub repository, using the following citation:
@article{nocturne2022,
  author  = {Vinitsky, Eugene and Lichtlé, Nathan and Yang, Xiaomeng and Amos, Brandon and Foerster, Jakob},
  journal = {arXiv preprint arXiv:2206.09889},
  title   = {{Nocturne: a scalable driving benchmark for bringing multi-agent learning one step closer to the real world}},
  url     = {https://arxiv.org/abs/2206.09889},
  year    = {2022}
}Feel free to open an issue at any time if you encounter a problem, need some help with installing or using Nocturne, want to ask us any related question, or even propose a new feature. We will be happy to help!
CMake is required to compile the C++ library.
Run cmake --version to see whether CMake is already installed in your environment. If not, refer to the CMake website instructions for installation, or you can use:
sudo apt-get -y install cmake(Linux)brew install cmake(MacOS)
Nocturne uses SFML for drawing and visualization, as well as on pybind11 for compiling the C++ code as a Python library.
To install SFML:
sudo apt-get install libsfml-dev(Linux)brew install sfml(MacOS)
pybind11 is included as a submodule and will be installed in the next step.
Start by cloning the repo:
git clone https://github.com/nathanlct/nocturne.git
cd nocturne
Then run the following to install git submodules:
git submodule sync
git submodule update --init --recursive
If you are using Conda (recommended), you can instantiate an environment and install Nocturne into it with the following:
# create the environment and install the dependencies
conda env create -f environment.yml

# activate the environment where the Python library should be installed
conda activate nocturne

# run the C++ build and install Nocturne into the simulation environment
python setup.py develop
If you are not using Conda, simply run the last command to build and install Nocturne at your default Python path.
You should then be all set to use the library. To find an example of constructing a Gym environment, using a basic Simulation, or rendering scenes, go to
examples and run respectively, create_env.py, nocturne_functions.py or rendering.py.
Python tests can be run with pytest.
Click here for a list of common installation errors
If you are getting errors with pybind11, install it directly in your conda environment (eg. conda install -c conda-forge pybind11 or pip install pybind11, cf. https://pybind11.readthedocs.io/en/latest/installing.html for more info).
Two versions of the dataset are available:
- a mini-one that is about 1 GB and consists of 1000 training files and 100 validation / test files at: Dropbox Link.
- the full dataset (150 GB) and consists of 134453 training files and 12205 validation / test files: Dropbox Link
Place the dataset in a folder of your choosing, unzip the folders inside of it, and change the DATA_FOLDER in cfgs/config.py to point to where you have
downloaded it.
Warning this step is not necessary, the dataset has already been downloaded in the prior step. This is only needed if you want to rebuild the dataset from scratch.
First, go to Waymo Open and follow the instructions to install the required packages. This may require additional steps if you are not on a Linux machine.
If you do want to rebuild the dataset, download the Waymo Motion version 1.1 files.
- Open
cfgs/config.pyand changeDATA_FOLDERto be the path to your Waymo motion files - Run
python scripts/json_generation/run_waymo_constructor.py --parallel --no_tl --all_files --datatype train valid. This will construct, in parallel, a dataset of all the train and validation files in the waymo motion data. It should take on the order of 5 minutes with 20 CPUs. If you want to include traffic lights scenes, remove the--no_tlflag. - To ensure that only files that have a guaranteed solution are included (for example, that there are no files where the agent goal is across an apparently uncrossable road edge), run
python scripts/json_generation/make_solvable_files.py --datatype train valid.
If you want to build the C++ library independently of the Python one, run the following:
cd nocturne/cpp
mkdir build
cd build
cmake ..
make
make install
Subsequently, the C++ tests can be ran with ./tests/nocturne_test from within the nocturne/cpp/build directory.
To get a sense of available functionality in Nocturne, we have provided a few examples in the examples folder of how to construct the env (create_env.py), how to construct particular observations (nocturne_functions.py), and how to render results (rendering.py).
Note: by default, Nocturne will log to $NOCTURNE_LOG_DIR which is set in nocturne/__init__.py and defaults to <PROJECT_PATH>/logs. If you'd like to log somewhere else, go to nocturne/__init__.py and change $NOCTURNE_LOG_DIR to a different path.
The following goes over how to use training algorithms using the Nocturne environment.
Nocturne comes shipped with a default Gym environment in nocturne/envs/base_env.py. Atop this, we build integration for a few popular RL libraries.
Nocturne by default comes with support for three versions of Proximal Policy Optimization:
- Sample Factory, a high throughput asynchronous PPO implementation (https://github.com/alex-petrenko/sample-factory)
- RLlib's PPO (https://github.com/ray-project/ray/tree/master/rllib)
- Multi-Agent PPO from (https://github.com/marlbenchmark/on-policy) Each algorithm is in its corresponding folder in examples and has a corresponding config file in cfgs/
Warning: only the Sample Factory code has been extensively swept and tested. The default hyperparameters in there should work for training the agents from the corresponding paper. The other versions are provided for convenience but are not guaranteed to train a performant agent with the current hyperparameter settings.
There are a few key hyperparameters that we expect users to care quite a bit about. Each of these can be toggled by adding
++<hyperparam_name>=<hyperparam_value> to the run command.
num_files: this controls how many training scenarios are used. Set to -1 to use all of them.max_num_vehicles: this controls the maximum number of controllable agents in a scenario. If there are more thanmax_num_vehiclescontrollable agents in the scene, we samplemax_num_vehiclesrandomly from them and set the remainder to be experts. If you want to ensure that all agents are controllable, simply pick a large number like 100.
Files from Sample Factory can be run from examples/sample_factory_files and should work by default by running
python examples/sample_factory_files/visualize_sample_factory.py algorithm=APPO
Additional config options for hyperparameters can be found in the config file.
Once you have a trained checkpoint, you can visualize the results and make a movie of them by running python examples/sample_factory_files/run_sample_factory.py <PATH TO OUTPUT MODEL>.
Warning: because of how the algorithm is configured, Sample Factory works best with a fixed number of agents
operating on a fixed horizon. To enable this, we use the config parameter max_num_vehicles which initializes the environment with only scenes that have fewer controllable agents than max_num_vehicles. Additionally, if there are fewer than max_num_vehicles in the scene we add dummy agents that receive a vector of -1 at all timesteps. When a vehicle exits the scene we continue providing it a vector of -1 as an observation and a reward of 0.
Files from RLlib examples can be run from examples/rllib_files and should work by default by running
python examples/rllib_files/run_rllib.py
Files from MAPPO examples can be run from examples/rllib_files and should work by default by running
python examples/on_policy_files/nocturne_runner.py algorithm=ppo
Nocturne comes with a baseline implementation of behavioral cloning and a corresponding
DataLoader. This can be run via python examples/imitation_learning/train.py.
|
|
|
|
| Eugene Vinitsky | Nathan Lichtlé | Xiaomeng Yang |
The majority of Nocturne is licensed under the MIT license, however portions of the project are available under separate license terms. The Waymo Motion Dataset License can be found at https://waymo.com/open/terms/.

