Deploy a Hail 0.2 cluster (https://hail.is/) in Google Cloud Platform.
Learn how to create a dataproc cluster with Hail 0.2 on Google Cloud Platform.
For MAC OS, you can use cloudtools, see https://github.com/Nealelab/cloudtools .
- Have a Google Cloud Account
A google cloud account is required with enough credentials. When your account is created, you will need to create a project in which the clusters will be launched and the data will be saved (https://cloud.google.com/resource-manager/docs/creating-managing-projects).
- Install Google Cloud SDK
Google Cloud SDK is a set of tools that you can use to manage resources and applications hosted on Google Cloud Platform. It will be easier to launch and detete cluster though SDK. Install the SDK cloud for your specific OS. Follow all the steps described in https://cloud.google.com/sdk/docs/. You will need to provide the name of your project. For Mac or Linux User, it will be fully integrated in your terminal. For Windows user, you will have to use a new command prompt terminal.
- Download the initialization script
To be able to launch a hail cluster, download and upload in one of your bucket in google storage the init_notebook.py available in this repository. It will be one of the initialization-actions. This script installs appropriately Hail, Python 3.6 with the most used packages (matplotly, pandas, searborn ...) and Jupyter notebook.
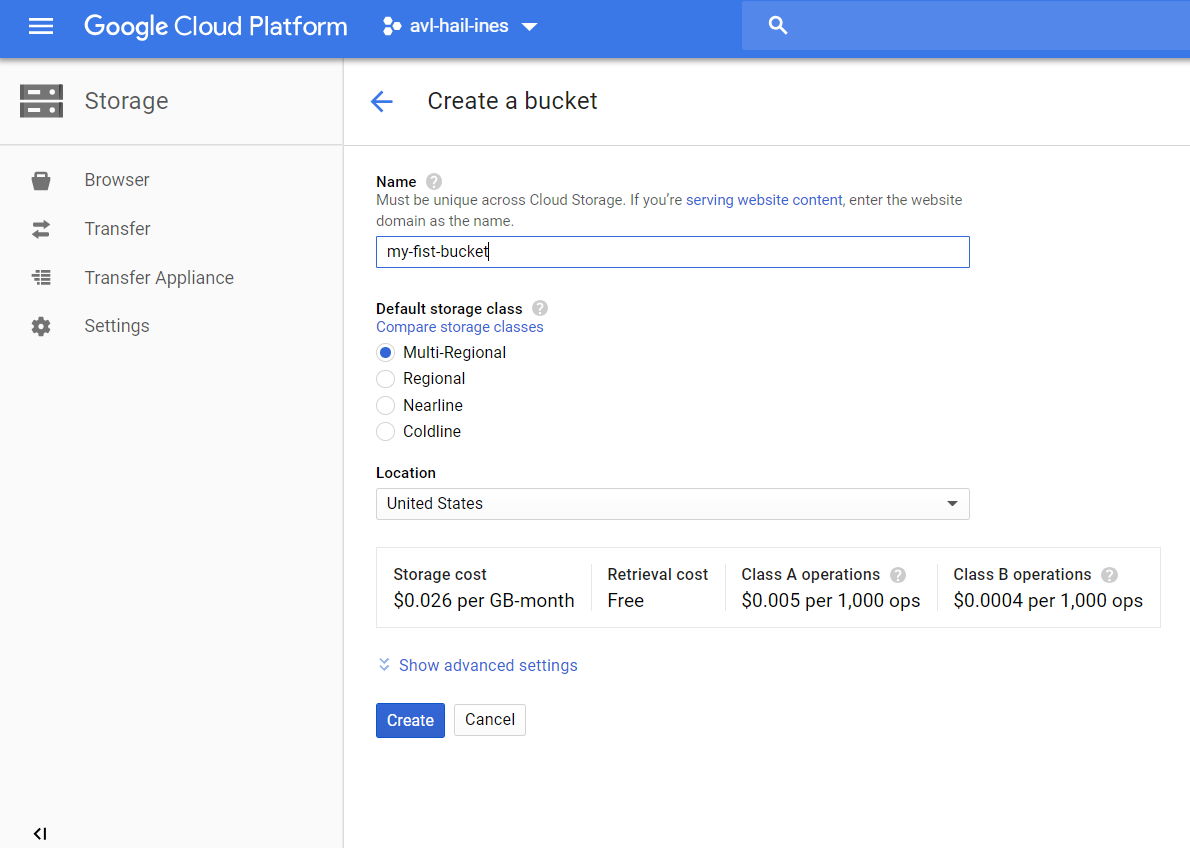
You will need fist to create a bucket and after to upload the init_notebook.py script.
Our advice in terms of cluster size (which are the default settings given in the example that follows) are :
-
Choose a small machine for the master node that is not the machine that performs the tasks, for example n1-standard-2
-
A number of worker nodes between 2 and 4 should be enough to start.
-
For the worker nodes, the machine will be identical and it must be chosen according to your needs. You can choose the machine instance type in https://cloud.google.com/compute/docs/machine-types To begin, you can use n1-highmem-32 ($1.8944 per hour). Always try to keep an eye on the price of your machines with https://cloud.google.com/compute/pricing or https://cloud.google.com/products/calculator/
-
You can use preemptile worker nodes to create very large clusters at a lower total cost. https://cloud.google.com/dataproc/docs/concepts/compute/preemptible-vms
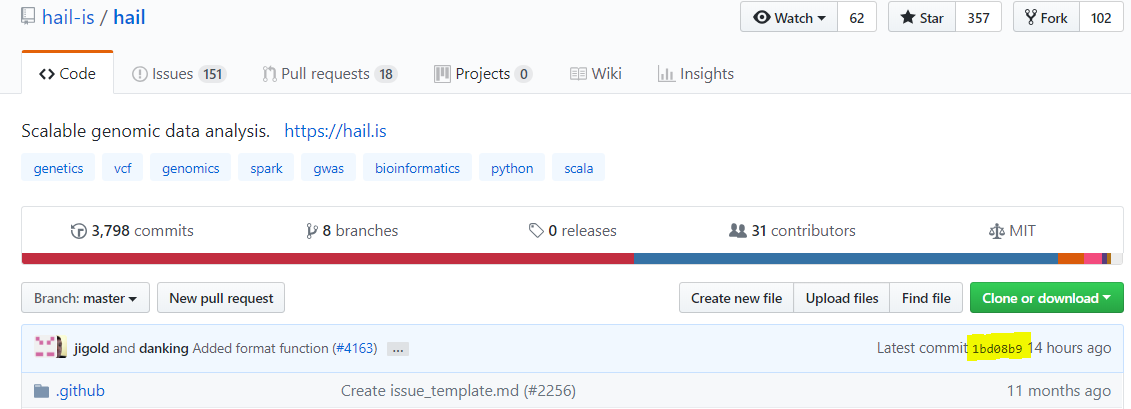
Hail is now released but Hail team commits regularly to solve some issues. If you want to create a cluster with the latest version of Hail 0.2, you have to retrieve the number from https://github.com/hail-is/hail.
All the JAR and ZIP files are available via the command gsutil ls -r gs://hail-common/builds/0.2/jars and gsutil ls -r gs://hail-common/builds/0.2/python Replace #version_number with the version that you want.
Here d33e2d1c19b2 for example.
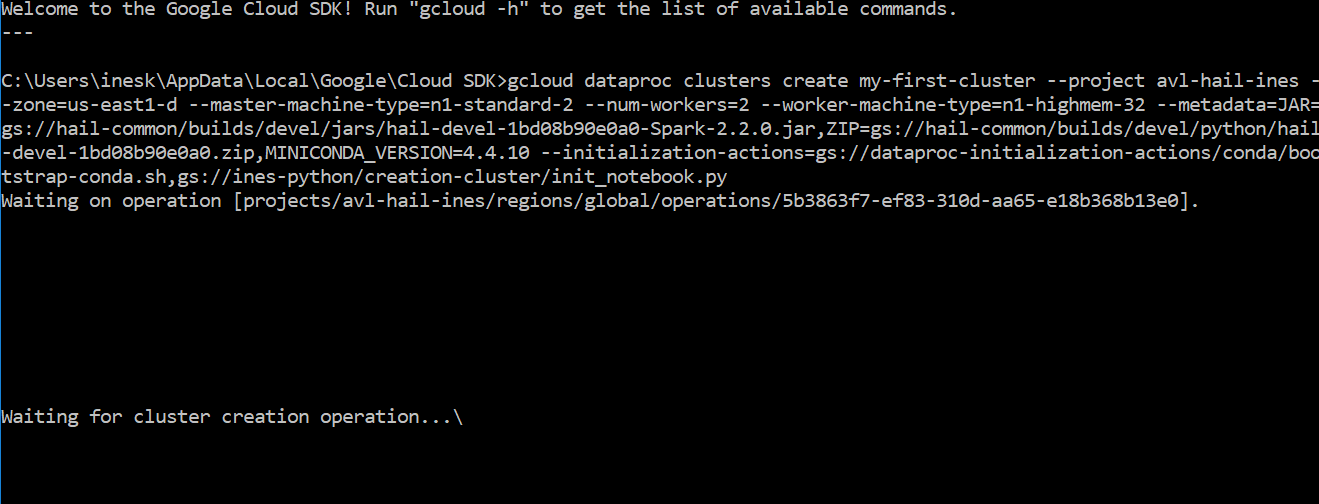
Use your terminal (or the SDK terminal for windows user) to type all the following commands.
- Launch a Hail cluster
gcloud dataproc clusters create *cluster-name* \
--project *your-project* \
--zone=us-east1-d \
--master-machine-type n1-standard-2 \
--num-workers 2 \
--worker-machine-type n1-standard-8 \
--num-preemptible-workers=0 \
--image-version=1.2-deb9 \
--metadata=JAR=gs://hail-common/builds/0.2/jars/hail-0.2-d33e2d1c19b2-Spark-2.2.0.jar,ZIP=gs://hail-common/builds/0.2/python/hail-0.2-d33e2d1c19b2.zip,MINICONDA_VERSION=4.4.10 \
--initialization-actions=gs://dataproc-initialization-actions/conda/bootstrap-conda.sh,gs://my-first-bucket/init_notebook.py
Be careful to use the right path to the init_notebook : gs://my-first-bucket/init_notebook.py.
The cluster installation is complete in less than 10 minutes.
- Connect to your cluster and open Jupyter Notebook
The url to have access to the Jupyter Notebook will be : http://ExternalIP-master-node:port.
You can find the external IP in the google API. The port is 8123 by default. You have to open a firewall rule to allow traffic to and from your virtual machines (go to VPC Network -> Firewall rules -> Create firewall rule).
To connect and open Jupyter Notebook for this specific example, you will use the URL http://35.229.17.83:8123.
For your own cluster, copy your own external IP adress instead of 35.229.17.83.
And the password is hail-class by default.
- Submit a hail job with a python script
gcloud dataproc jobs submit pyspark gs://path-to/python-script.py --cluster=*cluster-name* --project=*your-project*
- Delete the cluster
Don't forget to delete your cluster if you don't need it anymore !
gcloud dataproc clusters delete *cluster-name*


