A Flask application template with the boilerplate code already done for you.
Documentation available at http://hack4impact.github.io/flask-base.
- Blueprints
- User and permissions management
- Flask-SQLAlchemy for databases
- Flask-WTF for forms
- Flask-Assets for asset management and SCSS compilation
- Flask-Mail for sending emails
- gzip compression
- Redis Queue for handling asynchronous tasks
- ZXCVBN password strength checker
- CKEditor for editing pages
Home Page:
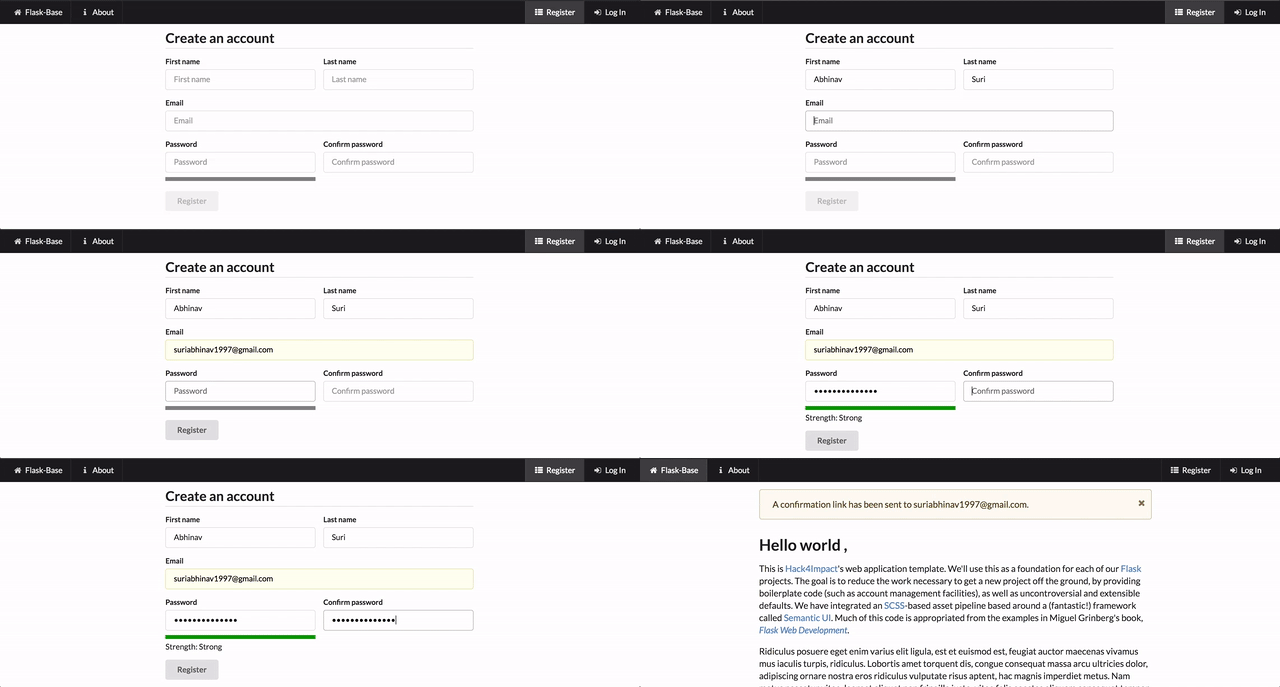
Registering User:
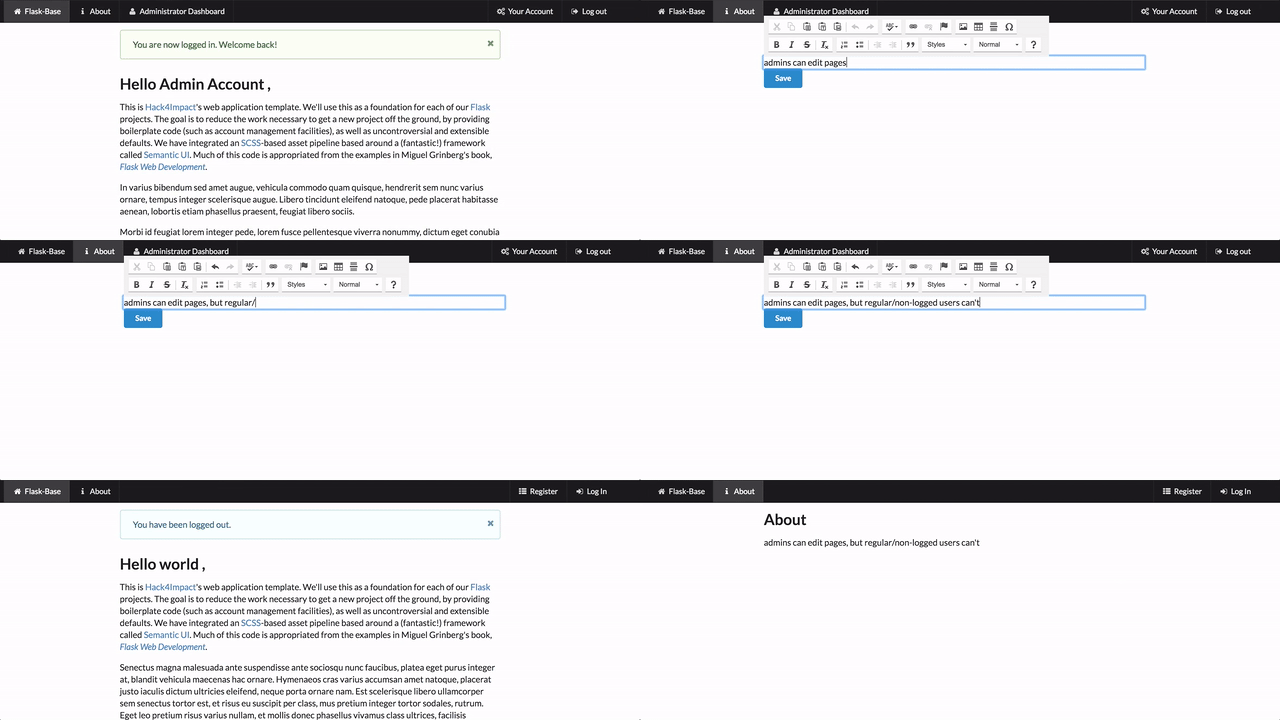
Admin Editing Page:
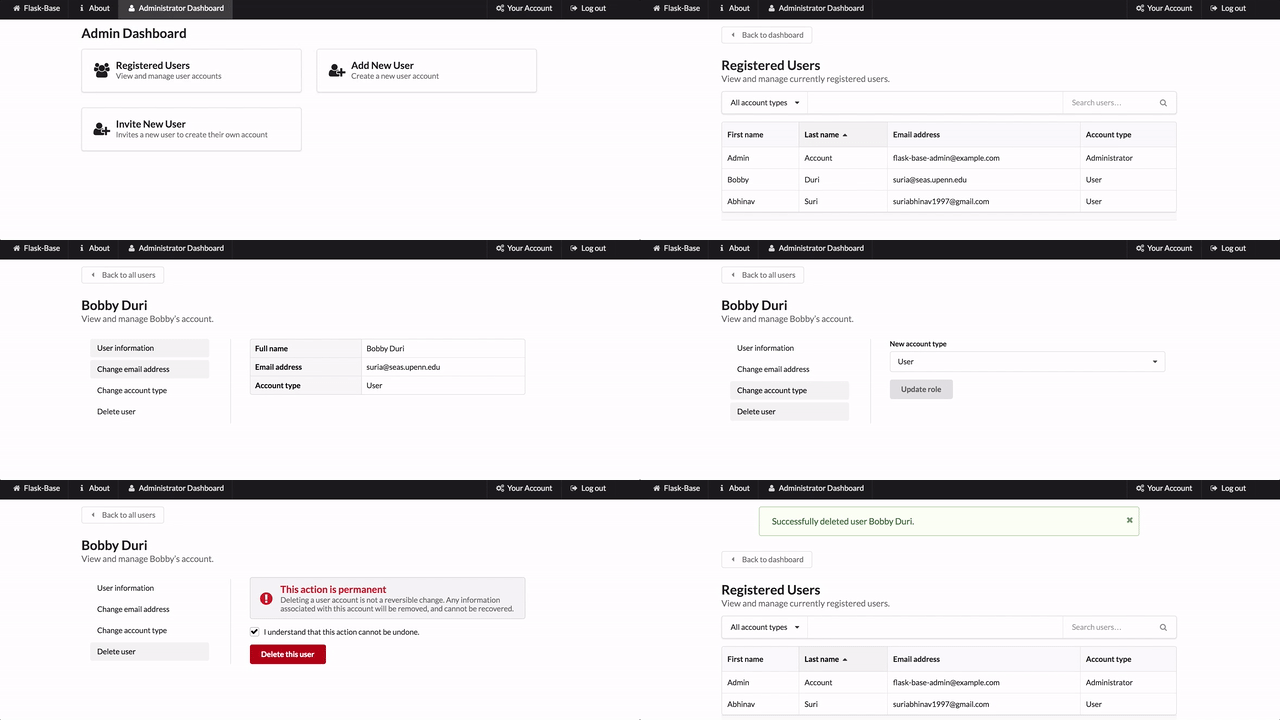
Admin Editing Users:
Navigate to the main project page and click the big, green "Use this template" button at the top right of the page. Give your new repository a name and save it.
$ git clone https://github.com/YOUR_USERNAME/REPO_NAME.git
$ cd REPO_NAME
Windows:
$ python3 -m venv venv
$ venv\Scripts\activate.bat
Unix/MacOS:
$ python3 -m venv venv
$ source venv/bin/activate
Learn more in the documentation.
Note: if you are using a python before 3.3, it doesn't come with venv. Install virtualenv with pip instead.
$ xcode-select --install
Create a file called config.env that contains environment variables. Very important: do not include the config.env file in any commits. This should remain private. You will manually maintain this file locally, and keep it in sync on your host.
Variables declared in file have the following format: ENVIRONMENT_VARIABLE=value. You may also wrap values in double quotes like ENVIRONMENT_VARIABLE="value with spaces".
-
In order for Flask to run, there must be a
SECRET_KEYvariable declared. Generating one is simple with Python 3:$ python3 -c "import secrets; print(secrets.token_hex(16))"This will give you a 32-character string. Copy this string and add it to your
config.env:SECRET_KEY=Generated_Random_String -
The mailing environment variables can be set as the following. We recommend using Sendgrid for a mailing SMTP server, but anything else will work as well.
MAIL_USERNAME=SendgridUsername
MAIL_PASSWORD=SendgridPassword
Other useful variables include:
| Variable | Default | Discussion |
|---|---|---|
ADMIN_EMAIL |
flask-base-admin@example.com |
email for your first admin account |
ADMIN_PASSWORD |
password |
password for your first admin account |
DATABASE_URL |
data-dev.sqlite |
Database URL. Can be Postgres, sqlite, etc. |
REDISTOGO_URL |
http://localhost:6379 |
Redis To Go URL or any redis server url |
RAYGUN_APIKEY |
None |
API key for Raygun, a crash and performance monitoring service |
FLASK_CONFIG |
default |
can be development, production, default, heroku, unix, or testing. Most of the time you will use development or production. |
$ pip install -r requirements.txt
You need Redis, and Sass. Chances are, these commands will work:
Sass:
$ gem install sass
Redis:
Mac (using homebrew):
$ brew install redis
Linux:
$ sudo apt-get install redis-server
You will also need to install PostgresQL
Mac (using homebrew):
brew install postgresql
Linux (based on this issue):
sudo apt-get install libpq-dev
$ python manage.py recreate_db
$ python manage.py setup_dev
Note that this will create an admin user with email and password specified by the ADMIN_EMAIL and ADMIN_PASSWORD config variables. If not specified, they are both flask-base-admin@example.com and password respectively.
$ python manage.py add_fake_data
$ source env/bin/activate
$ honcho start -e config.env -f Local
For Windows users having issues with binding to a redis port locally, refer to this issue.
Currently we have a Dockerfile intended for testing purposes and it automates the whole cycle of running the application, setting up the database and redis.
In only three simple steps :
- change the variables
MAIL_USERNAME,MAIL_PASSWORDandSECRET_KEY - `docker build -t <image_name> .
docker run -it -d -p 5000:5000 --name <container name> <image_name> /bin/bash- To run in foreground mode
docker run -it -p 5000:5000 --name <container name> <image_name> /bin/bash
A more robust version with docker-compose is being developed to separate redis in separate container and allow the deployment of production-level applications automatically without the need of manual provisioning
Before you submit changes to flask-base, you may want to autoformat your code with python manage.py format.
Contributions are welcome! Please refer to our Code of Conduct for more information.
To make changes to the documentation refer to the Mkdocs documentation for setup.
To create a new documentation page, add a file to the docs/ directory and edit mkdocs.yml to reference the file.
When the new files are merged into master and pushed to github. Run mkdocs gh-deploy to update the online documentation.


