Github dev containers for the following ROS 2 distributions:
- Foxy (core, base, desktop, core-testing, base-testing, desktop-testing)
- Galactic (core, base, desktop, core-testing, base-testing, desktop-testing)
- Humble (core, base, desktop, desktop-full, core-testing, base-testing, desktop-testing, desktop-full-testing)
- Iron (core, base, desktop, desktop-full, core-testing, base-testing, desktop-testing, desktop-full-testing)
- Rolling (core, base, desktop, desktop-full, core-testing, base-testing, desktop-testing, desktop-full-testing)
For the ROS 1 counterpart, see Dev Containers ROS 1.
You must add to your host-machine's ~/.bashrc,
xhost +local:root > /dev/null # Allows GUI in dev container to workThis lets you open GUI programs from within the dev-containers.
-
Clone this repository
-
In VS Code, Click on
Open Folder... [Ctrl+K Ctrl+O], and open one of the subdirectories that contain a.devcontainerfolder. (eg.rolling-desktop) -
VS Code will bring up the dialog below, asking about opening the folder in a dev container. Click on
Reopen in Container.
VS Code will then build the devcontainer. This takes some time the first time, but the second time should be much quicker.
If VS Code opens a dev container successfully, you now have ROS 2 (Rolling Desktop packages in this case) pre-installed, and ready to be used within that window. You can create a ROS 2 workspace and start developing!
If the build fails (it happens sometimes), open a GitHub Issue and post any available logs in it!
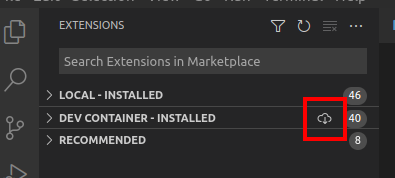
To use the extensions you always use, go to the Extensions pane on the left side of the VS Code window, and click on the following button.
The installation of the extensions should be relatively quick, and you should be able to use them as usual.
Here is a list of notes explaining the reason for using the respective options in devcontainer.json.
In devcontainer.json:
runArgs--privilegedallows the container to access the host's resources, including hardware devices (eg. webcam) and GPU.--network=hostallows the container to share the host’s networking namespace, and the container does not get its own IP-address allocated. This is necessary for nodes inside the docker container to communicate to nodes on the same network but on a different machine.

