GNSS Base Station based on Raspberry Pi 4B NO LONGER MAINTAINED
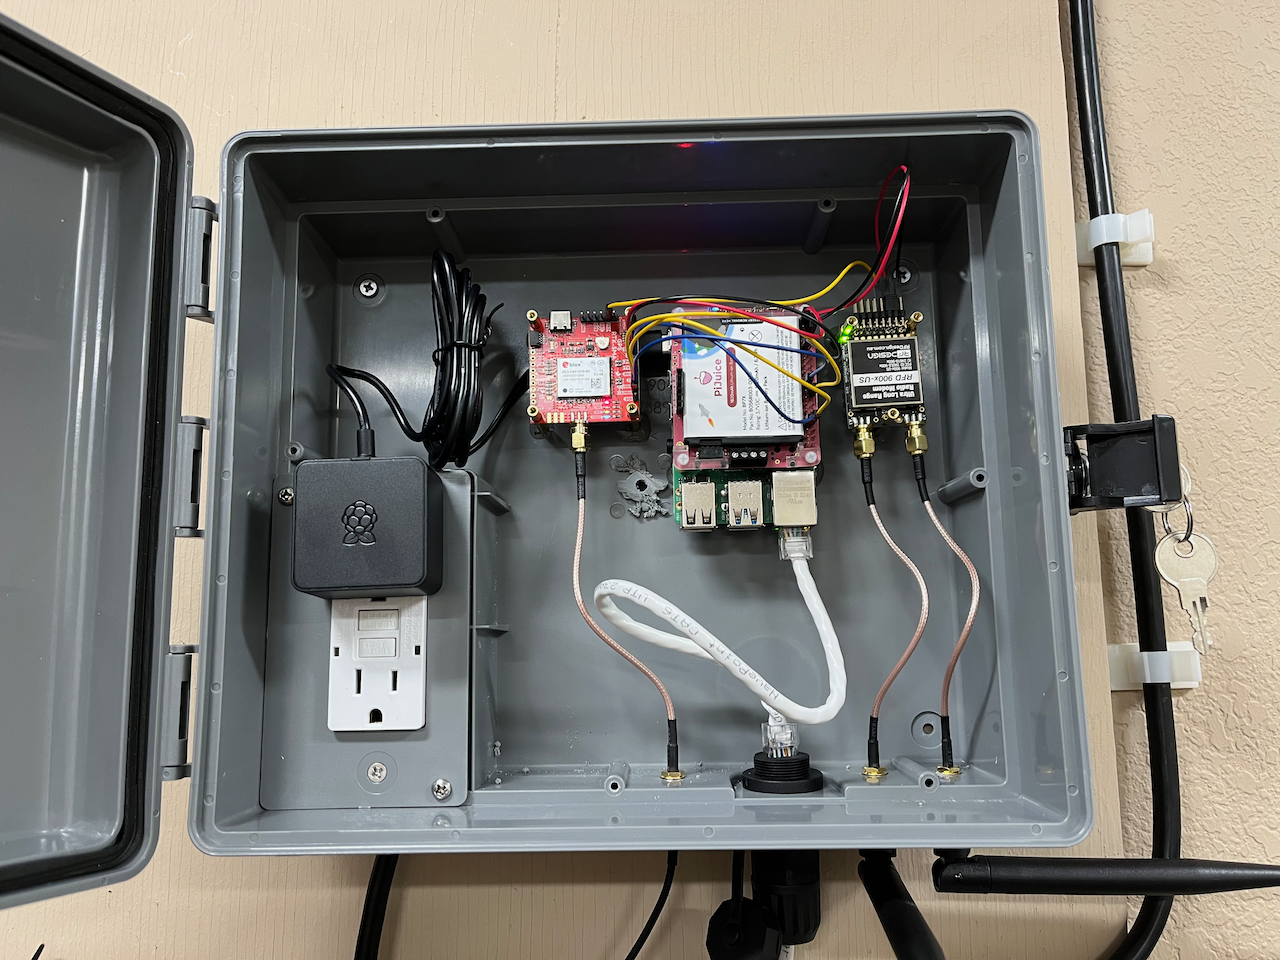
This project is intented to provide a design for creating a GNSS Reference Station using affordable and accessible hardware while maintaining high standards for functionality and reliability. The equipment used for this project is as follows:
- Raspberry Pi 4B
- SparkFun GPS-RTK-SMA (u-blox ZED-F9P)
- RFD900x-US Telemetry Modem
- PiJuice HAT
- GNSS Multi-Band L1/L2 Antenna TOP106
Please note that other hardware/accessories are required for this project:
- Soldering Iron example
- Break Away Headers example
- Jumper Wires F/F example
- SMA Male to TNC Male example
- SMA Male to SMA Female example
- Outdoor Junction Box example
- MicroSD Card example
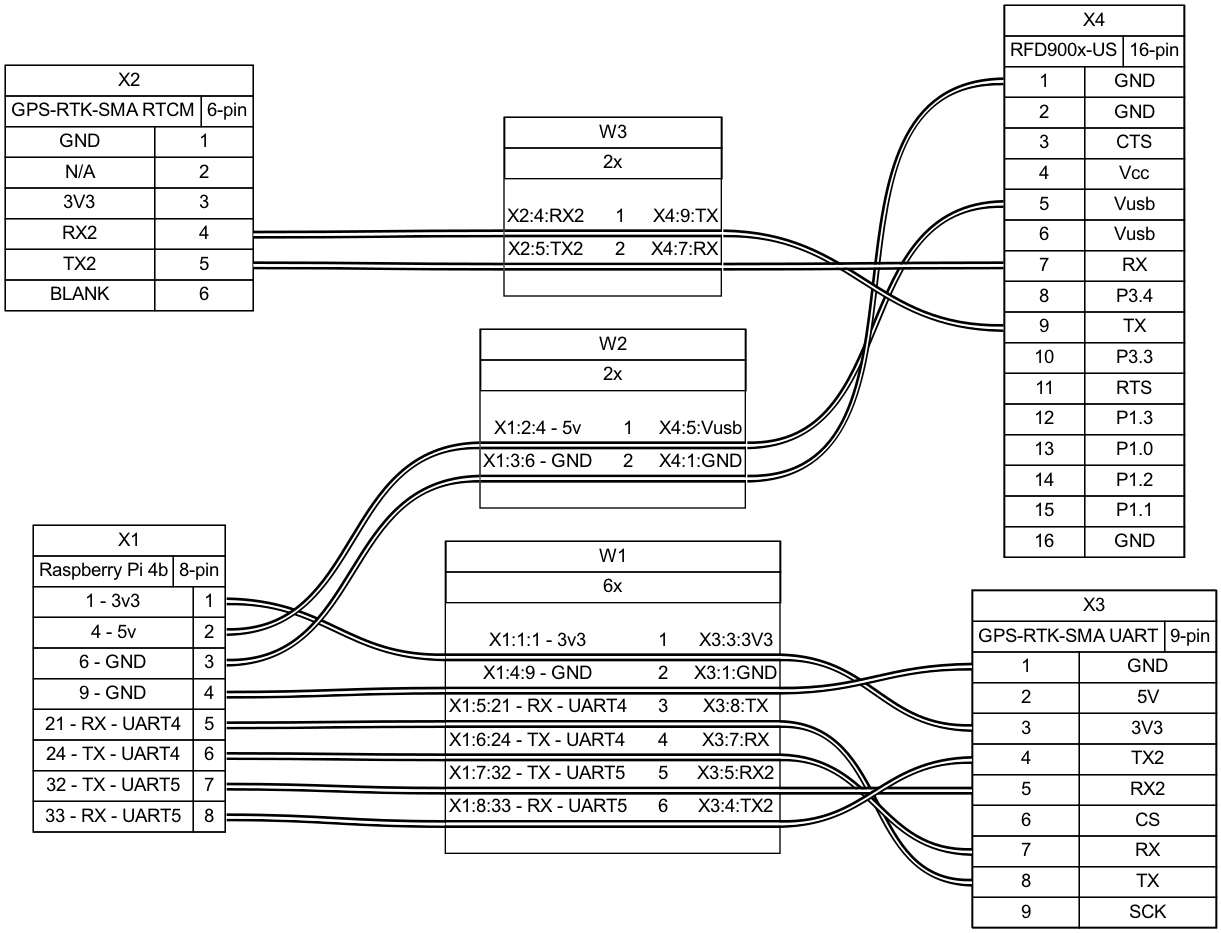
RTCM-Pi is connected as follows:

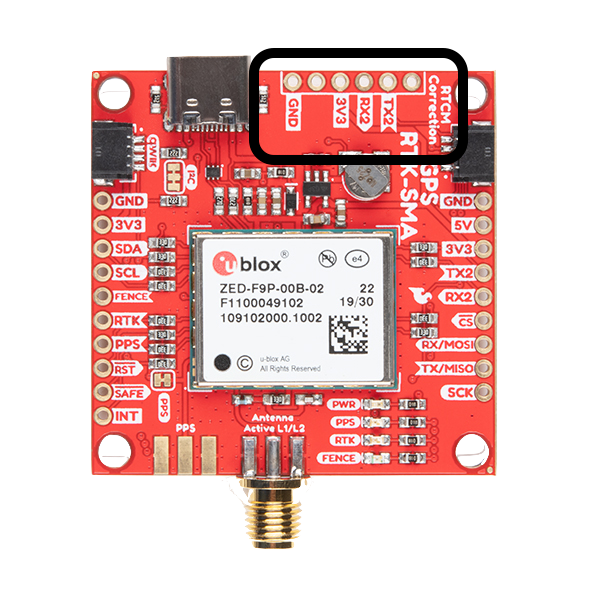
Where GPS-RTK-SMA RTCM refers to the RTCM Correction headers

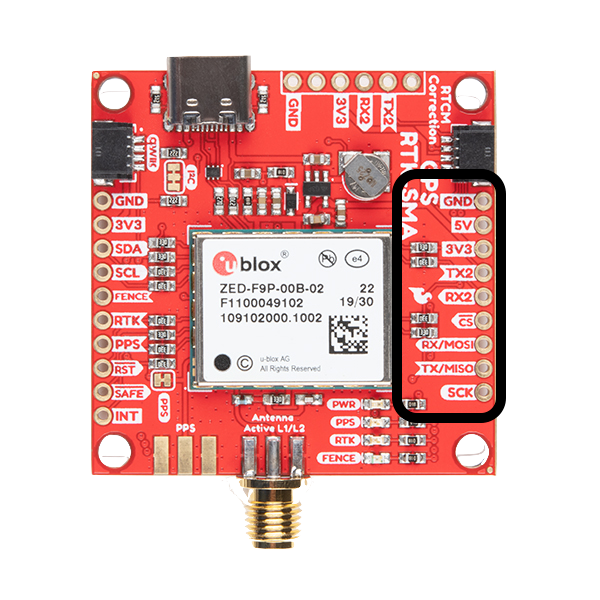
And where GPS-RTK-SMA UART refers to the standard UART headers on the right side of the board

You will need a Windows computer running U-Center Getting Started Tutorial.
Download the latest ZED-F9P firmware file from either the u-Blox website or this GitHub repo.
Update the F9P to the latest firmware following this tutorial.
Open a Configuration View Window and navigate to the MSG tab
- Set RXM-RAWX messages to transmit via UART1 every 1 second. (Be sure to send the configuration message after each setting that you change)
- RXM-SFRBX to UART1, 1
- RTCM3.3 1005 UART2, 1
- RTCM3.3 1074 UART2, 1
- RTCM3.3 1084 UART2, 1
- RTCM3.3 1094 UART2, 1
- RTCM3.3 1124 UART2, 1
- RTCM3.3 1230 UART2, 5
Go to the PRT tab in the Configuration View Window
- UART1
- Protocol in: none
- Protocol out: UBX + NMEA + RTCM3
- Baudrate 57600
- UART2
- Protocol in: RTCM3
- Protocol out: RTCM3
- Baudrate 57600
Go to the CFG tab in the Configuration View Window
- Save current configuration to ALL
Install Ubuntu Server 22.04 64bit onto the MicroSD card via Raspberry Pi Imager
Edit config.text and add the following lines after ‘enable_uart=1’: dtoverlay=uart4 dtoverlay=uart5
NOTE: This will allow you to use:
- ttyAMA2 to read RTCM data
- ttyAMA1 to read RAWX data
Insert the MicroSD card into the Pi and power it on
SSH into device and change the password. (Temporary username and password are 'ubuntu') SSH into it again
Update hostname via:
hostnamectl set-hostname [desired_hostname]
verify the name change was effective with hostnamectl
Reboot via:
sudo reboot now
SSH in again
sudo apt update
sudo apt upgrade
git clone https://github.com/ALA-Engineering/RTKLIB.git
sudo apt install build-essential -y
cd RTKLIB/app/consapp/str2str/gcc/ && make && cd
cd RTKLIB/app/consapp/convbin/gcc/ && make && cd
sudo apt install python3-pip -y
pip3 install selenium
sudo apt install firefox
wget https://github.com/mozilla/geckodriver/releases/download/v0.31.0/geckodriver-v0.31.0-linux64.tar.gz
tar -xvzf geckodriver*
chmod +x geckodriver
sudo mv geckodriver /usr/local/bin/
rm geckodriver-v*
sudo apt install xvfb -y
pip3 install pyvirtualdisplay
Run an initial 24 hour survey using the following command:
timeout 24h ./RTKLIB/app/consapp/str2str/gcc/str2str -in serial://ttyAMA1:57600:8:n:1:off -out [desired_filename].ubx
After the survey completes, convert it to .obs file using:
./RTKLIB/app/consapp/convbin/gcc/convbin -od -os -oi -ot -ti 30 [desired_filename].ubx
Wait at least half an hour, but 2 weeks works best. (You can always finish setup with a 30 minute wait and update later with another PPP solution)
Process .obs file with PPP solution of your choice. Below are two headless automations using Selenium that can automatically upload to the PPP provider. Please note that you will need to edit the .py file to include your information like email and password.
Using U-Center, open a Configuration View Window.
Navigate to the TMODE3 tab. Set Mode to '2 - Fixed Mode' Enter the ECEF coordinates you recieved from your chosen PPP provider and send the configuration message
Go to the CFG tab in the Configuration View Window
- Save current configuration to ALL
add the following to crontab using crontab -e:
@reboot ./RTKLIB/app/consapp/str2str/gcc/str2str -in serial://ttyAMA2:57600:8:n:1:off -out ntrips://:[base_station_password]@[ntrip_caster_ip]:[ntrip_caster_port]/[base_station_name]
Now your Raspberry Pi will automatically begin sending RTCM data to your NTRIP Caster upon bootup.
For a ROS2 Rover implementation using a ZED-F9R, check out this GitHub Repo
