 |
 |
|---|---|
 |
 |
 |
 |
cd ~/catkin_ws/src

git clone https://github.com/jerinpeter/4wdNavbot.git

cd ..

catkin_make

rosdep install --from-paths src --ignore-src -r -y
If catkin_make shows error, install the missing dependenices using the rosdep command.
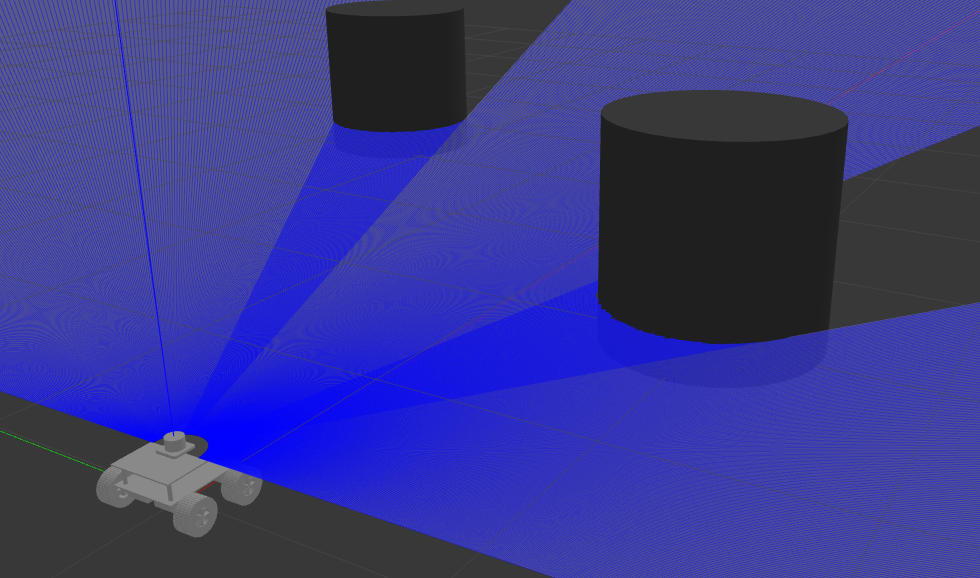
The Robot was modelled in Fusion360 and converted to URDF using fusion2urdf. Gazebo Pluggins for differential drive,Odometry and LaserScan were added to the urdf and tested in a custom made simulation environment/world in Gazebo.
Open a new terminal window and split it accordingly if using terminator,run the following commands
roslaunch navbot_description gazebo.launch

roslaunch gmapping mapping.launch

rosrun teleop_twist_keyboard teleop_twist_keyboard.py

rviz

rosrun map_server map_saver -f newmap
The map is already saved in /navbot_description/maps directory if using the preset map.
roslaunch navbot_description gazebo.launch

roslaunch navbot_navigation move_base.launch

rviz
- After opening Rviz open the configuration file from the Rviz folder.
- Type rqt in terminal and open dynamic reconfigure pluggin, load the final_reconf_param_sim.yaml from the reconf_params folder and you are all set to give navigation goals.
- Starting from the low-level control the Robot uses an Arduino Mega takes cmd_vel from the Jetson Nano via ros-serial via USB. The Arduino is also responsible for reading the encoder values and publishing it back to the Jetson Nano.
/cmd_vel
/right_ticks
/left_ticks
- I have used RMCS-2303 Motor drivers for controlling the Dc motors with encoders. The motor driver has inbuilt PID control implemented with the help of an STM32 MicroController.
- The Motor driver is connected to Arduino via UART (Tx,RX).4 such motor drivers where used to control the 4 motors and each motors where addresed using a unique slave-id set via jumper pins.
- The main advantage of using this motors were that only 3 wires (Tx,Rx,Gnd) was required to control all the 4 motors,vary its speed and read the encoder values.

-
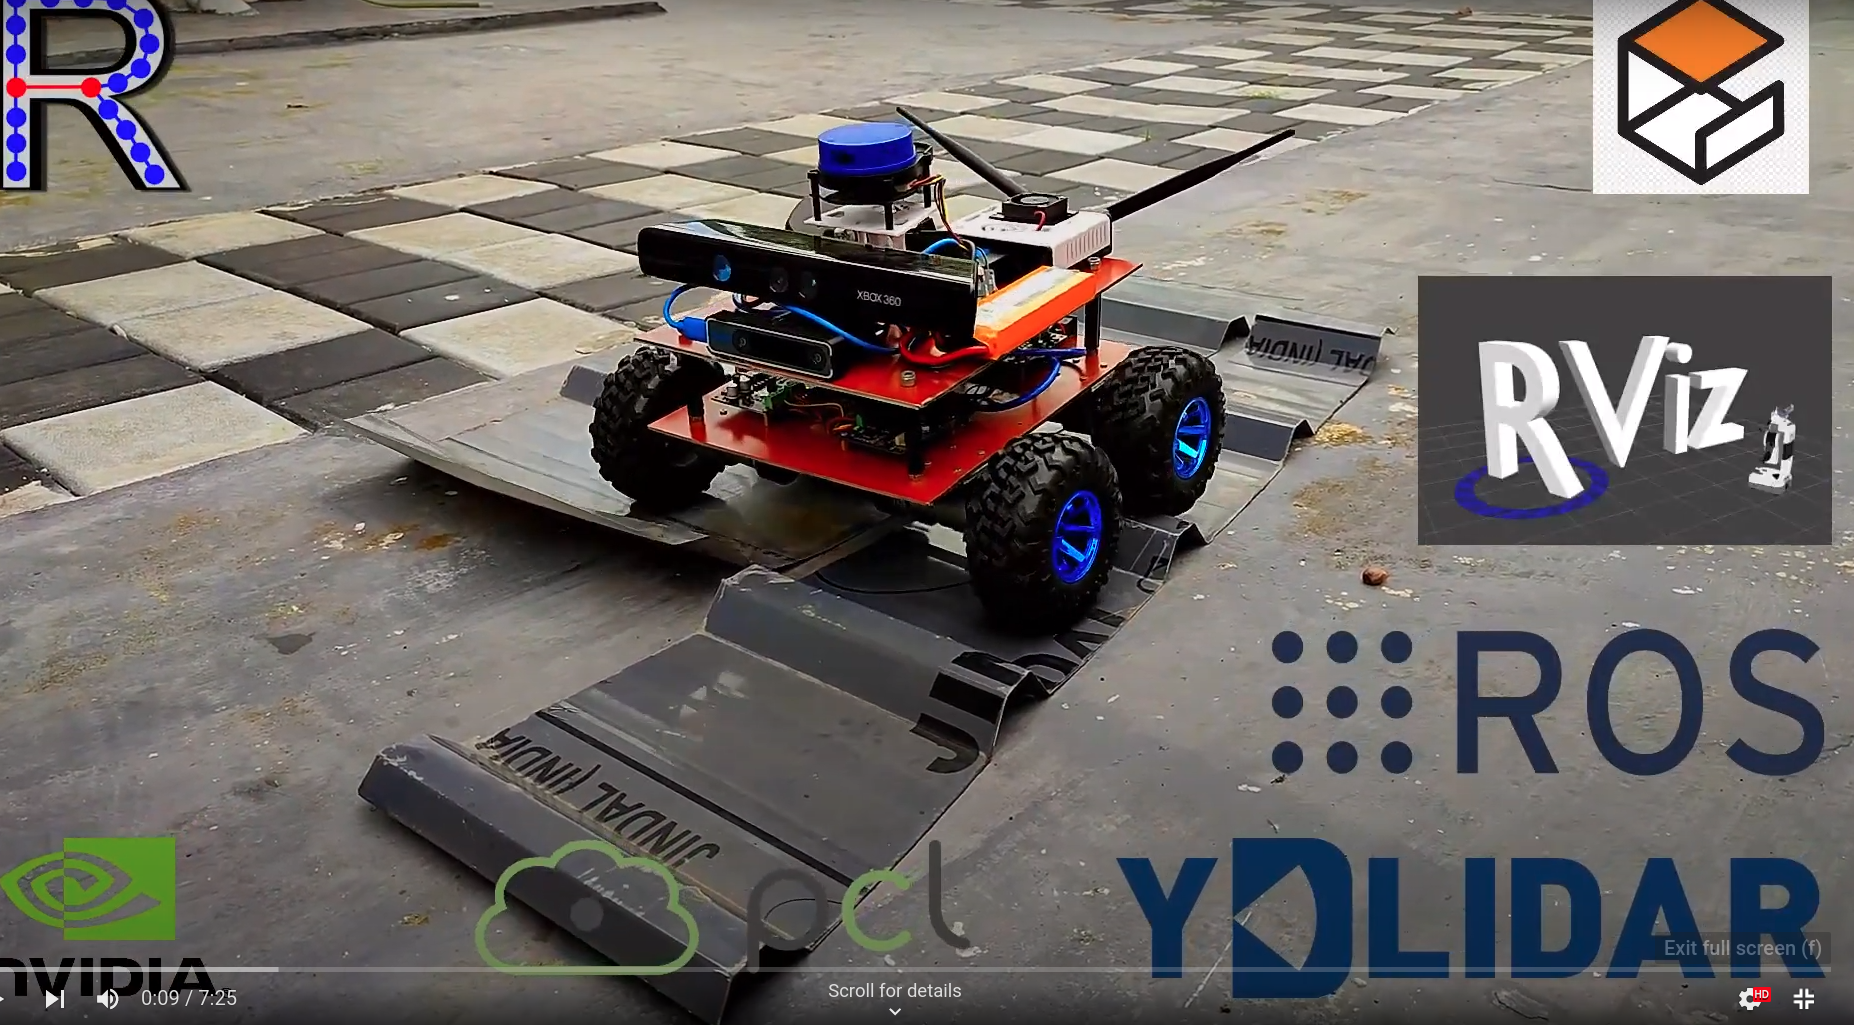
The High level control is Nvidia Jetson Nano which runs on Jetpack based on ubuntu 18.04 with ROS Melodic installed.
-
The Lidar is also connected to the Jetson Nano via Usb and the whole system is powered using 5v from a buck converter that steps down 12.6v from the Li-Ion Battery pack to 5V 4 amps max to power the Jetson Nano.
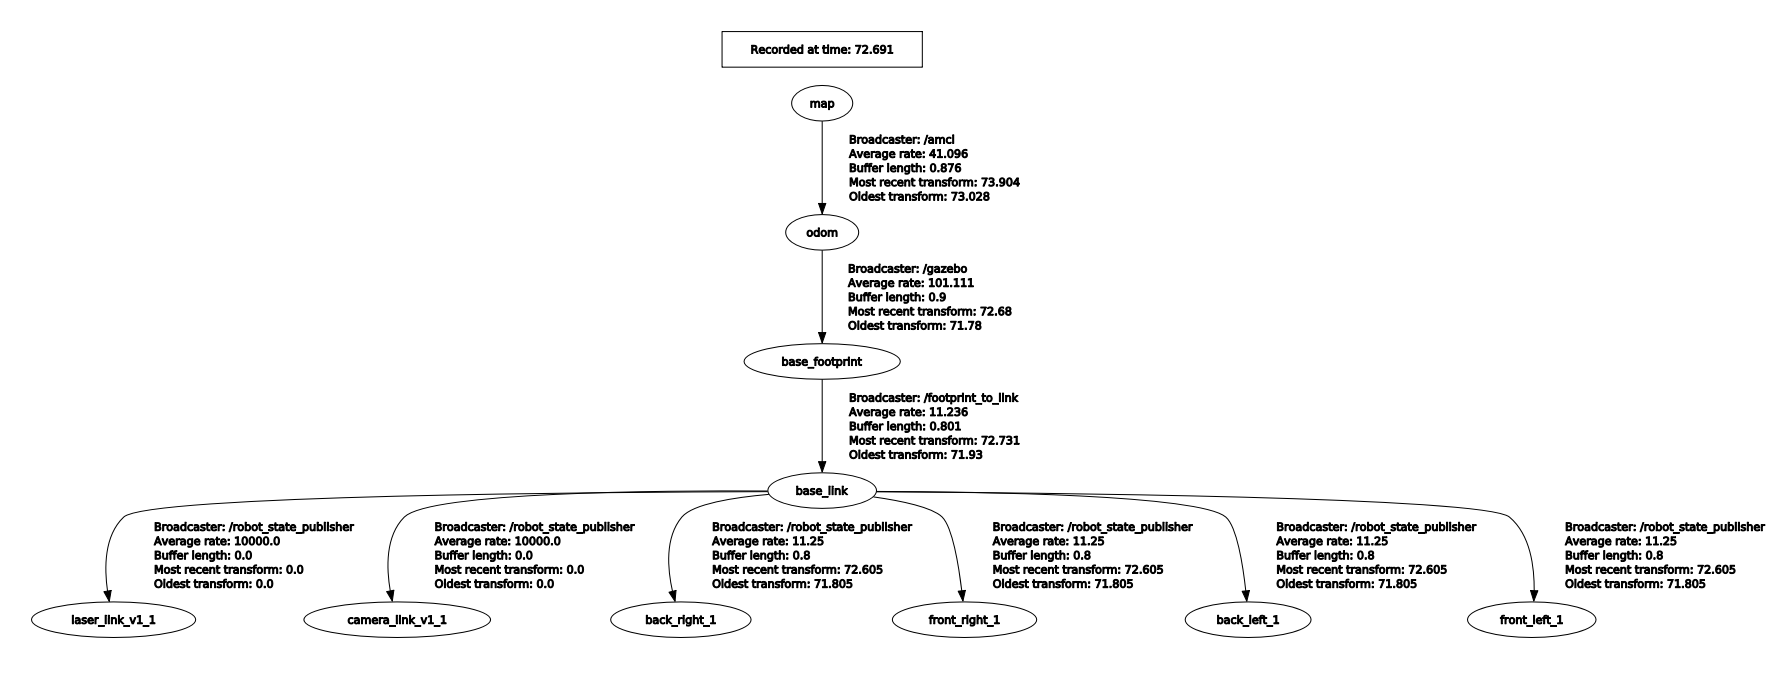
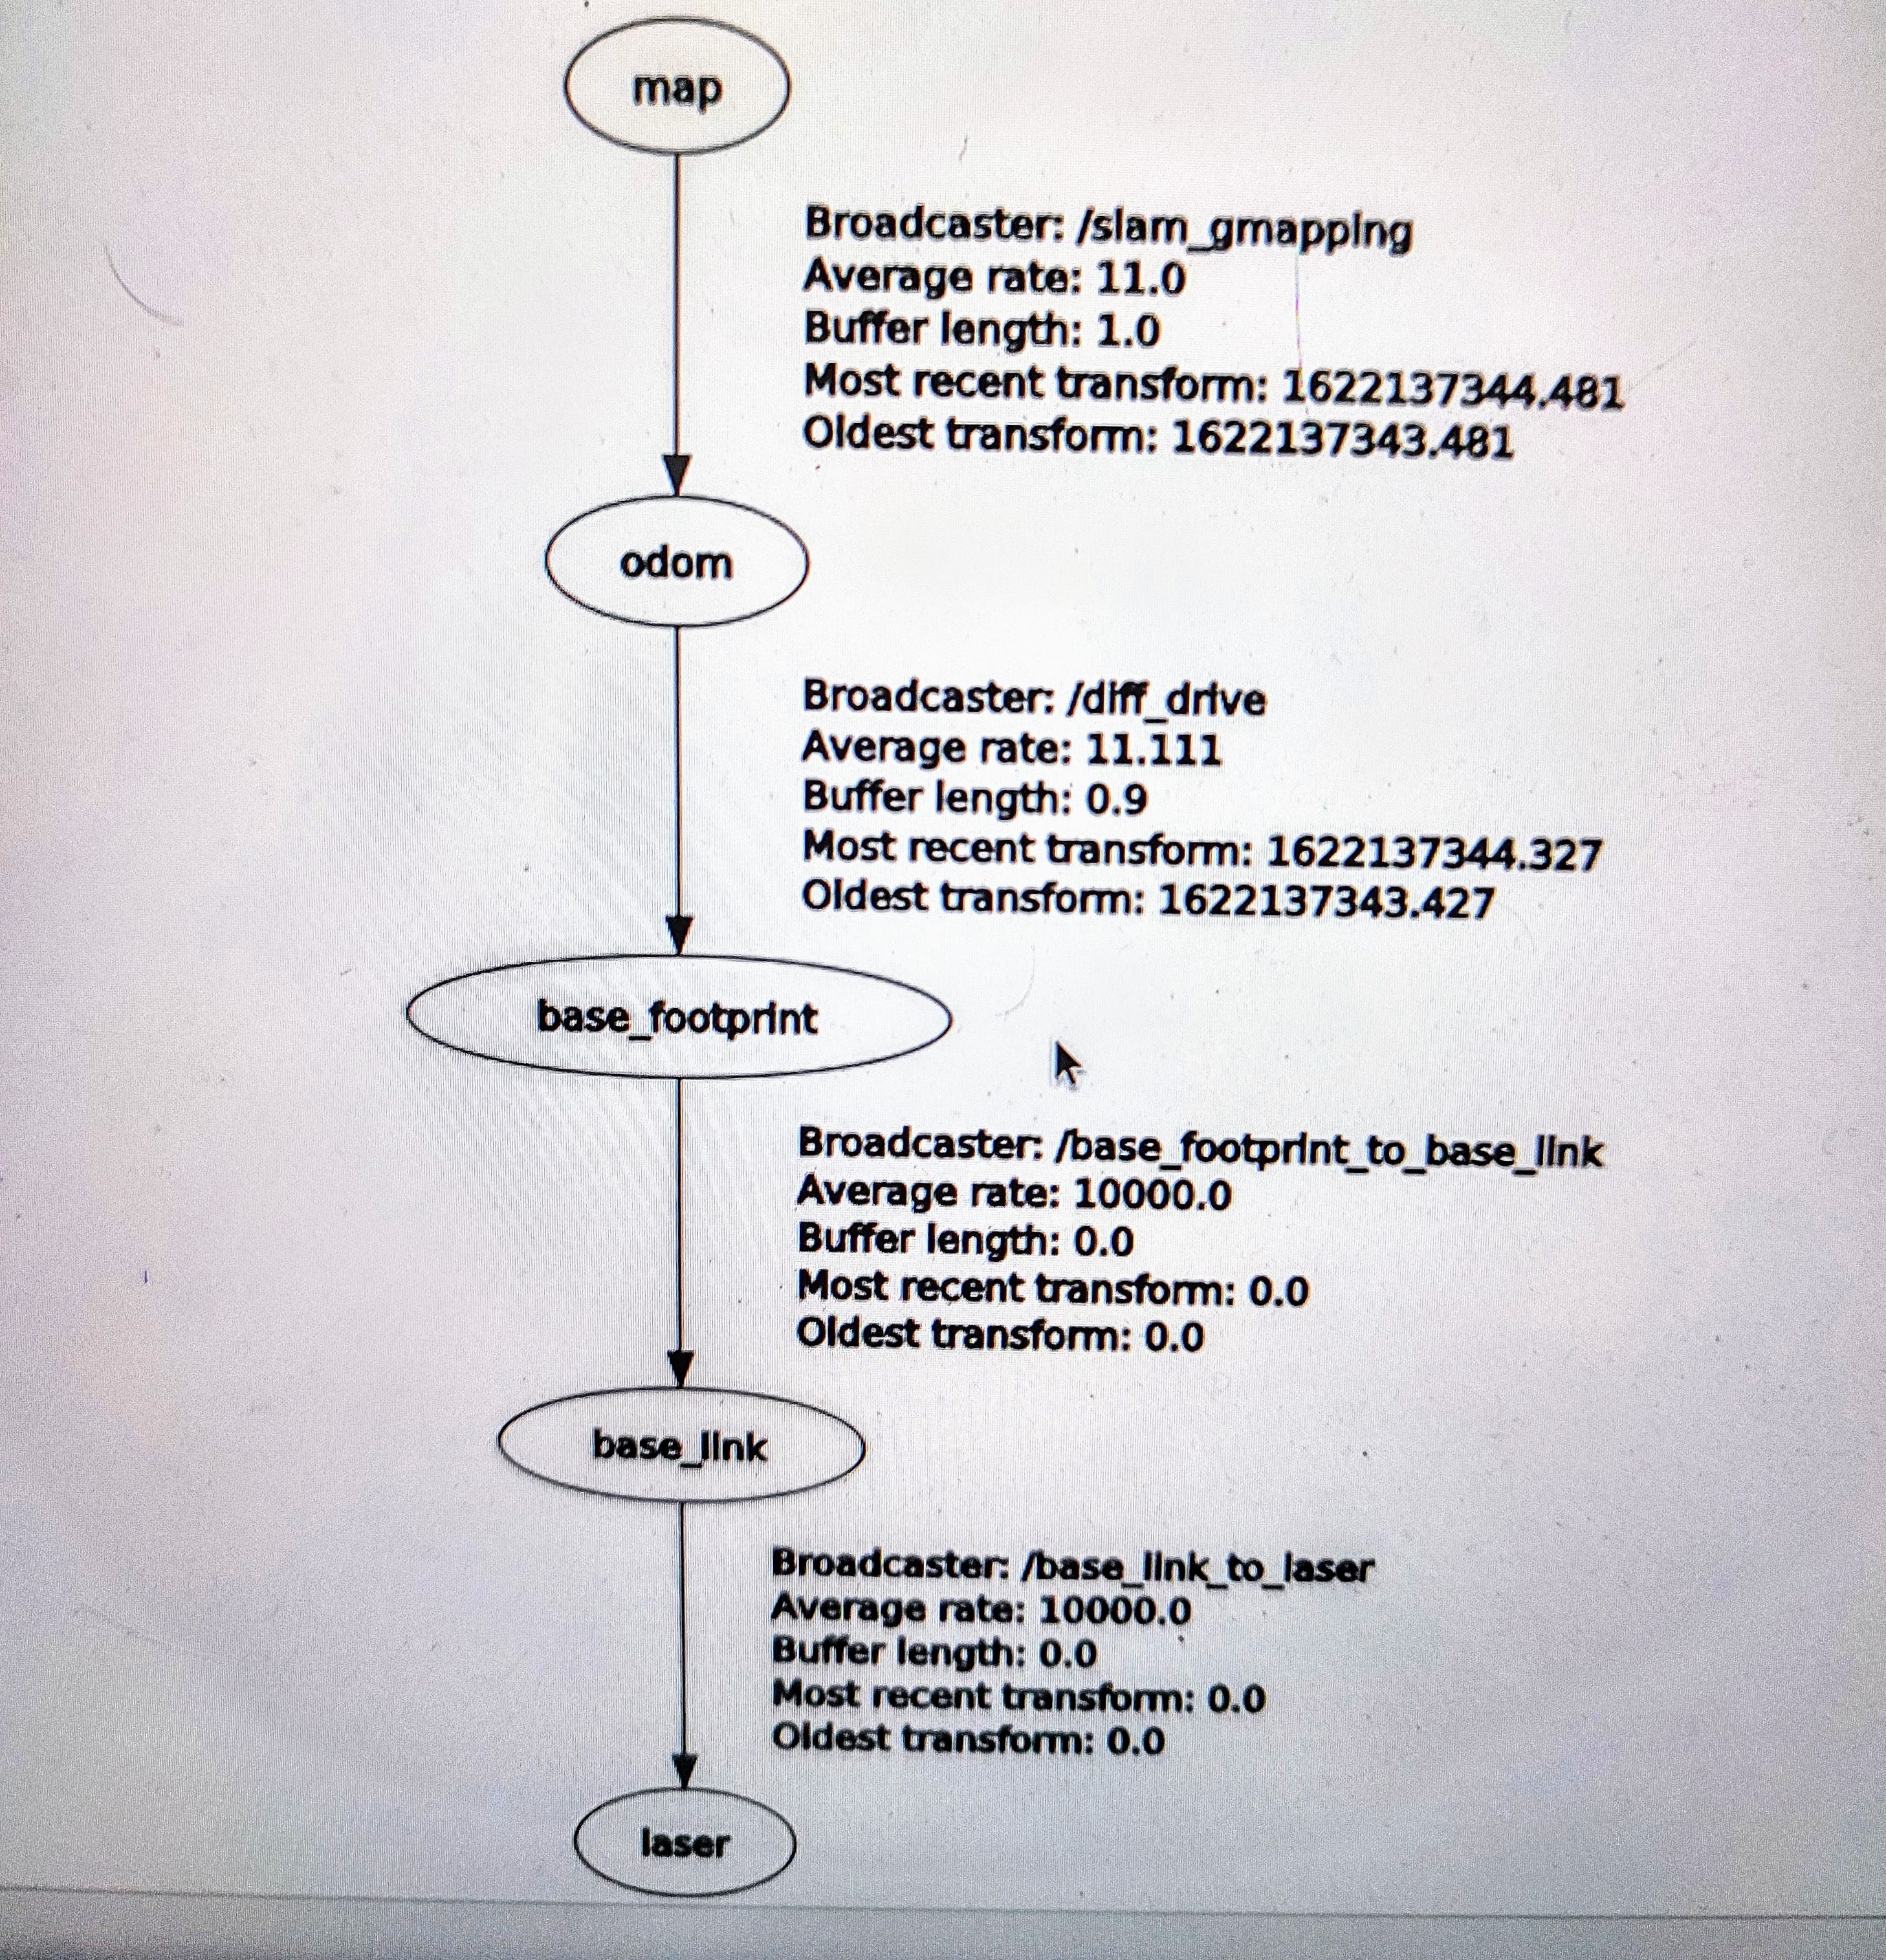
- The arduino publishes the encoder ticks into the Jetson Nano via ros-serial which are subscribed by the differential_drive package and publishes /odom as well as Tf (odom -> base_footprint).
The YdLidar package is responsible for publishing the LaserScan as /scan data along with Tf (base_link -> laser)
-
With the Robot Model
-
Without Robot Model


- Before setting up and running the robot,Jetson Nano and host machine should be set up following this tutorial -> ROS Network setup
roscore

rosrun rosserial_python serial_node.py /dev/ttyACM0

roslaunch ydlidar_ros yd_lidar.launch

roslaunch differential_drive tf_controller.launch

roslaunch navbot_navigation move_base.launch

rviz
-
After running Rviz open the Navbot.rviz configuration from the Rviz folder.
-
Open DynamicReconfigure from rqt gui and load final_reconf_params_real.yaml
-
Give the goal location in Rviz and we are good to go!
| Component | Image |
|---|---|
| Nvidia Jetson Nano |  |
| YD-Lidar X4 |  |
| Arduino Mega |  |
| RMCS 2303 Motor Drivers |  |
| 100 RPM High Precision Encoder Motors |  |
| 10,000Mah, 2C Li-Ion Battery |  |
| DC-DC Step Down Converter |  |
| 125mm AGV Wheels |  |
- Modularize all the nodes into launch files for ease of use.
- Addition of the dynamic reconfigure parameters into the navigation param files.
- Using IMU and EKF for better Localization and pose estimate.
- Adding Kinect / realsense for 3D mapping,Vision applications etc.
- Addition of return to base station for charging feature.
- The photos and videos that I took during the build, will make a final video soon!
- Added Support for using Odom from Intel RealSense T265 Tracking Camera
- Added the required TF Launch files for the same
- To use Odometry from T265 run these extra commands
roslaunch navbot_navigation tf.launch
- Updated parameters can be found in the params folder
To install the same use
sudo apt-get install ros-noetic-teb-local-planner
Kinect Drivers + ROS Package installation
- After installtion the following command will open up the depth stream / PointCloud in Rviz
roslaunch freenect_launch freenect.launch depth_registration:=true
Contributions are most welcome ;-)