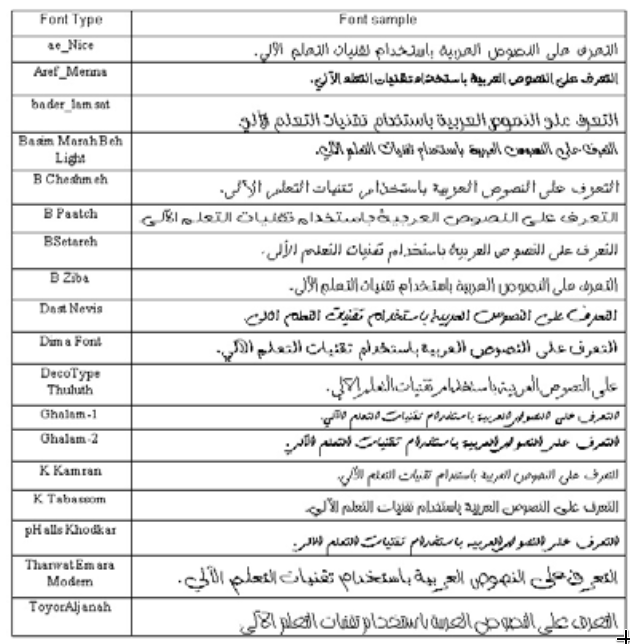
This work can be used to train Deep Learning OCR models to recognize words in any language including Arabic. The model operates in an end to end manner with high accuracy without the need to segment words. The model can be trained to recognized words in different languages, fonts, font shapes and word length, it was tested on (18) different font types and the accuracy was high.
The details of this model are presented in: https://arxiv.org/abs/2009.01987
The code to generate the dataset (Arabic word images and labels) can be found at:
https://github.com/msfasha/TextImagesToolkit
Using this toolkit, Arabic words can be generated using different fonts, sizes, word length, augmentation and many other features.
Samples of the datasets that were used to train and test the model can be found at:
https://drive.google.com/drive/folders/1mRefmN4Yzy60Uh7z3B6cllyyOXaxQrgg?usp=sharing
A utility program to unpack binary image files and extract them into png Arabic word image files can be accessed at:
The code in this model was based on the work of:
https://github.com/githubharald/SimpleHTR.
Open this notebook in Google Colab Notebook.
Select and download a sample dataset from: https://drive.google.com/drive/folders/1mRefmN4Yzy60Uh7z3B6cllyyOXaxQrgg?usp=sharing
A suitable dataset for initial training is the (1_nice_60000_rows) dataset as it has a moderate size.
Download the two files of that dataset from the dataset repository:
1_nice_60000_rows.bin
and
1_nice_60000_rows.txt
Upload the two files into you Colab account, and place them in the /content/ folder. You can place the dataset files at any folder of your preference but make sure to change the path settings in the begining of the notebook
Run the cells one by one, or run them all in sequence.
Change runtime to GPU or TPU for better performance.
The settings of the run session can be adjusted in the Config section of the notebook.
-
Clone/fork the repository to your local host.
-
Create python virtual environment in the repository directory.
sudo apt-get install python3-venv
python3 -m venv env
-
Activate python virtual environment.
source ./env/activate
Update pip
pip install --upgrade pip
-
install the required python libraries (this script uses TensorFlow version 1.x).
pip install -r requirements.txt
-
Download sample dataset from: https://drive.google.com/drive/folders/1mRefmN4Yzy60Uh7z3B6cllyyOXaxQrgg?usp=sharing
A suitable dataset for initial training is the (1_nice_60000_rows) dataset.
Download the two files of that dataset are:
1_nice_60000_rows.bin https://drive.google.com/file/d/1K2EzzIwI5A0rJ0X0yQGj4p_bpo1hs0Sm/view?usp=sharing
and
1_nice_60000_rows.txt https://drive.google.com/file/d/1uLf5ijOcupi-JuYZWYj7s6Jb-d2u2i4B/view?usp=sharing
-
Save dataset files in the dataset folder of the project (the location of the data files can be changed in Config.py).
-
Configurations of the run session can be adjusted in the Config.py, this includes folders names, the dataset files, the session type e.g. Train, Test, Infer and many other settings.
-
Initial setting of the configuration is:
-
BASE_FILENAME = "1_nice_60000_rows"
-
OPERATION_TYPE = OperationType.Training
-
REGENERATE_CHARLIST_AND_CORPUS = True
-
TRAINING_SAMPLES_PER_EPOCH = 5000
-
BATCH_SIZE = 100
-
IMAGE_WIDTH = 128
-
IMAGE_HEIGHT = 32
-
MAX_TEXT_LENGTH = 32
-
In the terminal window, goto src folder and run python Main.py.
-
The code will generate training, validation and testing dataset from (1_nice_60000_rows) dataset, and the training session will start.
Different datasets can be generated using https://github.com/msfasha/TextImagesToolkit
##Recognizing single images After training the model, you can set the OPERATION_TYPE = OperationType.Infer and define the path to the Arabic word images to be recognized:
Sample image 0.png
Sample image 1.png


