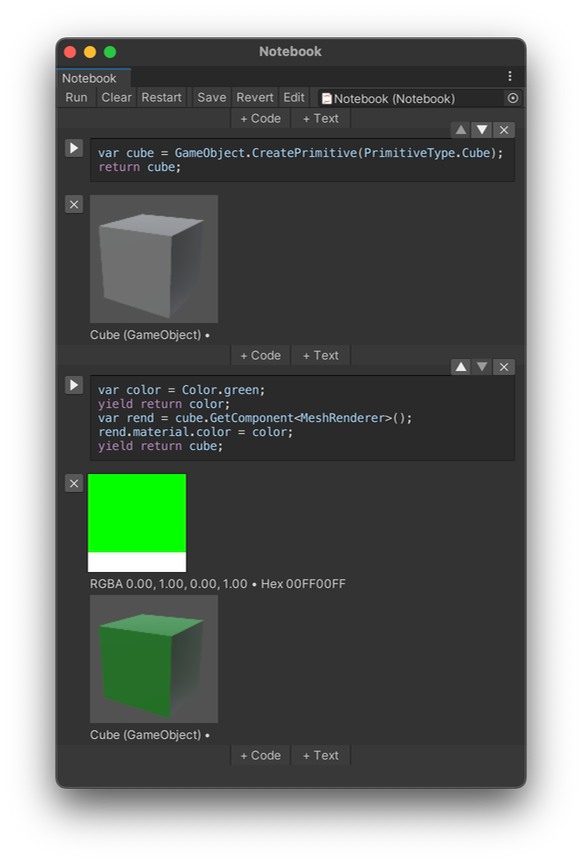
Welcome to Unity Notebook! This project brings the interactive coding experience of Jupyter Notebook to Unity, allowing you to use C# to create interactive projects within the Unity editor.
To add the Unity Notebook package to an existing Unity project:
- In the Unity Editor, select the menu
Window > Package Manager - Click the
+button in the top left corner and selectAdd package from git URL... - Enter
https://github.com/mstevenson/UnityNotebook.gitand click the Add button.
Once installed, create a new Notebook file:
- Select the menu
Window > Notebookto open the tool. - Click the
Create Notebookbutton and specify a path inside of your Assets folder. - A Notebook file will be created in Jupyter's standard
ipynbformat and stored as a Unity asset.
To open an existing notebook, there are three options:
- Click the
Open Notebookbutton and select a Notebook file. - Click the
Notebookspopup menu, then choose from a list of discovered Notebooks within the current project. - Double-click on a Notebook asset in the Unity Project view.
Unity Notebook is designed to function very similarly to the original Jupyter Notebook, with a few key differences to account for the integration with the Unity Editor. It adopts most of Jupyter's conventions such as storing blocks code in cells that can be rearranged and executed in any order while retaining local variable state, and adding in-line documentation in markdown-formatted cells. It also replicates Jupyter's keyboard shortcuts where applicable, such as Shift + Enter to run a cell and move to the next one.
If you are unfamiliar with Jupyter Notebook it is recommended to peruse its documentation: https://jupyter-notebook.readthedocs.io/en/latest/
C# code blocks offer some notable features:
- Code blocks have full access to the
UnityEngineandUnityEditornamespaces. - Cell outputs can display primitive types such as
floatandstring, as well as many Unity types, such asGameObject,Material, andColor.- The
returnstatement will display the resulting value in the cell's output. - The
yieldstatement will turn the block into a coroutine and display each yielded value separately. - A special static method
Show(object value)will immediately display a given value.
- The
- Code blocks can be executed either during edit mode or play mode. Note that play mode scene changes will not persist, and Notebooks can not be executed in builds.
- All local variable state will be preserved across runs, except for coroutine blocks that include one or more
yieldstatements.
Unity Notebook offers a simple toolbar for managing the storage and execution of Notebooks:
Run– executes all code cells sequentially.Clear– removes all displayed output from all cells.Restart– clears all stored local variable state that was generated during previous code cell executions.Save– saves in-Editor Notebook asset changes back to the Notebook'sipynbfile. Note that changes to the Unity asset will be automatically saved to the Asset Database during editing, butSavemust be explicitely invoked to modify the original asset file on disk.Revert– restore the in-Editor Notebook's state from theipynbasset file on disk.Edit– open the Notebook'sipynbfile in an external program, such as Visual Studio Code.
Each individual cell includes the following buttons:
▶– execute this cell.■– interrupt this cell if it's running as a coroutine.✕(next to output) – clear the cell's output.▲– move cell up.▼– move cell down.✕(top right of cell) – delete the cell.
- To view and edit C# Notebooks in Visual Studio Code, install Microsoft's Polyglot Notebooks extension
- For more information on using Jupyter Notebook, see the Jupyter documentation
- To learn about Microsoft's Roslyn and its interactive execution engine, see the .Net Interactive Documentation
