This example demonstrates combining ISSDK and FreeMASTER to create NMH1000 magnetic switch evaluation GUI for our customer to evaluate this sensor using sensor development tools with sensor expansion boards.
-
NXP's next-generation sensors feature a strong balance of intelligent integration, logic and customizable platform software to enable smarter, more differentiated applications.
-
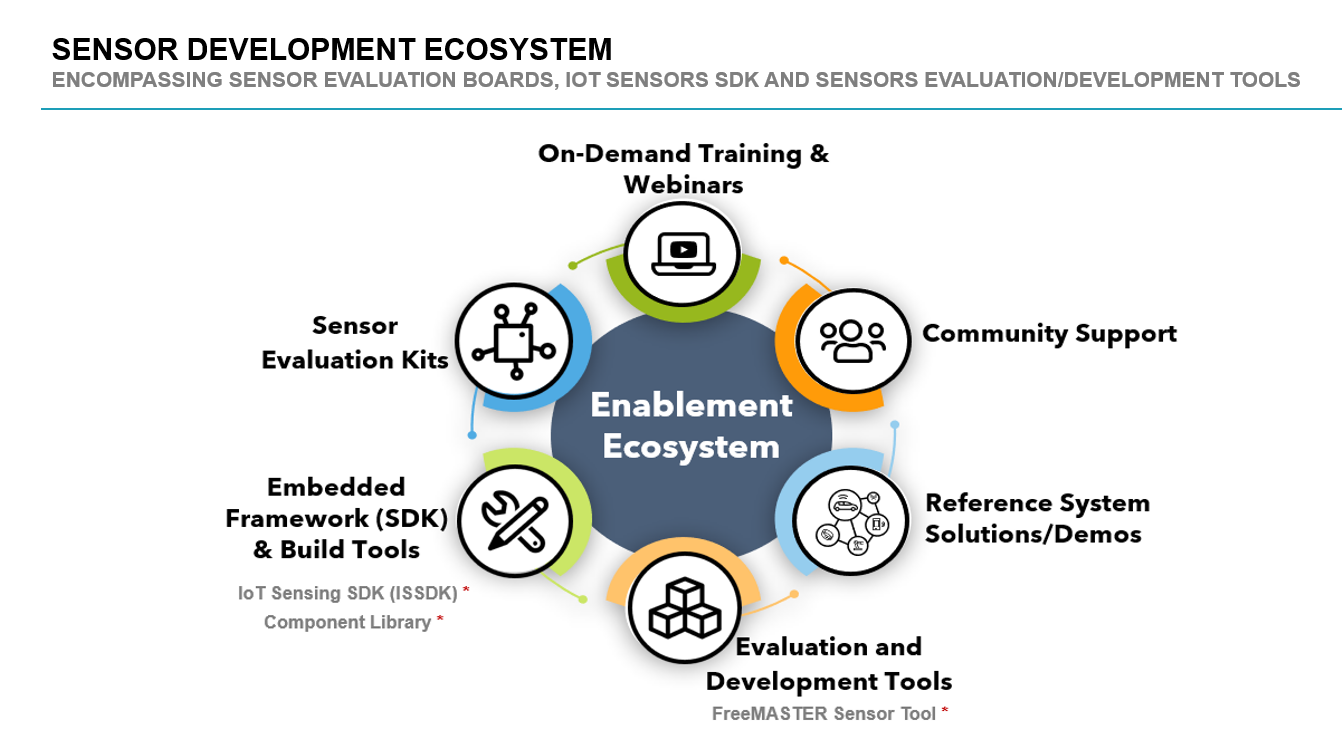
Easy enablement is of utmost importance to reduce evaluation, development & time to market. NXP's Sensor development ecosystem is making it easier for customers to accelerate their sensor product development.
-
The image below shows Sensors Development Ecosystem Offering:
-
NMH1000 is an ultra-low power monolithic Hall effect magnetic field sensor that provides a small footprint in low-current and low-operating-voltage, I2C mode or standalone mode. This magnetic switch sensor triggers an output when surrounding magnetic field is greater than the user-defined detection threshold.
-
Please refer to NMH1000 Magnetic Switch Sensor Datasheet for more information.
https://www.nxp.com/docs/en/data-sheet/NMH1000.pdf

- IoT Sensing SDK (ISSDK) v1.8 offered as middleware in MCUXpresso SDK for supported platforms
- MCXUpresso SDK 2.14.0 for FRDM-MCXN947
- MCUXPresso SDK 2.14.2 for FRDM-MCXA153
- MCUXpresso IDE v11.9.0 or later
- FreeMASTER v3.2.2 or later
- Git v2.39.0
- FRDM-MCXN947 MCU board
- FRDM-MCXA153 MCU board
- Hall Switch 3 click board (https://www.mikroe.com/hall-switch-3-click)
- Personal Computer
- Mini/micro C USB cable
- Download MCUXpresso IDE 2.19.0 or newer and Install following the installer instructions.
- Download MCXUpresso SDK 2.14.0 for FRDM-MCXN947. Make sure to select ISSDK and FreeMASTER middleware while building SDK.
- Install Git v2.39.0 (for cloning and running west commands)
- Download FreeMASTER v3.2.2 or newer and install following the installer instructions.
- Clone this repository to get the example projects:
- Change directory to cloned project folder:
cd dm-freemaster-nmh1000-evaluation-gui-firmware
- Open MCUXpresso IDE and select a directory to create your workspace.
- Install "MCXUpresso SDK 2.14.0 for FRDM-MCXN947" (drag and drop SDK zip into "Installed SDK" view) into MCUXpresso IDE.
- Install MCXUpresso SDK 2.14.2 for FRDM-MCXA153 (drag and drop SDK zip into "Installed SDK" view) into MCUXpresso IDE.
- Go to "Quickstart Panel" and click on "Import Project(s) from file system",
- Select "Project directory (unpacked)" and browse to the cloned project folder.
- Select example projects that you want to open and run.
- Right click on project and select build to start building the project.
- Connect the chosen example project HWs: FRDM-MCXN947 with Hall Switch 3 click board or FRDM-MCXA153 with Hall Switch 3 click board
- Right click on project and select "Debug As". Select MCUXpresso IDE LinkServer (inc. CMSIS DAP) probes.
- Connect a USB cable between the host PC and the MCU-Link USB port on the target board.
- Either press the reset button on your board or launch the debugger in your IDE to begin running the demo.
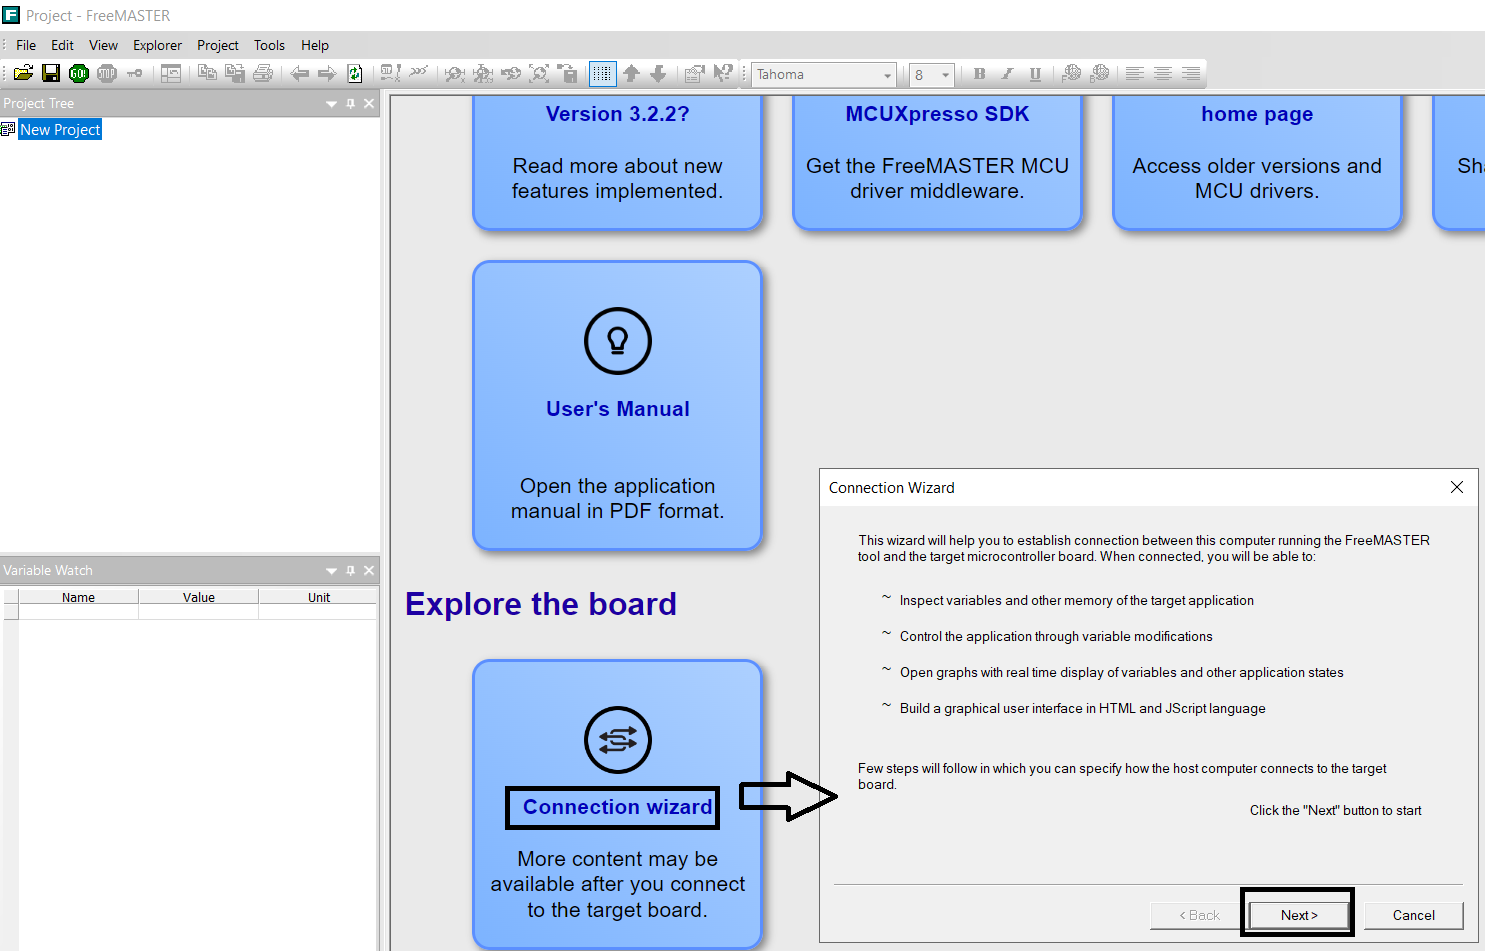
- Launch FreeMASTER application installed on your Windows PC.
- Click on "Connection Wizard" and select Next>.
- Select "Use direct connection to on board USB port" and click Next>.
- The FreeMASTER tool detects the COM port (Select the identified COM port on next screen) with the configured baud-rate automatically. Confirm the COM port and baud-rate, click "Next>".

- FreeMASTER detects the board connection and will ask to confirm the detected settings. Confirm by selecting "Yes" and click "Finish".
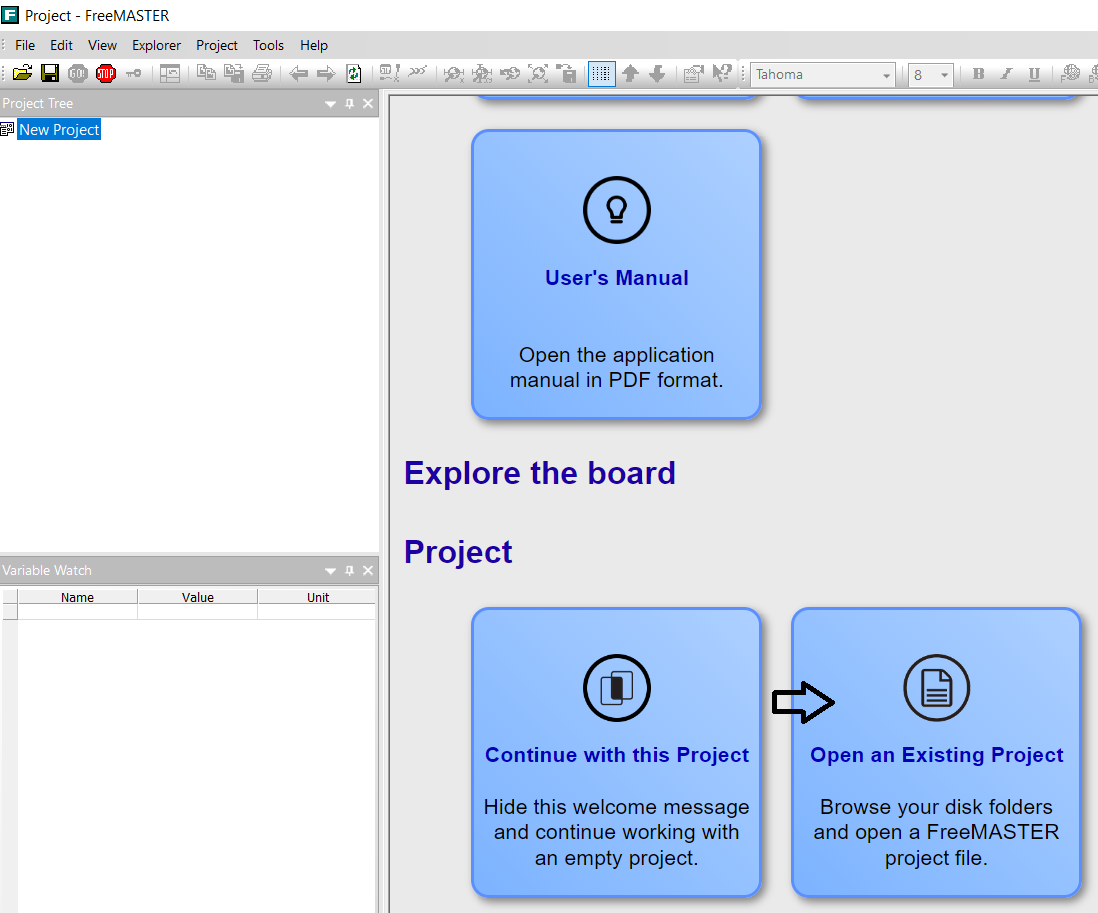
- FreeMASTER opens an option to "Open an Existing Project". Select the option.
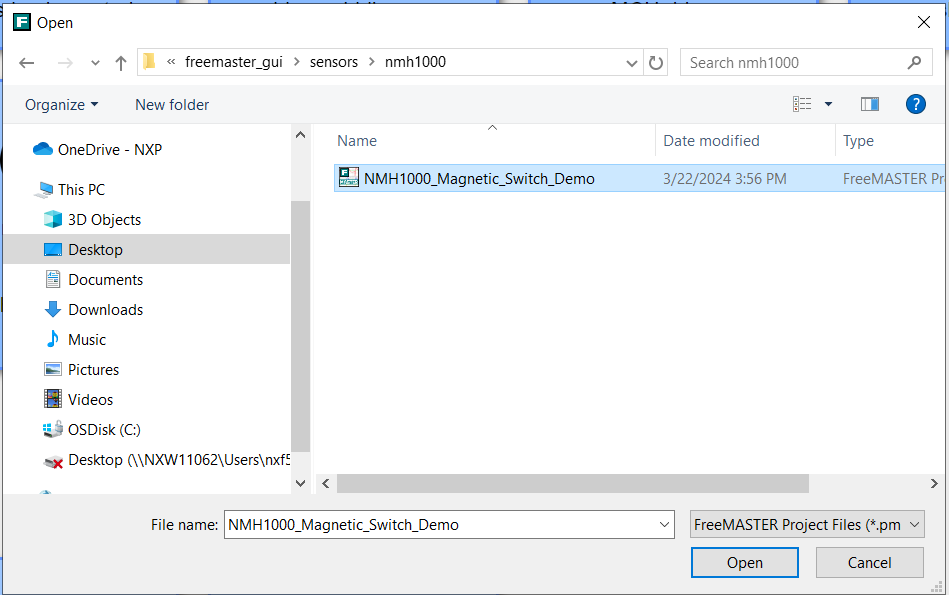
- Browse to "<dm-freemaster-nmh1000-evaluation-gui-firmware\nmh1000_evaluation_gui\freemaster_gui/sensors/nmh1000 folder
- Select "NMH1000_Magnetic_Switch_Demo.pmpx" sensor demo project. Click "Open".
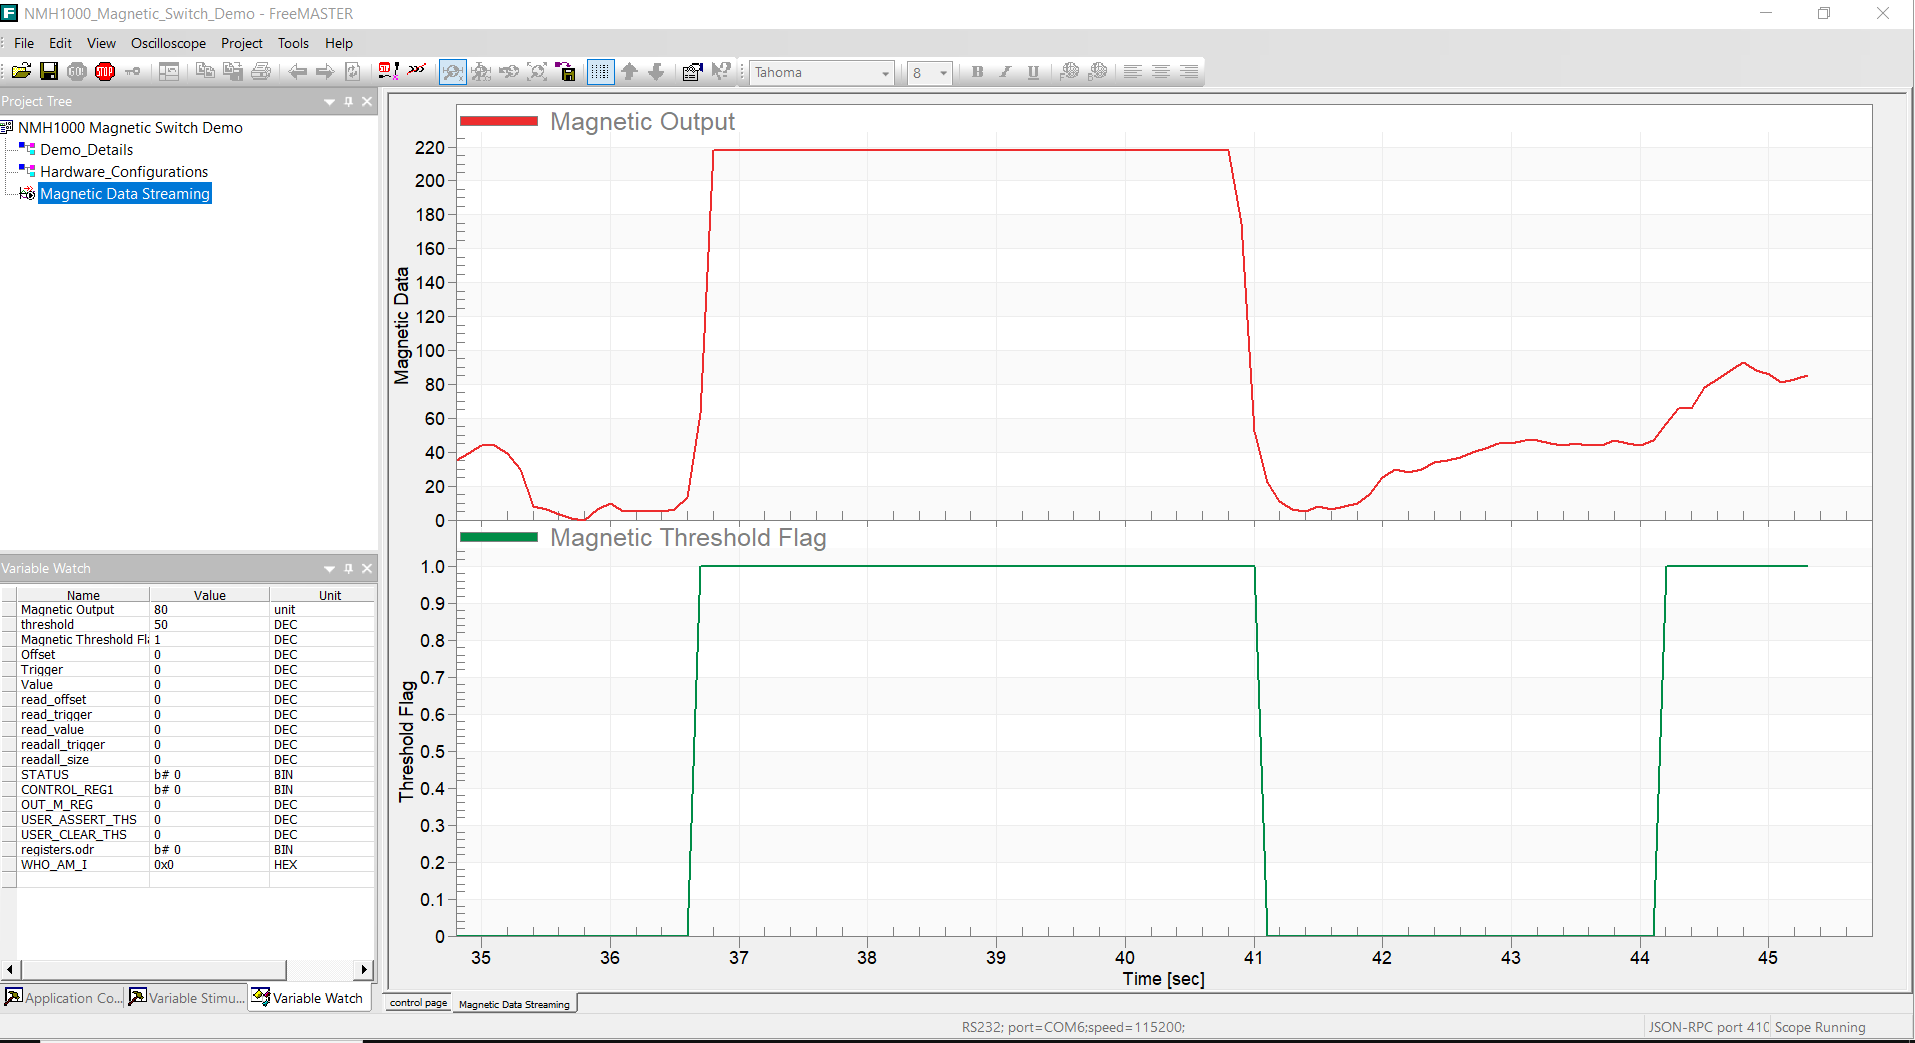
- FreeMASTER launches the NMH1000 sensor demo. Click on "Magnetic Data Streaming" to visualize the current magnetic strenght reading and magnetic event status. Apply a magnetic field greater than threshold value and check whether Mag event is raised.
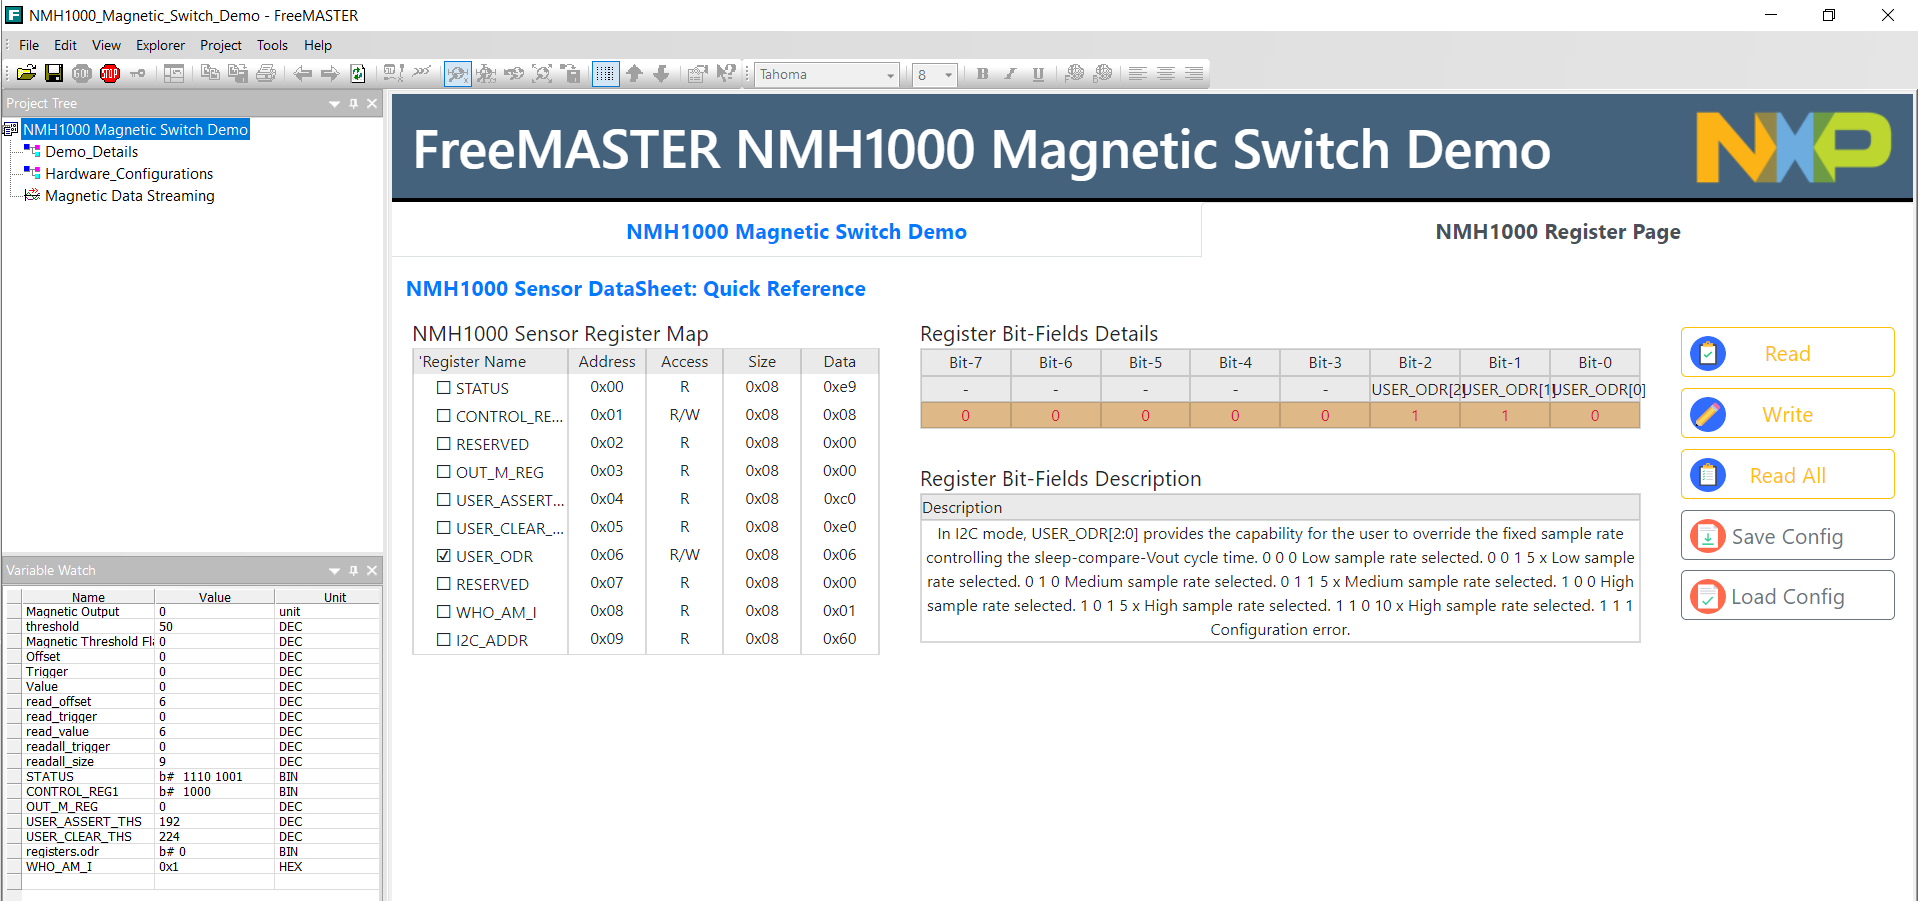
- Click "NMH1000 Register Page" tab to access the NMH1000 register set. Click "Read All" to view instantaneous values of the NMH1000 sensor registers in real time.

- Users can select specific registers and perform single register read or write actions in real time. For a chosen sensor register with read/write access, users can toggle bitfields to change the register value and click "Write" to perform register write operation and/or perform register read by clicking "Read".


- Reach out to NXP Sensors Community page for more support - NXP Community
- Learn more about NMH1000 ultra-low power mangetic switch, refer to - NMH1000 DS
- Accelerate your sensors development using Sensor ToolBox, refer to - Sensors Development Ecosystem
Questions regarding the content/correctness of this example can be entered as Issues within this GitHub repository.
Warning: For more general technical questions regarding NXP Microcontrollers and the difference in expected funcionality, enter your questions on the NXP Community Forum
| Version | Description / Update | Date |
|---|---|---|
| 1.0 | Initial release on Application Code Hub | May 1st 2024 |