This demo shows how to integrate the NXP sensors FXLS8974CF (3-axis accelerometer) and MPL3115 (absolute pressure) with FRDM-MCXN947 platform. Both sensors share the I2C bus of the Accel & Pressure click board, that is used in the demo for digital communication between the MCXN947 and the sensors.
The demo uses the LVGL graphics framework and a TFT Display (LCD-PAR-S035) to show sensor data. The GUI shows a multi-Tab menu that allows the user to:
- Monitor the 3-axis accelerometer measurements.
- Monitor the pressure sensor measurements in Pascals.
- Watch a live chart with the latest 40 points of the 3-axis accelerometer.
The GUI was designed with GUI Guider (NXP).
- IoT Sensing SDK (ISSDK) v1.8 offered as middleware in MCUXpresso SDK for supported platforms
- MCXUpresso SDK 2.14.0 for FRDM-MCXN947
- MCUXpresso IDE v11.9.0
- Git v2.39.0
For this demo you will need the next hardware.


- Personal Computer
- Mini/micro C USB cable
The following instructions are based on MCUXpresso IDE. However, similar steps can be followed for VS Code. Example includes linker files that allows demo to be imported and converted.
Check that the switch SW1 In the LCD is set to 010 (16bits 8080) and plug-in the LCD in the board (use the next image like reference) you should connect the LCD in the J8 header with two pins free in the top of the header.

Plug-in the Accel & Pressure click board (mikroe) atop the native mikroe slot of the FRDM board.
Then plug-in the USB cable between the host PC and the FRDM-MCXN947.
See the figure below for reference.

- Download MCUXpresso IDE 2.19.0 or newer and Install following the installer instructions.
- Download MCXUpresso SDK 2.14.0 for FRDM-MCXN947. Make sure to select ISSDK middleware while building SDK. Make sure to change version to 2.14.00 and build SDK for MCUXpresso IDE.
- Install Git v2.39.0 (for cloning and running west commands)
- Open MCUXpresso IDE and select a directory to create your workspace.
- Install "MCXUpresso SDK 2.14.0 for FRDM-MCXN947" (drag and drop SDK zip into "Installed SDK" view) into MCUXpresso IDE.
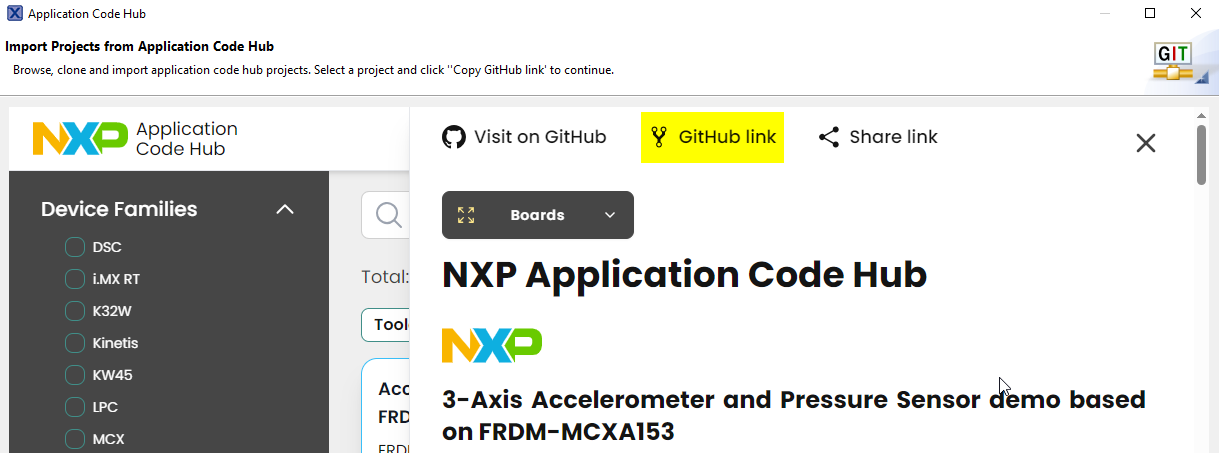
- Go to "Quickstart Panel" and click on "Import from Application Code Hub".

- Enter "Accel and Pressure sensor demo" in search bar. Select project card.
- Click "GitHub link" within wizard to copy github information into IDE wizard.
- Continue to follow the default steps of the Wizard. Click Next, Click Next for "main" branch.
- Select the desired destination to store the imported project. Initial branch = main. Click Next.
- Click next to select the discovered Eclipse projects.
- Click Finish to complete the import into workspace.
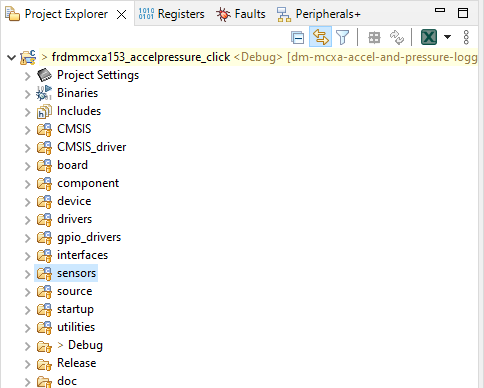
- Right click on project and select build to start building the project.


The demo will start running inmediately after the FW is downloaded to the target from MCUXpresso.
The GUI shows the Accel. panel by default. It will show acceleration measurements coming from the 3-axis accelerometer (FXLS8974CD), note that the vector magnitude is also shown.
The user can easily switches to another tab by tapping, for example to visualize the pressure subjected to the MPL3115 sensor.
The third tab "chart" shows the latest collected 40 samples for the three axis of the accel.
The figure below shows the demo running...

- Reach out to NXP Sensors Community page for more support - NXP Community
- Learn more about FXLS8974CF 3-axis accelerometer, refer to - FXLS8974CF DS
- Learn more about MPL3115A2S Precision pressure sensor, refer to - MPL3115A2S DS
- Accelerate your sensors development using Sensor ToolBox, refer to - Sensors Development Ecosystem
Questions regarding the content/correctness of this example can be entered as Issues within this GitHub repository.
Warning: For more general technical questions regarding NXP Microcontrollers and the difference in expected funcionality, enter your questions on the NXP Community Forum
| Version | Description / Update | Date |
|---|---|---|
| 1.0 | Initial release on Application Code Hub | May 17th 2024 |