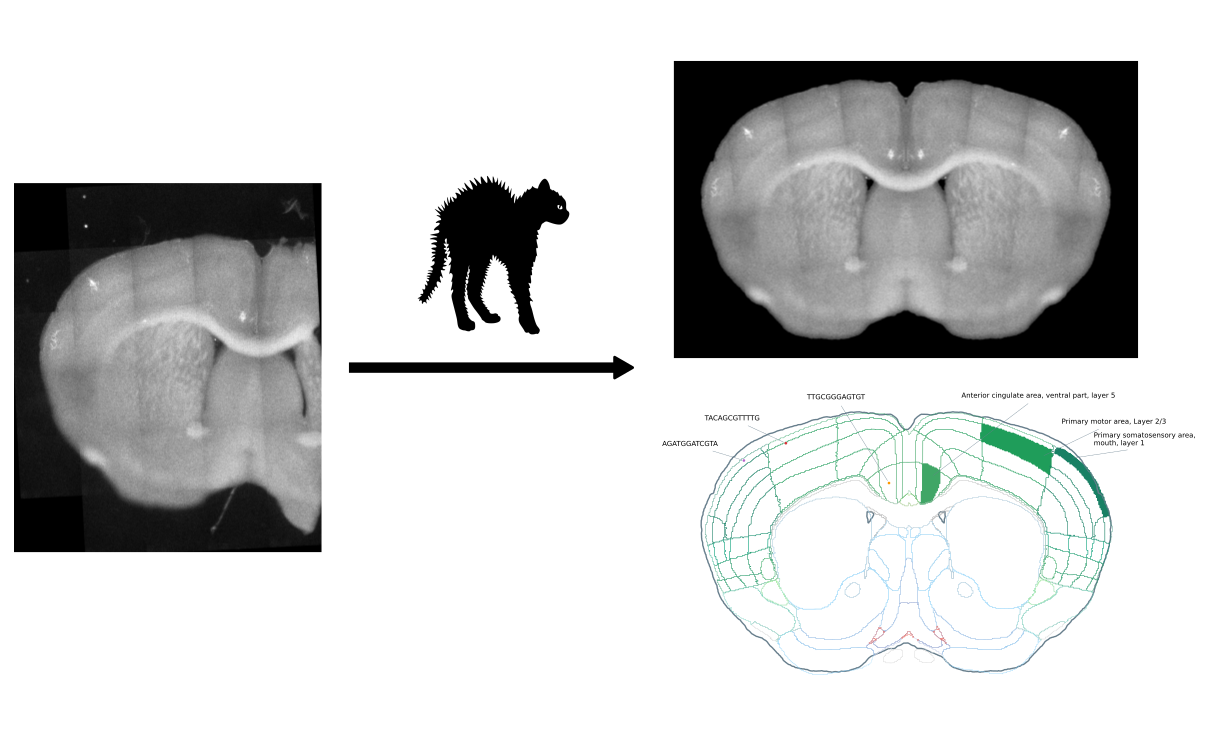
The coronal hemisphere annotation tool (CHAT; pronounced 'shah' with a questionable french accent) is a pipeline for annotating samples from mouse coronal slice hemispheres with the Allen Brain Atlas.
As inputs, it takes (a) microscopy autofluorescence images of mouse coronal slice hemispheres and (b) sample data in CSV format including the precise locations of the samples in the images. It segments and aligns the (stitched) images, and registers them to the Allen Brain Atlas reference volume. In this process, it keeps track of the given sample locations, and returns their corresponding atlas annotations.
Some parts of the pipeline are rather specific to our in-house setup but the core functionality has been written with re-usability in mind, specifically the scripts:
- hemisphere_segmentation_and_alignment.py
- image_registration.py
- image_annotation.py
- sample_annotation.py
-
Install anaconda, instructions here.
-
Download and unzip this repository.
-
Open a console and navigate to the repository top directory.
cd /path/to/coronal_hemisphere_annotation_tool/- Create a virtual environment that contains the required dependencies.
conda create --name chat --file environment.yml python=3.7- Open a console and navigate to the repository top directory.
cd /path/to/coronal_hemisphere_annotation_tool/- Activate the conda virtual environment.
conda activate chatRun the pipeline scripts in the following order.
This script queries a sample data CSV spreadsheet, extracts all rows that in the indicated column contain the indicated string, and writes the results to a new CSV file containing only the slice specific data.
The output CSV contains the same columns as the input CSV as well as the column 'sample_id', which is just the corresponding index in the inoput CSV file.
Usage:
python code/extract_sample_data.py /path/to/sample_data.csv column pattern /path/to/slice_specific_sample_data.csvExample:
python code/extract_sample_data.py data/plates_6_11_12_13_14_16_17_18.csv date 2019-03-22 test/sample_data.csv --showGiven sample coordinates in micrometers, this script determines the corresponding image pixels.
The sample data CSV has to contain the following columns:
- slice_number,
- image_x,
- image_y.
The images in the image directory have to be TIFF files containing XResolution and YResolution meta data tags, and have to match the following file name pattern: Image_[0-9]_*.tif, where the number indicates the slice number.
Usage:
python code/convert_sample_coordinates.py /path/to/slice_specific_sample_data.csv /path/to/image/directory/Example:
python code/convert_sample_coordinates.py test/sample_data.csv test/This script prepares a series of mouse coronal hemisphere sections for registration in the following steps:
- Isolate a single hemisphere (remove background, other hemisphere) in each image.
- Reflect hemispheres to create complete coronal sections.
- Align sections with each other in one image stack.
The images in the image directory have to be TIFF files, and have to match the following file name pattern: Image_[0-9]_*.tif, where the number indicates the slice number.
Sample coordinates are provided as a CSV spreadsheet. These coordinates are then transformed such that locations in the input image are mapped to the right locations in the output image. The spreadsheet has to contain the following four columns:
- sample_id : an integer sample ID,
- image_row : the X coordinate (or column) in the input image,
- image_col : the Y coordinate (or row) in the input image, and
- slice_number : the Z coordinate (or slice number).
This script creates the following files in the provided output directory:
- an NPZ file containing the aligned image stacks and masks (open with numpy.load), and
- the segmented and aligned slices as individual PNG files (for registration).
Furthermore, the script adds two columns to the CSV spreadsheet
- segmentation_row, and
- segmentation_col,
which are the sample locations (in pixels) in the segmented output images.
Usage:
python code/hemisphere_segmentation_and_alignment.py /path/to/image/directory/ /path/to/sample_data.csv /path/to/output/directory/Example:
python code/hemisphere_segmentation_and_alignment.py test/ test/sample_data.csv test/segmentation/Register a series of mouse coronal sections to the Allen Brain Atlas using DeepSlice.
The images in the image directory have to be PNG files, and have to match the following file name pattern: Image_s[0-9]*.png, where the number indicates the slice number.
Usage:
python code/image_registration.py /path/to/segmentation/directory/ /path/to/output/directory/ --slice_direction <caudal-rostro OR rostro-caudal> --slice_thickness <float>Example:
python code/image_registration.py test/segmentation test/registration --slice_direction caudal-rostro --slice_thickness 150Use the image registration results to query the Allen Brain Atlas for a corresponding annotation.
The Allen Brain data directory is a used to deposit a copy of the Allen Brain mouse atlas. The atlas is downloaded the first time this script is executed and then used in any subsequent invocations.
Usage:
python code/image_annotation.py /path/to/registration/results.csv /path/to/allen/brain/data/directory/ /path/to/output/directory/Example:
python code/image_annotation.py test/registration/deepslice_registration_results.csv data/ test/annotation/Annotate samples based on image annotation results.
Usage:
python code/sample_annotation.py /path/to/annotation/directory/ /path/to/sample_data.csvExample:
python code/sample_annotation.py test/annotation/ test/sample_data.csvUsage:
python code/make_figures.py /path/to/segmentation/directory/ /path/to/annotation/directory/ /path/to/sample_data.csv /path/to/figure/directory/Example:
python code/make_figures.py test/segmentation/ test/annotation/ test/sample_data.csv test/figures/
