Lego car-like robot stuff
The project idea is a mobile car-type robot capable of mimicking human-like trajectories to reach its assigned position while avoiding obstacles.
This repository includes the source code for both its control system and computer vision system (CV). The CV was designed for robot localization and obstacle detection.
Please take a loot at the video first.
Table of Contents
Description
The repository consists of three parts:
- The
control_partfolder includes the source code of the control system - The
cv_partfolder includes the source code of the computer vision systel - The
scilabfolder includes files associated with the simulation of the control system in Scilab
The Car-type robot was built using the LEGO MIDSTRMS EV3 set. The general view of the robot and its kinematic model are shown in the figures below.
| Car-like robot | Kinematic model |
|---|---|
 |
 |
The whole structure of the project is illustrated on the figure below.

Installation
Robot
-
Build the car-type robot (Ackermann Steering tutorial) using LEGO mindstorms EV3
-
Creating a bootable Micro SD card with Linux
-
Connect the EV3 to a WiFi network using a WiFi adapter (eg. a doodle)
-
Connect via SSH to your robot (user: robot, password: maker)
ssh robot@XXX.XXX.XXX.XXX (IP adress of the robot)
-
Clone the repository or copy only the
control_partfolder to your robotcd ~ git clone https://github.com/red-itmo/lego-car-project.git
-
Change permissions for Python scripts
cd control_part/sources/carsystems/
sudo chmod +x *.py
-
Intall
numpylibrary for Python3pip3 install numpy
Computer
-
Install
OpenCVlibrary to your computer (installation on Linux) -
Install
kivylibrary(installation on Linux) -
Install
numpypip3 install numpy
Usage
-
Mount your camera on the ceiling so that the optical axis is directed as a normal to the floor. Measure the distance from the camera to the floor. Calculate the length of the diagonal of the frame along the floor using the diagonal field view of camera. This value has to be inserted instead of the "D" variable in the file
cv_part/kivy_gui.py.px_to_m = D / math.hypot(cam_res[0], cam_res[1])
-
Creat a color marker for the robot and place it on its upper part
-
Calibrate the colors using this script. Detection of the robot's position and orientation must be stable. The color ranges for the markers need to be written in the script
cv_part/libs/Mapping.py. More precisely, inside the constructor of the class "Mapping" in the following lines:self.blueLower = (96, 110, 126) self.blueUpper = (105, 255, 247) self.yellowLower = (0, 89, 122) self.yellowUpper = (94, 150, 255)
-
Clone this repository to any directory
git clone https://github.com/red-itmo/lego-car-project.git
-
Launch the CV part of the project
$ python cv_part/kivy_gui.py
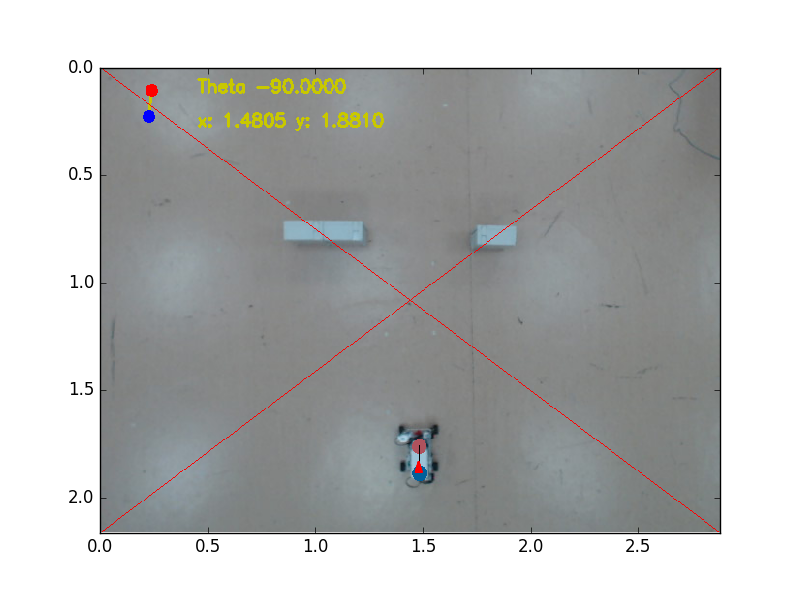
You will see a window showing a user friendly interface as seen in the figure below.

Support
Please open an issue if you've found a bug.
Contribution
Please contribute using Github Flow. Create a branch, add commits, and open a pull request.