Setting up a distributed Kubernetes cluster along with Istio service mesh locally with Vagrant and VirtualBox
使用Vagrant和VirtualBox在本地搭建分布式Kubernetes集群和Istio Service Mesh - 中文
Setting up a Kubernetes cluster and Istio service mesh with vagrantfile which consists of 1 master(also as node) and 3 nodes. You don't have to create complicated CA files or configuration.
Note: Because of using virtual machines to setup distributed Kubernetes cluster will bring high load on your computer, so I created the lightweight Cloud Native Sandbox using Docker to setup a standalone Kubernetes.
Click the following image to watch the video.
Because I want to setup the etcd, apiserver, controller and scheduler without docker container.
We will create a Kubernetes 1.15.0 cluster with 3 nodes which contains the components below:
| IP | Hostname | Componets |
|---|---|---|
| 172.17.8.101 | node1 | kube-apiserver, kube-controller-manager, kube-scheduler, etcd, kubelet, docker, flannel, dashboard |
| 172.17.8.102 | node2 | kubelet, docker, flannel、traefik |
| 172.17.8.103 | node3 | kubelet, docker, flannel |
The default setting will create the private network from 172.17.8.101 to 172.17.8.103 for nodes, and it will use the host's DHCP for the public IP.
The kubernetes service's VIP range is 10.254.0.0/16.
The container network range is 170.33.0.0/16 owned by flanneld with host-gw backend.
kube-proxy will run as ipvs mode.
- Host server with 8G+ mem(More is better), 60G disk, 8 core cpu at lease
- Vagrant latest(2.2.16 recommended)
- VirtualBox 5.2 (5.2+ is not supported)
- Kubernetes 1.16 (support the latest version 1.16.14)
- Across GFW to download the kubernetes files (For China users only)
- MacOS/Linux (Windows is not supported completely)
- NFS Server Package
Required
- CoreDNS
- Dashboard
- Traefik
Optional
- Heapster + InfluxDB + Grafana
- ElasticSearch + Fluentd + Kibana
- Istio service mesh
- Helm
- Vistio
- Kiali
Clone this repo into your local machine and download kubernetes binary release first and move them into the root directory of this repo (GitBash for the Windows must be run as Administrator to install vagrant-winnfsd plugin).
vagrant plugin install vagrant-winnfsd
git clone https://github.com/rootsongjc/kubernetes-vagrant-centos-cluster.git
cd kubernetes-vagrant-centos-clusterNote: If this your first time to setup Kubernetes cluster with vagrant, just skip the above step and run the following command, it will download Kubernetes release automatically for you and no need to download the release next time. You can find the download address the Kubernetes releases here. Download the release of version you wanted, move it to the root of this repo, rename it to kubernetes-server-linux-amd64.tar.gz then the install.sh script will skip the download step.
As this repo folder is mounted to /vagrant with NFS in virtual machines, you may be required to enter a password to for administrator privileges during the installation.
Set up Kubernetes cluster with vagrant.
vagrant upWait about 10 minutes the kubernetes cluster will be setup automatically.
If you have difficult to vagrant up the cluster because of have no way to download the centos/7 box, you can download the box and add it first.
Add centos/7 box manually
wget -c http://cloud.centos.org/centos/7/vagrant/x86_64/images/CentOS-7-x86_64-Vagrant-1801_02.VirtualBox.box
vagrant box add CentOS-7-x86_64-Vagrant-1804_02.VirtualBox.box --name centos/7
The next time you run vagrant up, vagrant will import the local box automatically.
VirtualBox may be blocked by Mac's security limit.
Go to System Preferences - Security & Privacy - Gerneral click the blocked app and unblock it.
Run sudo "/Library/Application Support/VirtualBox/LaunchDaemons/VirtualBoxStartup.sh" restart in terminal and then vagrant up.
- The project will run some bash script under the VirtualMachines. These scripts line ending need to be in LF. Git for windows set
core.autocrlftrue by default at the installation time. When you clone this project repository, this parameter (set to true) ask git to change all line ending to CRLF. This behavior need to be changed before cloning the repository (or after for each files by hand). We recommend to turn this off by runninggit config --global core.autocrlf falseandgit config --global core.eol lfbefore cloning. Then, after cloning, do not forget to turn the behavior back if you want to run other windows projects:git config --global core.autocrlf trueandgit config --global core.eol crlf.
If you have executed the previous git global configuration then, you will not see these output while node3 is going to be complete:
    node3: Created symlink from /etc/systemd/system/multi-user.target.wants/kubelet.service to /usr/lib/systemd/system/kubelet.service.
    node3: Created symlink from /etc/systemd/system/multi-user.target.wants/kube-proxy.service to /usr/lib/systemd/system/kube-proxy.service.
    node3: deploy coredns
    node3: /tmp/vagrant-shell: ./dns-deploy.sh: /bin/bash^M: bad interpreter: No such file or directory
    node3: error: no objects passed to apply
    node3: /home/vagrant
Solution:
vagrant ssh node3
sudo -i
cd /vagrant/addon/dns
yum -y install dos2unix
dos2unix dns-deploy.sh
./dns-deploy.sh -r 10.254.0.0/16 -i 10.254.0.2 |kubectl apply -f -There are 3 ways to access the kubernetes cluster.
- on local
- login to VM
- Kubernetes dashboard
local
In order to manage the cluster on local you should Install kubectl command line tool first(But, you don't need to do it manually because of install.sh script itself does this).
Go to Kubernetes release notes, download the client binaries, unzip it and then move kubectl to your $PATH folder, for MacOS:
wget https://storage.googleapis.com/kubernetes-release/release/v1.16.14/kubernetes-client-darwin-amd64.tar.gz
tar xvf kubernetes-client-darwin-amd64.tar.gz && cp kubernetes/client/bin/kubectl /usr/local/bin
Copy conf/admin.kubeconfig to ~/.kube/config, using kubectl CLI to access the cluster.
mkdir -p ~/.kube
cp conf/admin.kubeconfig ~/.kube/config
We recommend you follow this way.
VM
Login to the virtual machine for debuging. In most situations, you have no need to login the VMs.
vagrant ssh node1
sudo -i
kubectl get nodes
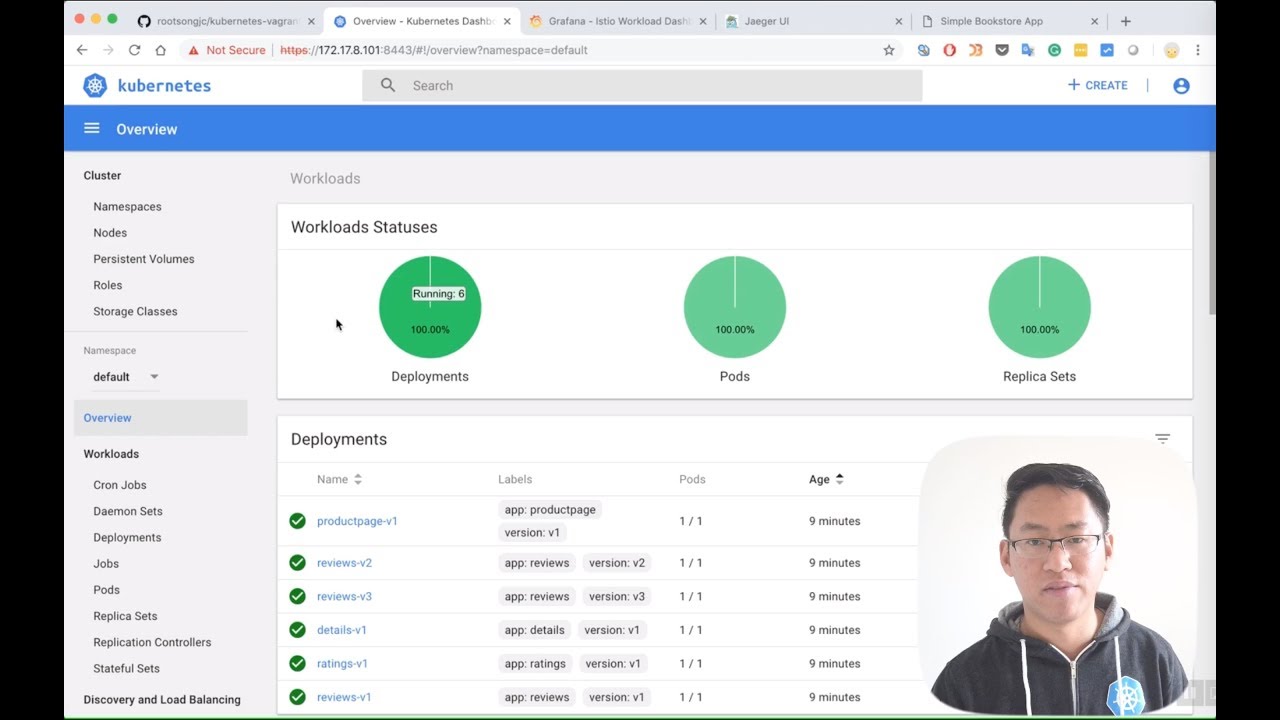
kubectl get pods --namespace=kube-systemKubernetes dashboard
Kubernetes dashboard URL: https://172.17.8.101:8443
Get the admin token:
kubectl -n kube-system describe secret `kubectl -n kube-system get secret|grep admin-token|cut -d " " -f1`|grep "token:"|tr -s " "|cut -d " " -f2Note: You can see the token message on console when vagrant up done.

Only if you install the heapter addon bellow that you can see the metrics.
Visit from Chrome/Firefox on Windows
If you see the hint NET::ERR_CERT_INVALID, follow these steps:
vagrant ssh node1
sudo -i
cd /vagrant/addon/dashboard/
mkdir certs
openssl req -nodes -newkey rsa:2048 -keyout certs/dashboard.key -out certs/dashboard.csr -subj "/C=/ST=/L=/O=/OU=/CN=kubernetes-dashboard"
openssl x509 -req -sha256 -days 365 -in certs/dashboard.csr -signkey certs/dashboard.key -out certs/dashboard.crt
kubectl delete secret kubernetes-dashboard-certs -n kube-system
kubectl create secret generic kubernetes-dashboard-certs --from-file=certs -n kube-system
kubectl delete pods $(kubectl get pods -n kube-system|grep kubernetes-dashboard|awk '{print $1}') -n kube-system #re-install dashboard
Refresh the browser and click Advance, skip it. You will see the dashboard page there.
Heapster monitoring
Run this command on your local machine.
kubectl apply -f /vagrant/addon/heapster/Append the following item to your local /etc/hosts file.
172.17.8.102 grafana.jimmysong.ioOpen the URL in browser: http://grafana.jimmysong.io

Traefik
Run this command on your local machine.
kubectl apply -f /vagrant/addon/traefik-ingressAppend the following item to your local file /etc/hosts.
172.17.8.102 traefik.jimmysong.ioTraefik UI URL: http://traefik.jimmysong.io

EFK
Run this command on your local machine.
kubectl apply -f /vagrant/addon/efk/Note: Powerful CPU and memory allocation required. At least 4G per virtual machine.
Helm
Run this command on your local machine.
/vagrant/hack/deploy-helm.shWe use istio as the default service mesh.
Installation
Go to Istio release to download the binary package, install istio command line tool on local and move istioctl to your $PATH folder, for Mac:
wget https://github.com/istio/istio/releases/download/1.0.0/istio-1.0.0-osx.tar.gz
tar xvf istio-1.0.0-osx.tar.gz
mv istio-1.0.0/bin/istioctl /usr/local/bin/
Deploy istio into Kubernetes:
kubectl apply -f /vagrant/addon/istio/istio-demo.yaml
kubectl apply -f /vagrant/addon/istio/istio-ingress.yaml
Run sample
We will let the sidecars be auto injected.
kubectl label namespace default istio-injection=enabled
kubectl apply -n default -f /vagrant/yaml/istio-bookinfo/bookinfo.yaml
kubectl apply -n default -f /vagrant/yaml/istio-bookinfo/bookinfo-gateway.yaml
kubectl apply -n default -f /vagrant/yaml/istio-bookinfo/destination-rule-all.yaml
Add the following items into the file /etc/hosts of your local machine.
172.17.8.102 grafana.istio.jimmysong.io
172.17.8.102 prometheus.istio.jimmysong.io
172.17.8.102 servicegraph.istio.jimmysong.io
172.17.8.102 jaeger-query.istio.jimmysong.io
We can see the services from the following URLs.
More detail see https://istio.io/docs/examples/bookinfo/

Vizceral is an open source project released by Netflix to monitor network traffic between applications and clusters in near real time. Vistio is an adaptation of Vizceral for Istio and mesh monitoring. It utilizes metrics generated by Istio Mixer which are then fed into Prometheus. Vistio queries Prometheus and stores that data locally to allow for the replaying of traffic.
Run the following commands in your local machine.
# Deploy vistio via kubectl
kubectl -n default apply -f /vagrant/addon/vistio/

# Expose vistio-api
kubectl -n default port-forward $(kubectl -n default get pod -l app=vistio-api -o jsonpath='{.items[0].metadata.name}') 9091:9091 &

# Expose vistio in another terminal window
kubectl -n default port-forward $(kubectl -n default get pod -l app=vistio-web -o jsonpath='{.items[0].metadata.name}') 8080:8080 &
If everything up until now is working you should be able to load the Vistio UI in your browser http://localhost:8080

More details see Vistio — Visualize your Istio Mesh Using Netflix’s Vizceral.
Kiali is a project to help observability for the Istio service mesh, see https://kiali.io.
Run the following commands in your local machine.
kubectl apply -n istio-system -f /vagrant/addon/kialiKiali web: http://172.17.8.101:32439
User/password: admin/admin

Note: Kiali use jaeger for tracing. Do not block the pop-up windows for kiali.
Weave scope is a project for monitoring, visualisation & management for Docker & Kubernetes, see https://www.weave.works/oss/scope/
Run the following commands in your local machine.
kubectl apply -f /vagrant/addon/weave-scopeAdd a record on your local /etc/hosts.
172.17.8.102 scope.weave.jimmysong.io
Now open your browser on http://scope.weave.jimmysong.io/

Except for special claim, execute the following commands under the current git repo's root directory.
Suspend the current state of VMs.
vagrant suspendResume the last state of VMs.
vagrant resumeNote: every time you resume the VMs you will find that the machine time is still at you last time you suspended it. So consider to halt the VMs and restart them.
Halt the VMs and up them again.
vagrant halt
vagrant up
# login to node1
vagrant ssh node1
# run the prosivision scripts
/vagrant/hack/k8s-init.sh
exit
# login to node2
vagrant ssh node2
# run the prosivision scripts
/vagrant/hack/k8s-init.sh
exit
# login to node3
vagrant ssh node3
# run the prosivision scripts
/vagrant/hack/k8s-init.sh
sudo -i
cd /vagrant/hack
./deploy-base-services.sh
exit
Now you have provisioned the base kubernetes environments and you can login to kubernetes dashboard, run the following command at the root of this repo to get the admin token.
hack/get-dashboard-token.shFollowing the hint to login.
Clean up the VMs.
vagrant destroy
rm -rf .vagrantOnly use for development and test, don't use it in production environment.
- Kubernetes Handbook - jimmysong.io
- duffqiu/centos-vagrant
- coredns/deployment
- kubernetes ipvs
- Vistio — Visualize your Istio Mesh Using Netflix’s Vizceral
Follow the ServiceMesher community on twitter to get more information about Istio and service mesh.