Introductory Python programs for controlling LEDs using a Raspberry Pi (for my workshop)
- Resistor: use a 100 - 220 Ohm resistor. Different kits have different resistors. Resistor colour codes
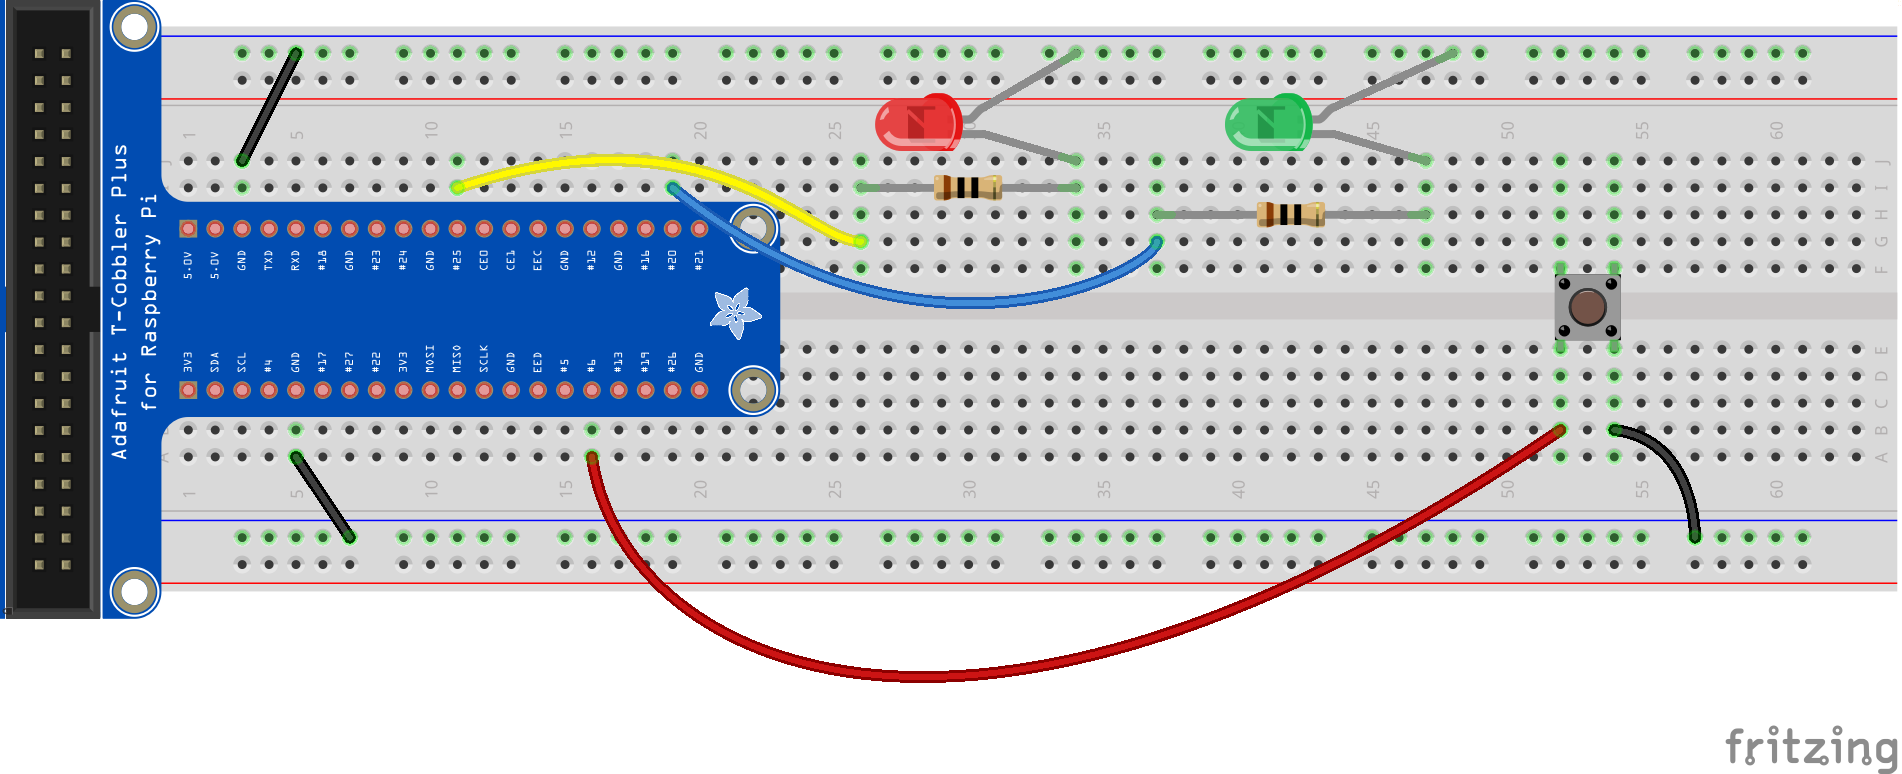
- Connections to the T-Cobbler (it's really hard to read the numbers unless you click on the image):
- the black wires go to GND.
- the yellow wire for from the Red LED resistor goes to #25
- the blue wire for from the Green LED resistor goes to #20
- the red wire from the switch is connected to #6
=====
- With this circuit you can run all of the programs in this repository.
- To copy all of these programs, type
git clone https://github.com/salamander2/leds
This will make a folder called "leds" in your current dicrectory and put the programs in it.
- Type
cd ledsto change directory to "leds". - Type
ls -lto see a listing of the programs. - The programs get more complex and refined from #1 to #5.
- Example:
python light2.pyto run program 2. - NOTE: previous versions of Raspbian required
sudo python light2.py
===== You can also run the the "Pulse2.py" program which will pulse the two LEDS using PWM mode.
=====
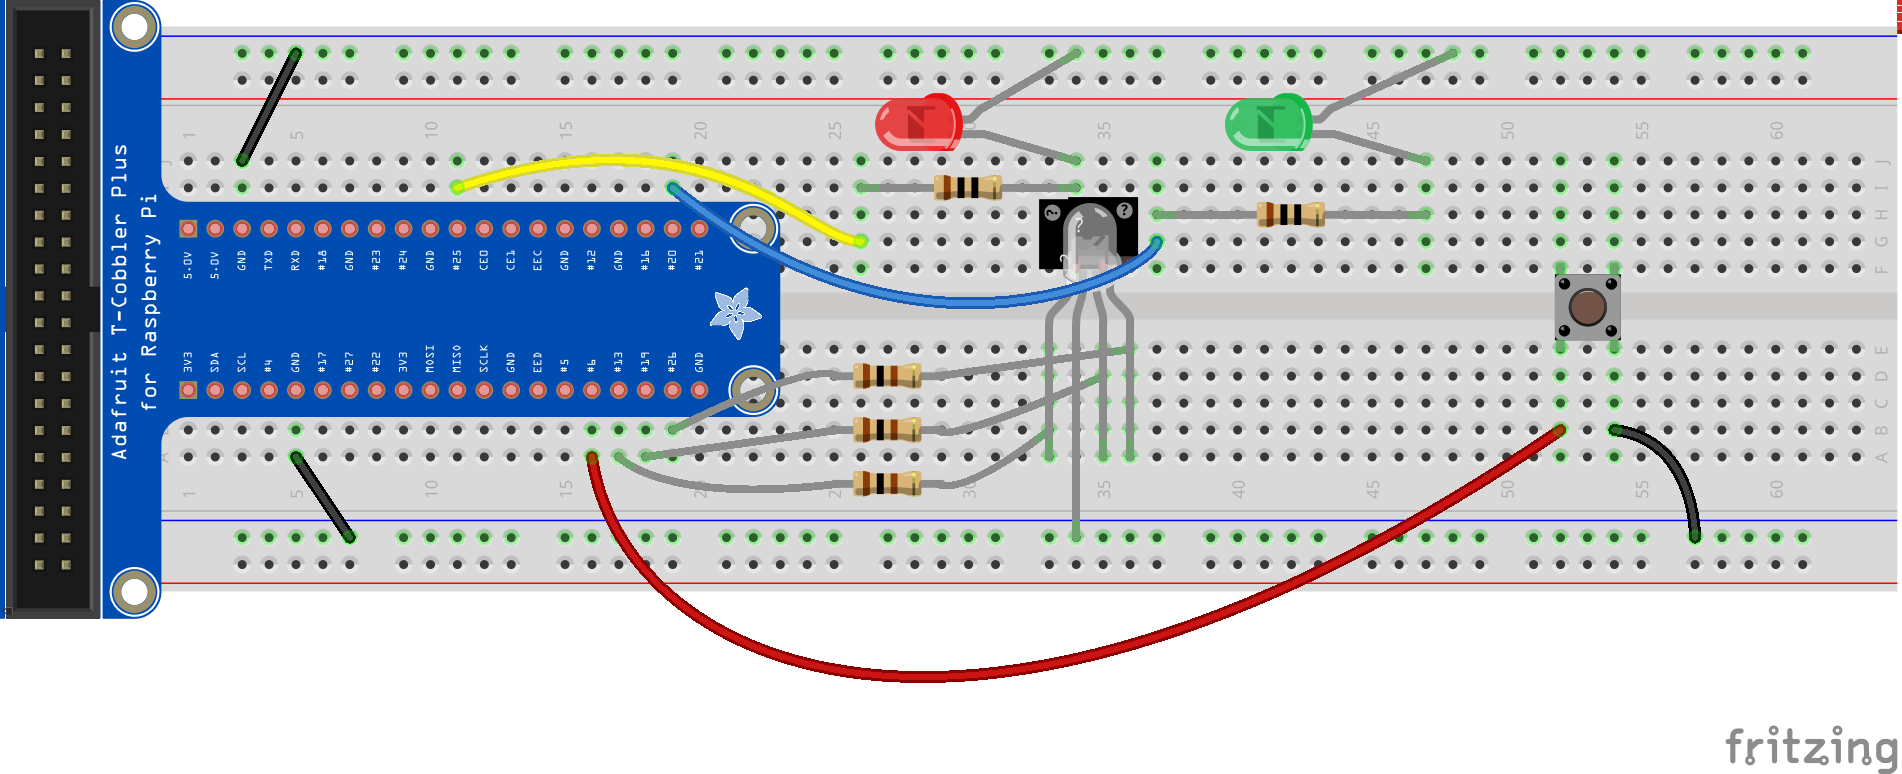
- Connections:
- the long leg of the LED goes to GND.
- the three resistors connect to the short legs of the 3 colour LED.
- they also connect to GPIO pins #13, #19, #26
Now you can run the TriColour program "Tricolour.py". Press 'r', 'g', and 'b' keys to increase the red, green, and blue. Use capital R G B to decrease the amounts.
For the repository that contains everything, please go to the one called "RaspberryPi" https://github.com/salamander2/RaspberryPi