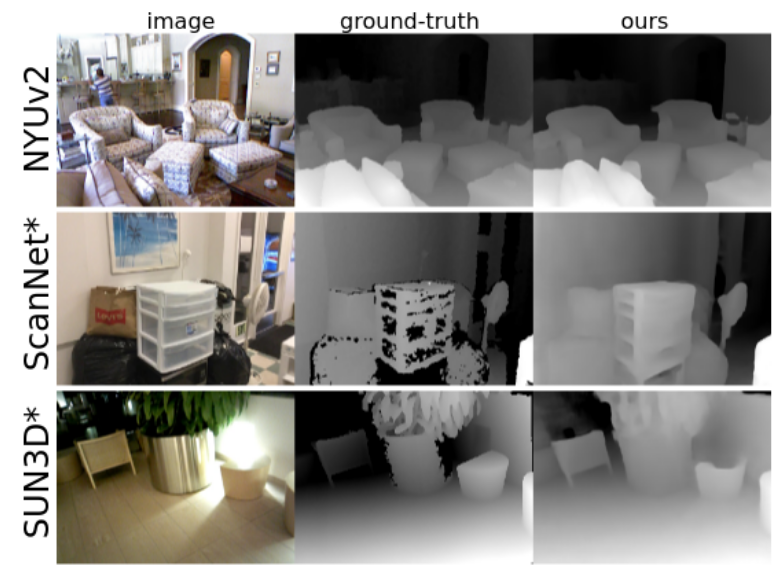
This repository contains the source code for our paper:
DeepV2D: Video to Depth with Differentiable Structure from Motion
Zachary Teed and Jia Deng
International Conference on Learning Representations (ICLR) 2020
Our code was tested using Tensorflow 1.15.0 and Python 3.6 To use the code, you need to first install the following python packages:
First create a clean virtualenv
conda create -n deepv2d python=3.6
conda activate deepv2d
pip install tensorflow-gpu==1.15.0 #for cuda 10.0+
pip install matplotlib
pip install easydict
pip install scipy
pip install opencv-python
pip install pyyaml
pip install toposort
pip install vtkYou can optionally compile our cuda backprojection operator by running
cd deepv2d/special_ops && ./make.sh && cd ../..This will reduce peak GPU memory usage. You may need to change CUDALIB to where you have cuda is installed.
Try it out on one of the provided test sequences. First download our pretrained models
./data/download_models.shor from google drive
The demo code will output a depth map and display a point cloud for visualization. Once the depth map has appeared, press any key to open the point cloud visualization.
python demos/demo_v2d.py --model=models/nyu.ckpt --sequence=data/demos/nyu_0python demos/demo_v2d.py --model=models/scannet.ckpt --sequence=data/demos/scannet_0python demos/demo_v2d.py --model=models/kitti.ckpt --sequence=data/demos/kitti_0You can also run motion estimation in global mode which updates all the poses jointly as a single optimization problem
python demos/demo_v2d.py --model=models/nyu.ckpt --sequence=data/demos/nyu_0 --mode=globalIf you do not know the camera intrinsics you can run DeepV2D in uncalibrated mode. In the uncalibrated setting, the motion module estimates the focal length during inference.
python demos/demo_uncalibrated.py --video=data/demos/golf.movDeepV2D can also be used for tracking and mapping on longer videos. First, download some test sequences
./data/download_slam_sequences.shTry it out on NYU-Depth, ScanNet, TUM-RGBD, or KITTI. Using more keyframes --n_keyframes=? reduces drift but results in slower tracking.
python demos/demo_slam.py --dataset=kitti --n_keyframes=2python demos/demo_slam.py --dataset=scannet --n_keyframes=3The --cinematic flag forces the visualization to follow the camera
python demos/demo_slam.py --dataset=nyu --n_keyframes=3 --cinematicThe --clear_points flag can be used so that only the point cloud of the current depth is plotted.
python demos/demo_slam.py --dataset=tum --n_keyframes=3 --clear_pointsYou can evaluate the trained models on one of the datasets...
./data/download_nyu_data.sh
python evaluation/eval_nyu.py --model=models/nyu.ckptFirst download the dataset using this script provided on the official website. Then run the evaluation script where KITTI_PATH is the location of where the dataset was downloaded
./data/download_kitti_data.sh
python evaluation/eval_kitti.py --model=models/kitti.ckpt --dataset_dir=KITTI_PATHFirst download the ScanNet dataset.
Then run the evaluation script where SCANNET_PATH is the location of where you downloaded ScanNet
python evaluation/eval_scannet.py --model=models/scannet.ckpt --dataset_dir=SCANNET_PATHYou can train a model on one of the datasets
First download the training tfrecords file here (143Gb) containing the NYU data. Once the data has been downloaded, train the model by running the command (training takes about 1 week on a Nvidia 1080Ti GPU)
Camera poses for NYU were estimated using ORB-SLAM2 using kinect measurements. You can download the estimated poses from google drive.
python training/train_nyu.py --cfg=cfgs/nyu.yaml --name=nyu_model --tfrecords=nyu_train.tfrecordsNote: this creates a temporary directory which is used to store intermediate depth predictions. You can specify the location of the temporary directory using the --tmp flag. You can use multiple gpus by using the --num_gpus flag. If you train with multiple gpus, you can reduce the number of training iterations in cfgs/nyu.yaml.
First download the dataset using this script provided on the official website. Once the dataset has been downloaded, write the training sequences to a tfrecords file
python training/write_tfrecords.py --dataset=kitti --dataset_dir=KITTI_DIR --records_file=kitti_train.tfrecordsYou can now train the model (training takes about 1 week on a Nvidia 1080Ti GPU). Note: this creates a temporary directory which is used to store intermediate depth predictions. You can specify the location of the temporary directory using the --tmp flag. You can use multiple gpus by using the --num_gpus flag.
python training/train_kitti.py --cfg=cfgs/kitti.yaml --name=kitti_model --tfrecords=kitti_train.tfrecordspython training/train_scannet.py --cfg=cfgs/scannet.yaml --name=scannet_model --dataset_dir="path to scannet"
