DT228/DT211/DT282/DT508 Games Engines 1 2020-2021
Resources
- Class Facebook page
- Course Notes (out of date!)
- Assignment
- Unity Tutorials
- GDC Vault
- Game maths tutorials
Contact me
Previous years courses
- 2019-2020
- 2018-2019
- 2017-2018
- 2016-2017
- 2015-2016
- 2014-2015
- 2013-2014
Assessment Schedule
- Week 5 - CA proposal & Git repo - 10%
- Week 13 - CA Submission & Demo - 40%
Week 11 - C# Job System
- Documentation

Week 10 - Infinite Terrain
Lab
Try and make this:
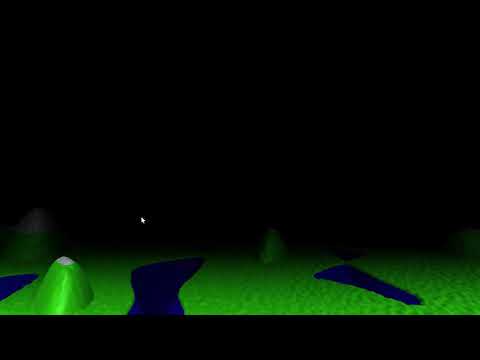
- Start with the InfiniteTerrain2 Scene
- Modify the SampleCell function so that if the sample falls within a certain range in the middle, you flatten in. Ie. Make it's value 0.5, and flatten or raise values above and below
- Create a new shader that colours the vertex based on it's Y value (height). If the height falls within different ranges it gets a different colour
Week 9 - Audio Responsive stuff
Understand the following terms:
- Samples
- Sample rate
- Resolution
- Frequency
- Harmonics/partials
- FFT
- Time domain/frequency domain
- Frame size
- Bin width
And the following from Unity:
- AudioSource
- AudioClip
- AudioListener
Update your forks and create a branch for your work today!
Modify the AudioAnalyzer class so that it calculates the average amplitude of a frame of samples. Remember samples can be positive or negative, so you have to get the absolute value of the samples
Modify the code in AudioVisualizer2 so that it uses the amplitude to control the rotation of the cubes as per the video:

Also modify the code in AudioVisualiser2 so that the cubes start and the same y value like in the video and grow upwards. You will have to to move the y position by half the scale value
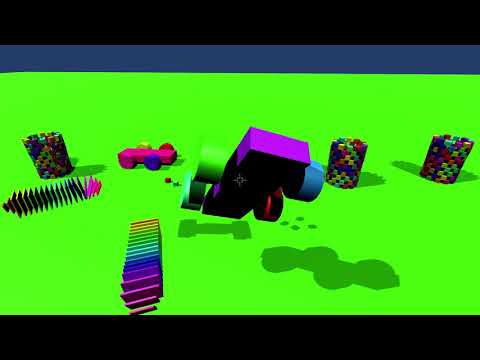
Week 8 - Unity Physics
Lecture
Lab
- Open up the Physics2 scene from the repo and write code for the methods CreateTower and CreateCar
- I have left comments in the code explaining what to do
Week 7 - Physics 1
Lecture
Lab
Learning outcomes
- Write a physics integration function from scratch
- Use trigonometry
- Make a path following AI
Today lets use the Seek steering behaviour as inspiration to make this little scenario:
- Make a Path MonoBehaviour that has a public List of Vector3. Use trigonometry to create the elements of the vector. You can also add gizmos so that the path can be seen in the Unity editor. This class does not need an Update method. It is just a container for the waypoints
- Make a PathFollower MonoBehaviour that has a public field for the path (that you can drag the Path onto) and another public field for the current waypoint. This class should have an Update method that steers the gameobject towards the current waypoint. When it gets close it should advance to the next
- Make a prefab consisting of a Cube with a TrailRenderer attached. Attach the Pathfollower
- Make a Spawner that spans the prefabs and assigns the path. You can offset the current waypoint for each one that you spawn
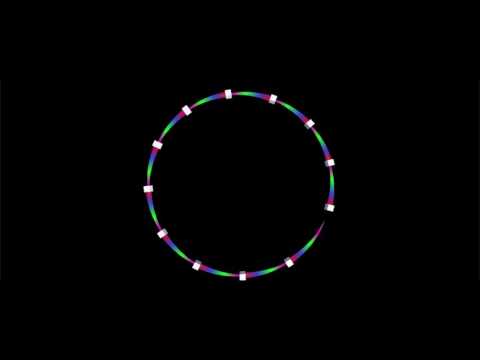
Week 6 - Spine Animation System example
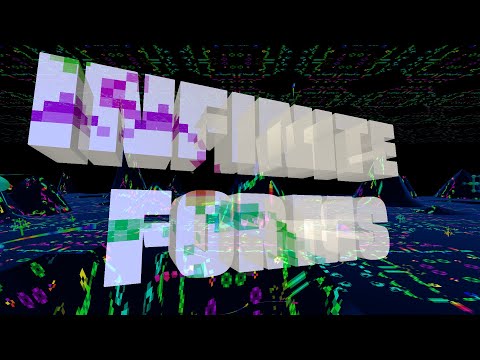
Today lets make a core component of Infinite Forms, the SpineAnimator system:

Questions:
- Look at the code TentacleGenerator1.cs. This generates a tentacle from two prefabs, headPrefab and segmentPrefab.
- Look at the code in the Awake method and try to comment it with what you think each line is doing
- Why does the code go into Awake rather than Start?
- What direction is the tentacle generated? In other words, if the tentaclegenerator was attached to a gameobject located at 0,0,0 with a forward vector of (0, 0 1) would the segments be laid out along the positive or negative Z azis?
- How exactly is each segment position calculated? What is the maths?
- Why do it this way rather than use transform.TransformPoint?
- Where is the head relative to the segments? How is this determined?
- How is the colour of each segment determined and what would it look like?
- What would the hierarchy look like after this?
Ok Now look at the code in the Start method of SpineAnimator.cs
- Try to comment this code so that you understand what each line is doing
- This method calculates the Vector3 offsets between each segment and populates the offsets list
- How is each offset calculated?
- Why is it necessary to multiply the offset by the inverse quaternion of the previous segment? What is this doing?
- If there are 10 transforms in the children list, how many transforms will be in the offsets list?
Now look at the Update method. This method lerps the positions and slerps the rotations so that you get "spine like" animation such that each segment "follows" the previous one.
- Try to comment this code so that you understand what each line is doing
- How is the wantedPosition variable calculated? WHat is the maths?
- How is the wantedRotation calculated. Draw a diagram!
- How is lerpedPosition calculated?
- What is the purpose of the clampedOffset variable?
- What does changing the damping variable do?
Ok! Your turn to write some code. I have removed some of the code from Start in OctopusGenerator.cs, but left in some comments. The purpose of this class is to generate a series of tentacles arranged in a circle. Ive left some comments in the method to give you some ideas about how to make the tentacles
Now have a look at HeadRotator.cs. This script is attached to the head segment of each of the tentacles and it's purpose is to rotate the head back and forth using a harmonic function. (I.e. A sine wave)
- What is the purpose of the co-routine? What effect will this achieve?
- Write the code for the Update function. It should perform a harmonic rotation on the gameObject by using transform.localRotation. I've left comments in
If you figure out all of the above! Some extra things to try:
- Make the tentacle segments start big and get smaller as they get towards the end of the tentacle
- Add a hemisphere to the segment prefabs so they look more "tentacle like"
- Vary the length and number of tentacles and see what kind of creatures you can create
Week 5 Quaternions

Quaternions in Unity:
An ode to Quaternions:
A quaternion is like a vector, but with a "w"
To construct one, use an axis and an angle, that's what we do
For rotations it must be normal, or otherwise its pure
So we normalise, divide by length, just to be sure
To invert a normal quaternion, we negate x, y and z
Multiply quaternion, vector, inverse quaternion and it rotates don't you see
A rotation of 0 radians is the same as two pi
To convert a quaternion to a matrix, we use the API
So here's a health to old Hamilton, your inventor it would appear
And to imaginary numbers floating in the hypersphere
- Dr Bryan Duggan
Lab
Today lets make this system:
The system is a turret AI system for a game such as a tower defence game. In the video below, the red "tower" will turn to face the players tank and start shooting as soon as the player comes in range. To create this system:
- Make the turret from two cubes and set a spawn point for bullets on the turret
- Add a TurretController component to the turret. Add fields for rotationSpeed and fireRate (and any others you might need)
- Use a SphereCollider on the turret and set isTrigger to be true
- Override OnTriggerEnter and OnTriggerStay to detect the player
- Use quaternions to rotate the turret
- Use a co-routine to shoot multiple times per second
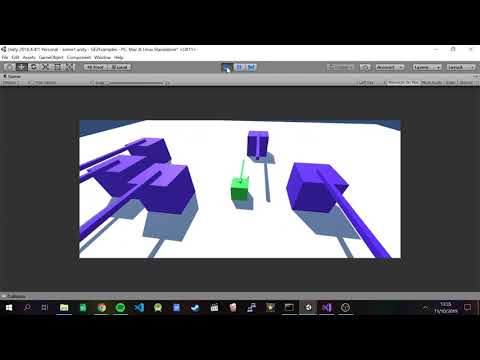
Week 4 - Infinite Forms System - enabling & disabling components
Lab
Your task today is to recreate this system from Infinite Forms:
Update your fork from my master branch repo and make sure you start from the master branch. Create a branch for todays solution (call it lab4)
Open up the lab4 scene. There is the coloured tank following it's circular path (solution from 2 weeks ago). We are going to add a control orb to the red tank so that the player can enter the orb and take control of the red tank.
- Use the dodecehedron and attach it at an appropriate position on the red tank. You can add the transparent material to the dodecahedron
- Make a script called RotateMe that performs a local rotation and attach it to the orb so that the orb spins by itself
- Add a sphere collider to the orb and set the isTrigger flag to be true
- Add a script called OrbController to the orb and add methods for OnTriggerEnter and OnTriggerStay. OnTriggerEnter gets called on the script whenever the attached collider overlaps with another collider. OnTriggerStay gets called once per frame so long as the collider is still overlapping.
- In OnTriggerEnter you need to:
- Check you are colliding with the MainCamera (Use tags!)
- If so, disable the FPS Controller on the MainCamera and enable the TankController script on the tank
- Disable the EnemyTankController on the Enemy Tank
- Disable the RotateMe script on the orb
- In OnTriggetStay you need to:
- Check you are colliding with the player
- Lerp the camera position (Vector3.Lerp) and slerp the camera so that it points forward) (Quaternion.Slerp)
- Check for the space key, if pressed this frame:
- Disable the TankController on the tank
- Enable the EnemyTankController
- Enable the Tank controller
- Enable the RotateMe script
I may have left out some steps, but you can figure out the rest yourself
Week 3 - Coroutines, colliders and triggers
Lecture
Lets make this:
Clone the repo for the course and make sure you start from the master branch. Create a branch for todays solution (call it lab4)
What is happening:
- The green tank is the player. The blue tanks are the "enemies"
- Enemies spawn at a rate of 1 enemy per second
- Enemies fall from the sky and land on the ground
- There are a maximum of 5 enemies at any time
- After 4 seconds, it sinks into the ground. You can disable the collider on the tank and set drag to be 1
- After seven seconds, it gets removed from the scene
Advanced!
-
When the player hits an enemy it "explodes" (all the parts break apart)
-
To implement this you will have to do a few things:
-
Iterate over all the child transforms to get access to the turret using:
-
You could also use
transform.getChild(0) -
Add a rigidbody to the turret
-
Set the useGravity and isKinematic fields on the rigidbody appropriately
-
Add a random velocity
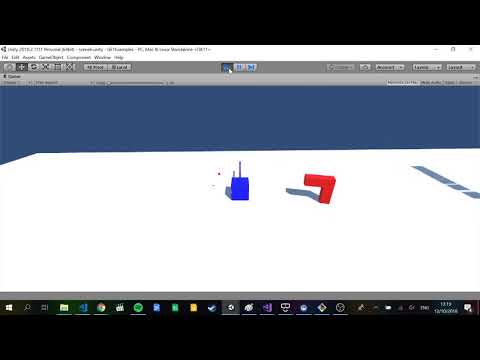
Week 2 - Tank game, trigonometry & vectors
Lab
Learning Outcomes
- Build a simple agent with perception
- Develop computation thinking
- Use trigonometry
- Use vectors
- Use the Unity API
- Practice C#
Instructions
Today you will be making this:
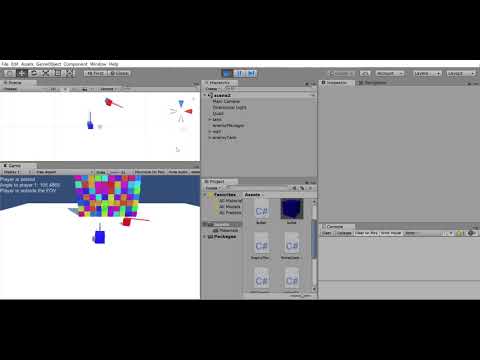
What is happening:
- The red tank has a script attached that has radius and numWaypoints fields that control the generation of waypoints in a circle around it. It draws sphere gizmos so you can see where the waypoints will be.
- The red tank will follow the waypoints starting at the 0th one and looping back when it reaches the last waypoint.
- The red tank prints the messages using the Unity GUI system to indicate:
- Whether the blue tank is in front or behind
- Whether the front tank is inside a 45 degree FOV
- Use the Unity reference to figure out what API's to call!
Week 1 - Introduction
Lecture
Learning Outcomes
- Install Unity & git for Windows
- Sign up for the class Facebook page
- Find the Unity tutorials
Instructions
- Sign up for the class Facebook page
- Install Unity
- Fork the repository for the course and clone it
- Check out the Unity tutorial videos