This guide will aid you in setting up Ubuntu on a virtual machine (on a Windows PC/Laptop) and install ROS on it. While installing ROS on a virtual machine is suitable for teaching and learning purposes, however, it is recommended to dual boot your computer for development.
-
Ubuntu Version: 20.04 LTS Focal Fossa
-
ROS Version: ROS Noetic
Guide compiled by Ian (@iangohy).
- PC/Laptop running Windows
- At least 35GB of free disk space
- Install VirtualBox
- Download Ubuntu ISO
- Create Virtual Machine
- Install Ubuntu
- Installing ROS on Ubuntu
- Install VirtualBox Guest Additions (Optional)
-
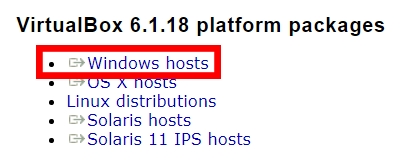
Download VirtualBox for Windows Host here (Version number might be different).
-
Run the .exe file and install VirtualBox.
-
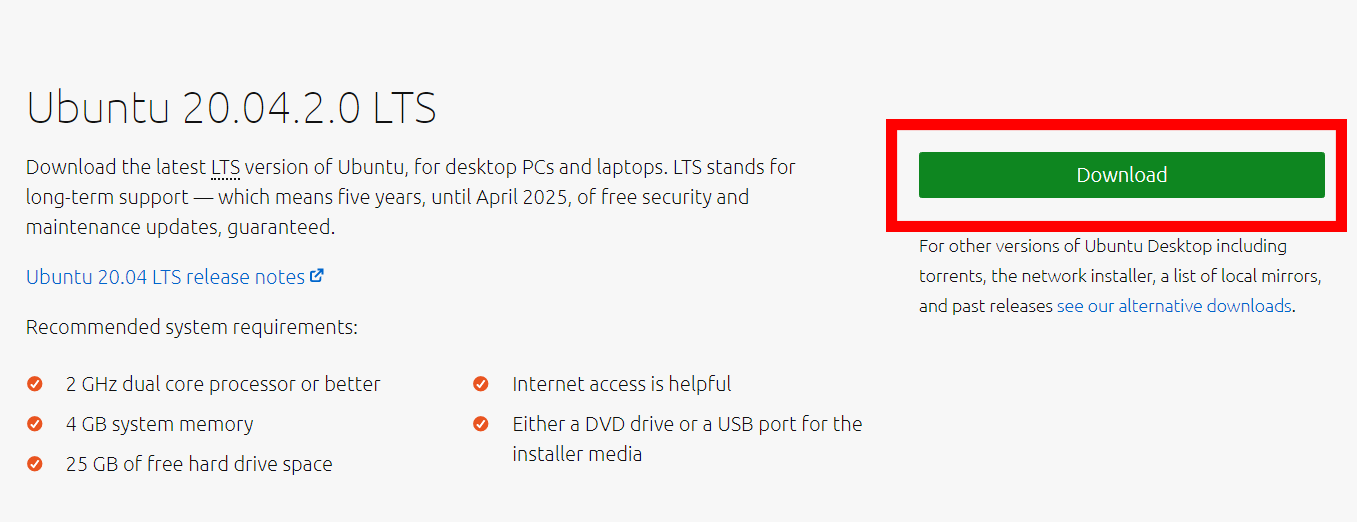
Download Ubuntu ISO here.
Download may take a while as the file size for Ubuntu 20.04.2.0 LTS is 2.7GB.
-
Open VirtualBox.
-
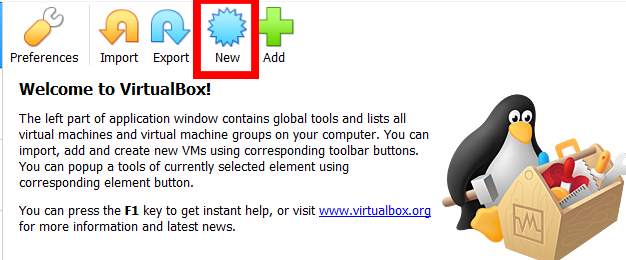
Create a new virtual machine by clicking on the
Newicon or going toMachine > New. -
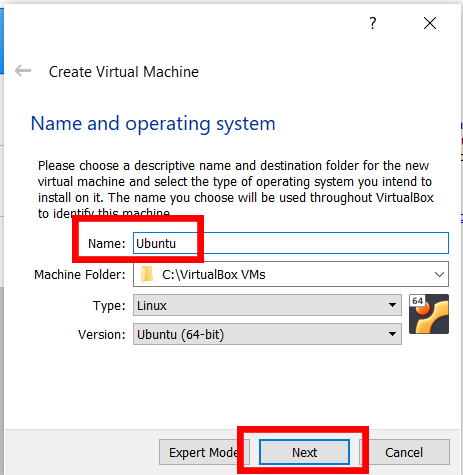
Enter
Ubuntuas the name. Type and Version should be automatically filled for you, if not, set Type toLinuxand Version toUbuntu (64-bit). ClickNext. -
Increase the memory size to
6144MB(6GB). If6144MBis within the orange or red zone, use a memory size of4096MBinstead. ClickNext. -
Select
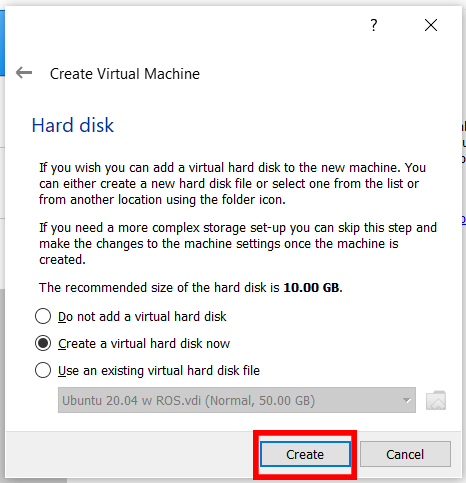
Create a virtual hard disk nowand clickCreate. -
Select
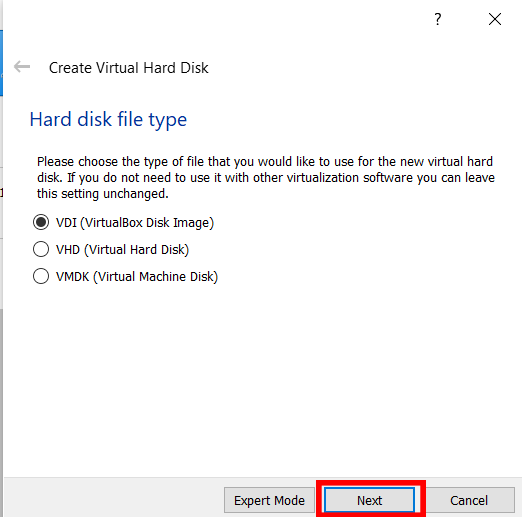
VDI (VirtualBox Disk Image)and clickNext.- Select
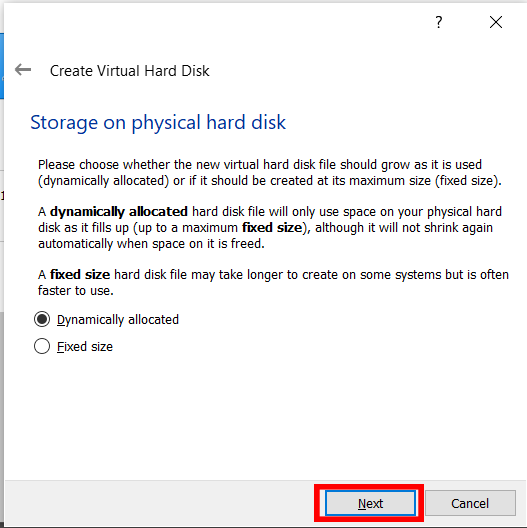
Dynamically allocatedand clickNext.
- Select
-
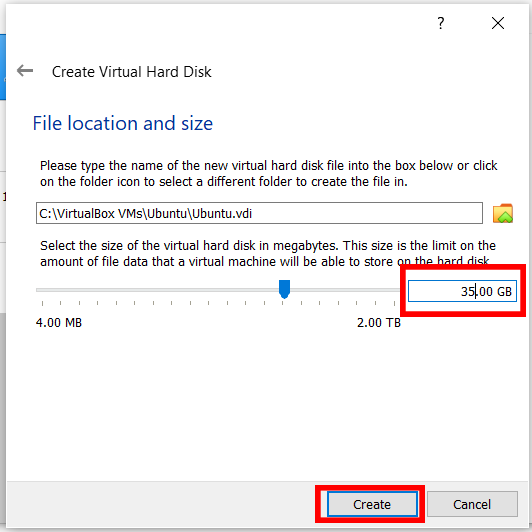
Change the hard disk size to
35.00GB. You may change the location where the disk image is saved at but it is alright to leave it as the default. ClickCreate. -
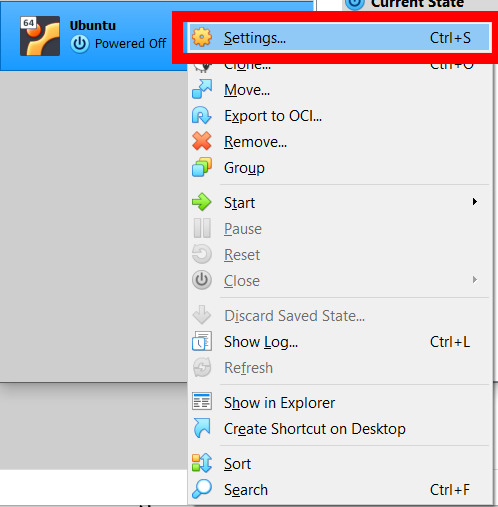
Right-click on the newly created virtual machine and click
Settings. Alternatively single left-click the virtual machine and go toMachine > Settings. -
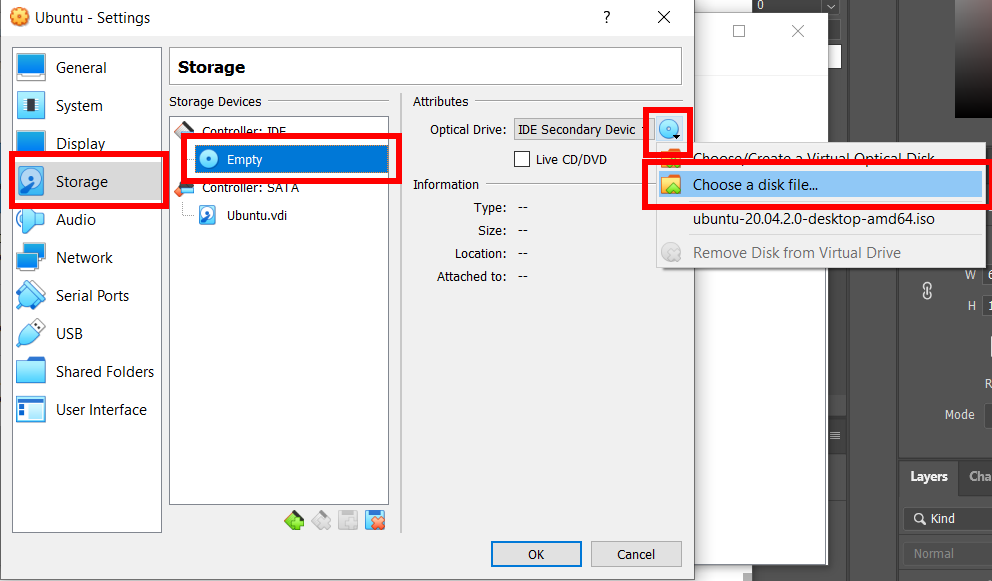
Navigate to
Storageon the left-hand menu and select theStoragetab. Click on the line with the CD. On the right, underOptical Drive, click on the CD icon with the down arrow and selectChoose a disk file.... Navigate to the earlier downloaded Ubuntu ISO.
-
Navigate to
Systemon the left-hand menu and select theProcessortab. Increase the slider until the end of the green zone, which may be different as compared to the diagram below.
-
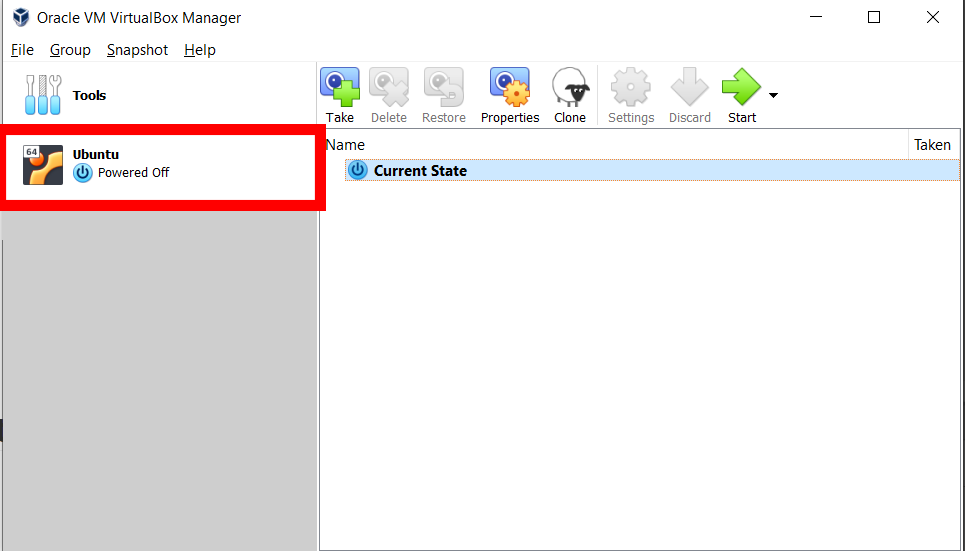
Double click on the newly created virtual machine.
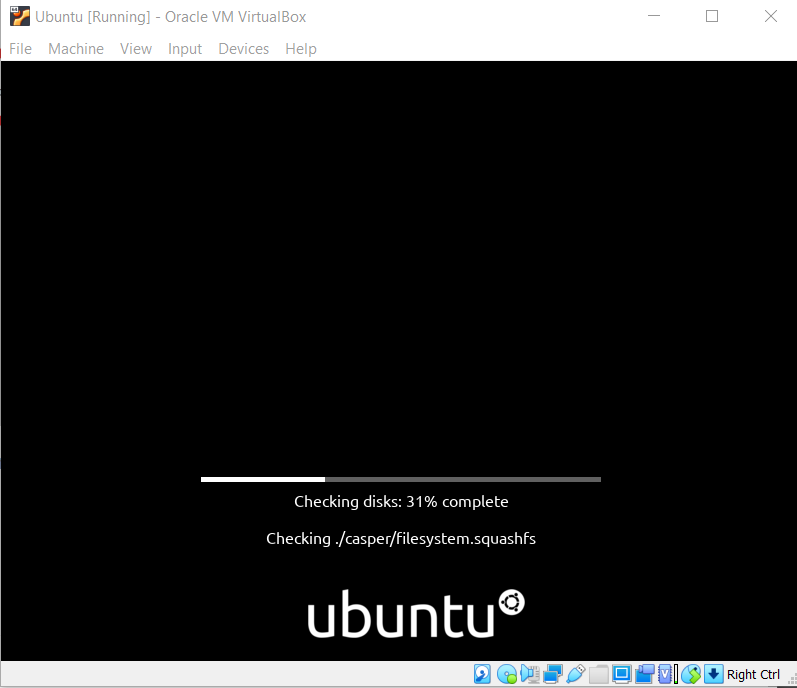
The virtual machine will start to boot
-
Wait while the virtual machine to checks the disk.
-
Select
Install Ubuntu. -
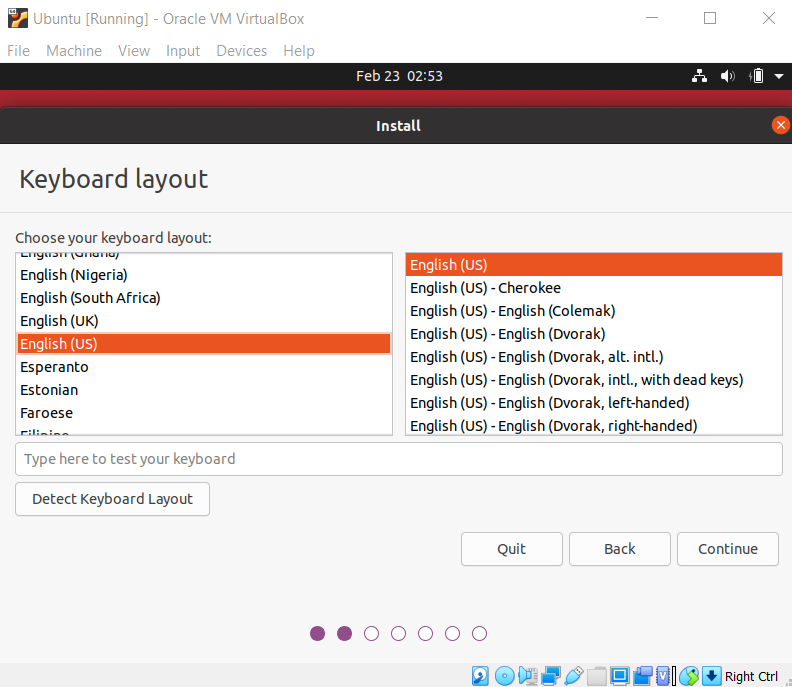
Choose your keyboard layout as
English (US). ClickContinue. -
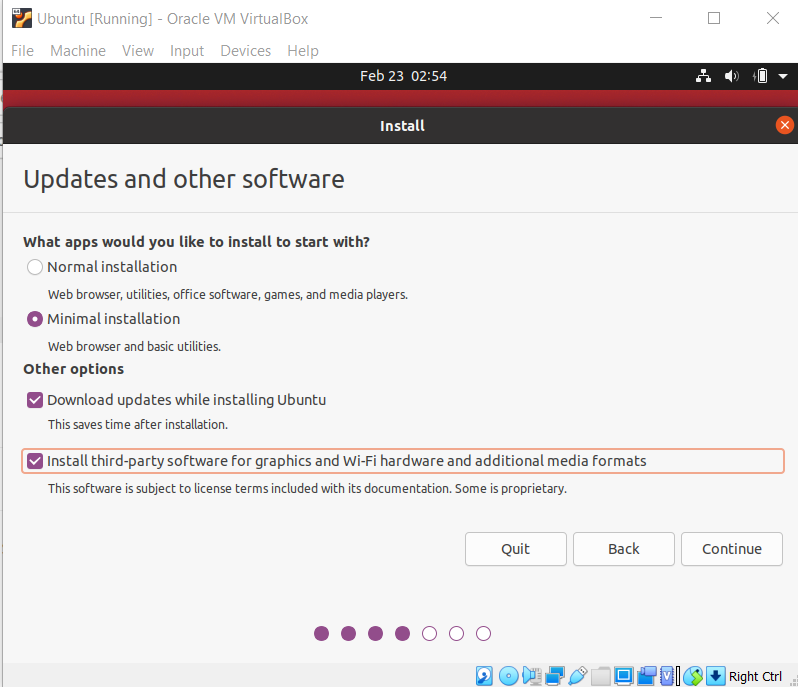
Select
Minimal installation,Download updates while installing UbuntuandInstall third-party software for graphics and Wi-Fi hardware and additional media formats. ClickContinue. -
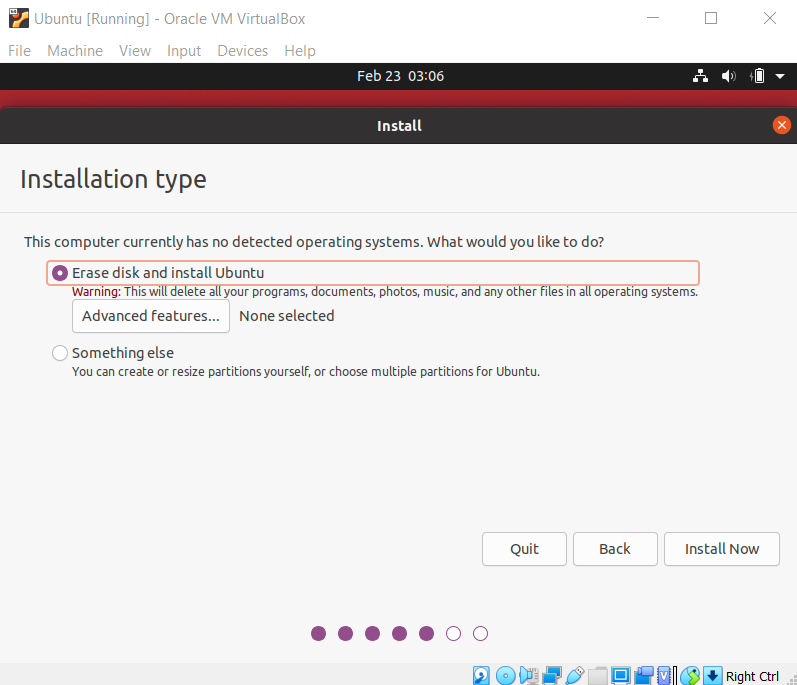
Select
Erase disk and install Ubuntu. ClickInstall Nowand clickContinueif a warning pops out. -
Select your country and click
Continue. -
Enter your personal details and click
Continue. -
Wait while Ubuntu installs. This may take a while.
-
Restart the VM. If prompted to remove the installation medium, just press enter.
-
Congratulations! You've successfully installed Ubuntu on a virtual machine.
-
Follow the instructions found here. For convenience, the commands have been listed below. If you encounter any errors or want to find out more, please go to the link to follow the full guide. Alternatively,
-
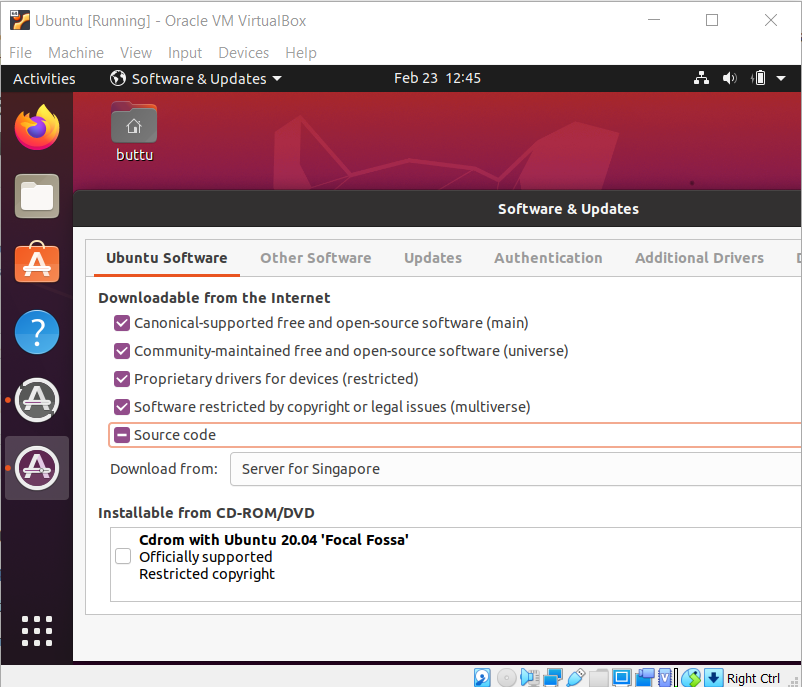
Open
Software & Updatesprogram by pressing the windows key and searchingSoftware & Updates. -
Tick all boxes and click
Close. -
Click
Reload. -
Open a terminal window by pressing the windows key and searching
Terminalor using the keyboard shortcutCtrl+Alt+T. -
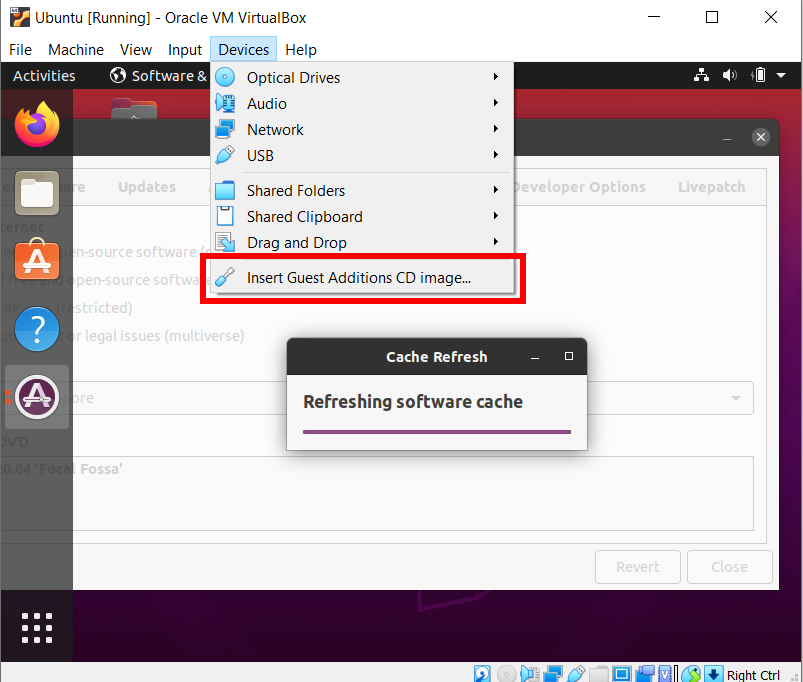
Run the following commands sequentially. For convenience, you may want to install the virtualbox guest additions which will enable
Host to Guestclipboard viaDevices > Shared Clipboard > Host to Guest, allowing you to copy from Windows and paste in Ubuntu. Alternatively, you can navigate to this page on Firefox in the virtual machine to copy and paste the commands.Commands adapted from http://wiki.ros.org/noetic/Installation/Ubuntu.
Set up sources.list
sudo sh -c 'echo "deb http://packages.ros.org/ros/ubuntu $(lsb_release -sc) main" > /etc/apt/sources.list.d/ros-latest.list'Set up keys
sudo apt-key adv --keyserver 'hkp://keyserver.ubuntu.com:80' --recv-key C1CF6E31E6BADE8868B172B4F42ED6FBAB17C654Update Debian package index
sudo apt updateInstall ROS Desktop-Full
sudo apt install -y ros-noetic-desktop-fullSource setup.bash
echo "source /opt/ros/noetic/setup.bash" >> ~/.bashrc
source ~/.bashrc
Install dependencies for building packages
sudo apt install -y python3-rosdep python3-rosinstall python3-rosinstall-generator python3-wstool build-essentialsudo rosdep init rosdep updateCreate a ROS Workspace
mkdir -p ~/catkin_ws/src
cd ~/catkin_ws/
catkin_make
Source catkin workspace
echo "source $(pwd)/devel/setup.bash" >> ~/.bashrc
source ~/.bashrc
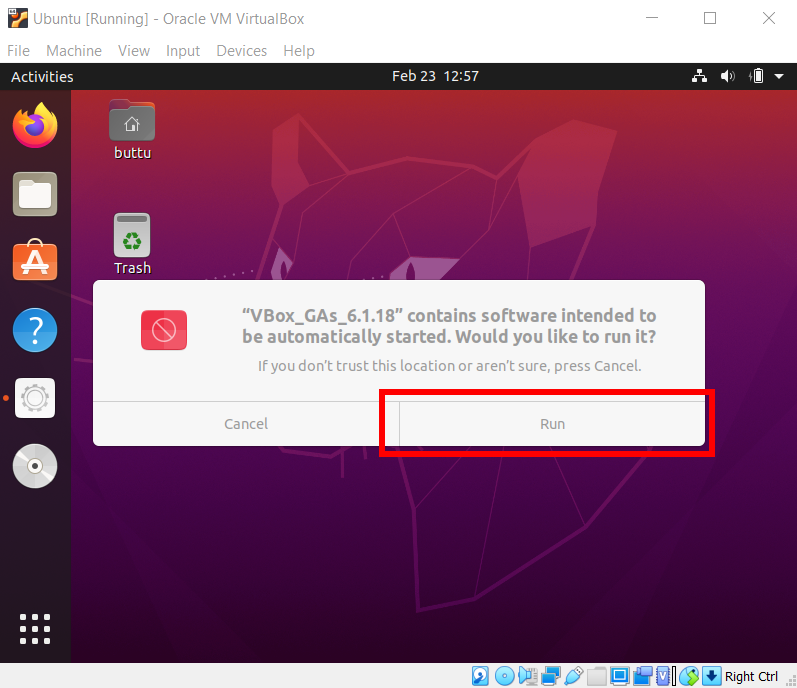
VirtualBox Guest Addition on the guest OS will allow you to resize the window of VirtualBox.
