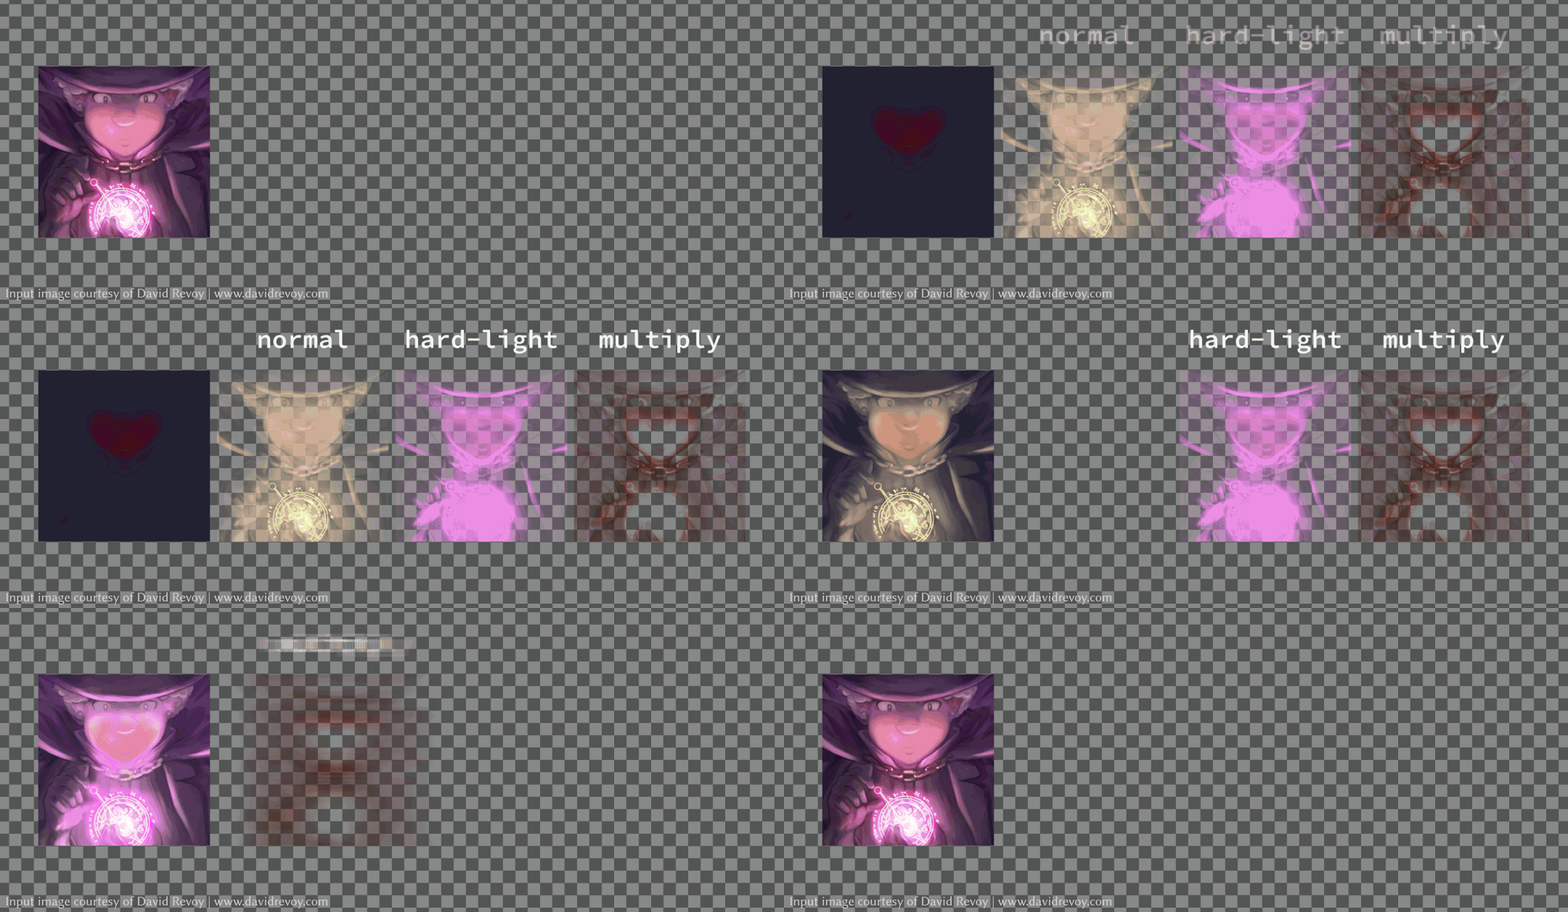
Unblending is a C++ library for decomposing a target image into a set of semi-transparent layers associated with advanced color-blend modes (e.g., "multiply" and "color-dodge"). Output layers can be imported to Adobe Photoshop, Adobe After Effects, GIMP, Krita, etc. and are useful for performing complex edits that are otherwise difficult.
unblendingis a library that provides the main functionality for the use from other programs.unblending-cliis an executable with a command line interface to use the main functionality.unblending-guiis an executable with a graphical user interface to use the main functionality with interactive specification of necessary input parameters.
Yuki Koyama and Masataka Goto. 2018. Decomposing Images into Layers with Advanced Color Blending. Comput. Graph. Forum 37, 7, pp.397--407 (2018). (a.k.a. Proceedings of Pacific Graphics 2018) DOI: https://doi.org/10.1111/cgf.13577
This library is provided mainly for researchers who want to use or extend the method described in the above paper. We also expect that this library is useful for developers who plan to use the method in their software.
Unblending Web App: https://unblending.ongaaccel.jp
- cxxopts https://github.com/jarro2783/cxxopts (included as gitsubmodule)
- json11 https://github.com/dropbox/json11 (included as gitsubmodule)
- NLopt https://nlopt.readthedocs.io/ (included as gitsubmodule)
- nlopt-util https://github.com/yuki-koyama/nlopt-util (included as gitsubmodule)
- parallel-util https://github.com/yuki-koyama/parallel-util (included as gitsubmodule)
- timer https://github.com/yuki-koyama/timer (included as gitsubmodule)
- tinycolormap https://github.com/yuki-koyama/tinycolormap (included as gitsubmodule)
- Eigen http://eigen.tuxfamily.org/
- Qt https://www.qt.io/
Eigen (3.x.x) and Qt (5.x.x) need to be installed beforehand.
brew install eigen qt5sudo apt install qt5-default libeigen3-devUnblending is organized using cmake and is built by the following commands:
git clone https://github.com/yuki-koyama/unblending.git --recursive
mkdir build
cd build
cmake ../unblending
make
This process builds a static library (e.g., libunblending.a) and a command line interface (CLI) named unblending-cli.
The CLI can be used by the following command:
./unblending-cli/unblending-cli [-o <output-dir-path>] [-w <target-image-width>] <input-image-path> <layer-infos-path>The GUI allows you to interactively specify necessary parameters. Currently the GUI is tested on macOS only (pull requests are highly appreciated).
If you use docker, you can easily build the CLI by docker build:
git clone https://github.com/yuki-koyama/unblending.git --recursive
cd unblending
docker build -t unblending-cli:latest .
Then, you can use the CLI by docker run:
docker run --rm --volume $(pwd):/tmp -it unblending-cli:latest [-o <output-dir-path>] [-w <target-image-width>] <input-image-path> <layer-infos-path>For example, the following command generates results into a sub directory named output:
docker run --rm --volume $(pwd):/tmp -it unblending-cli:latest -o /tmp/output -w 120 /tmp/examples/magic.png /tmp/examples/magic.jsonNote: this typically takes around 10--30 seconds with consumer-level laptops.
See LayerInfos.md.
Unblending is dual-licensed; You may use this software under either LGPLv3 or our commercial (proprietary) license. See the LICENSE files for details.
Pull requests are highly welcome. Please be aware that any contribution to this repository will be licensed under the above license condition.
- Yuki Koyama
- Masataka Goto
Copyright (c) 2018 National Institute of Advanced Industrial Science and Technology (AIST) - koyama.y@aist.go.jp

