By Sudharsan Ananth, Taiyi Pan, Pratyaksh Prabhav Rao,
New York University
Table of Contents
- Introduction
- Dependencies
- Experiments in 2d Environment
- Prerequisites
- Step-by-Step Installation
- Install Anaconda
- Create conda environment
- Install basic packages in environment
- Install Habitat-sim and test
- Install Habitat Lab and Test
- Clone SplitNet repo
- Run Test
- Experiments
- Results
- References
- License
- Acknowledgments
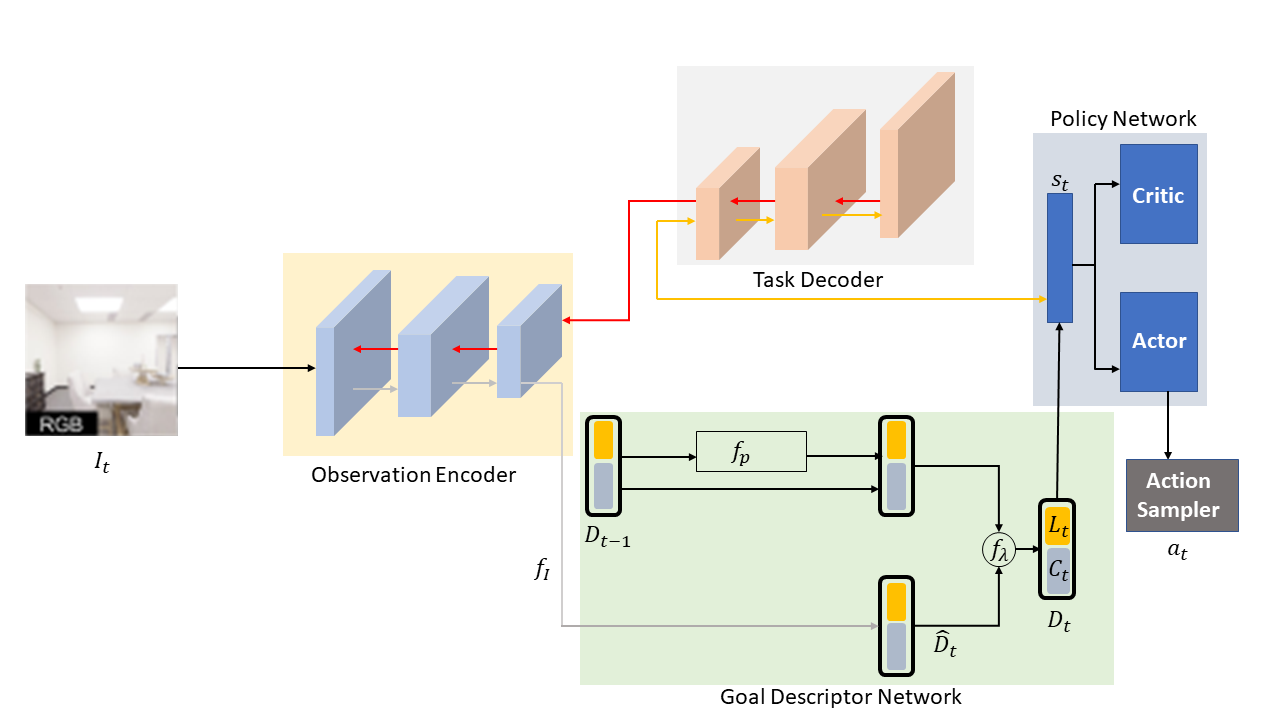
The main goal of the embodied navigation task is to allow an agent to find a target location by perceiving embodied visual inputs. In this project, we hope to tackle some of the challenges discussed above using an end-to-end deep reinforcement learning framework. Our framework will include feature extraction for understanding the perceived visual cue and a reinforcement learning policy for taking necessary actions. Our proposed framework allows for the sharing and reuse of information between different visual environments. Rather than learning the task of visual perception and policy learning independently or completely tied, we build on the work of Kim et al. for learning these embodied visual tasks which benefits both from the scalability and strong in-domain, on-task performance of an end-to-end system and from the generalization and fast adaptability of modular systems.
This project is built with the below given major frameworks and libraries. Some of the libraries and tools support are supported only for Linux and Mac OS. The code is primarily based on python. And the environment is created using Anaconda. All the program is tested in Ubuntu 20.04 LTS with python version 3.7.11 and cmake version 3.14.0. Some of the libraries used are habitat, pytorch, matplotlib, opencv and many libraries are found in requirements.txt.
A high-performance physics-enabled 3D simulator with support for:
- 3D scans of indoor/outdoor spaces (with built-in support for HM3D, MatterPort3D, Gibson, Replica, and other datasets)
- CAD models of spaces and piecewise-rigid objects (e.g. ReplicaCAD, YCB, Google Scanned Objects),
- Configurable sensors (RGB-D cameras, egomotion sensing)
- Robots described via URDF (mobile manipulators like Fetch, fixed-base arms like Franka,quadrupeds like AlienGo),
- Rigid-body mechanics (via Bullet).
habitat2_small.mp4
Habitat Lab currently uses Habitat-Sim as the core simulator, but is designed with a modular abstraction for the simulator backend to maintain compatibility over multiple simulators. For documentation refer here.
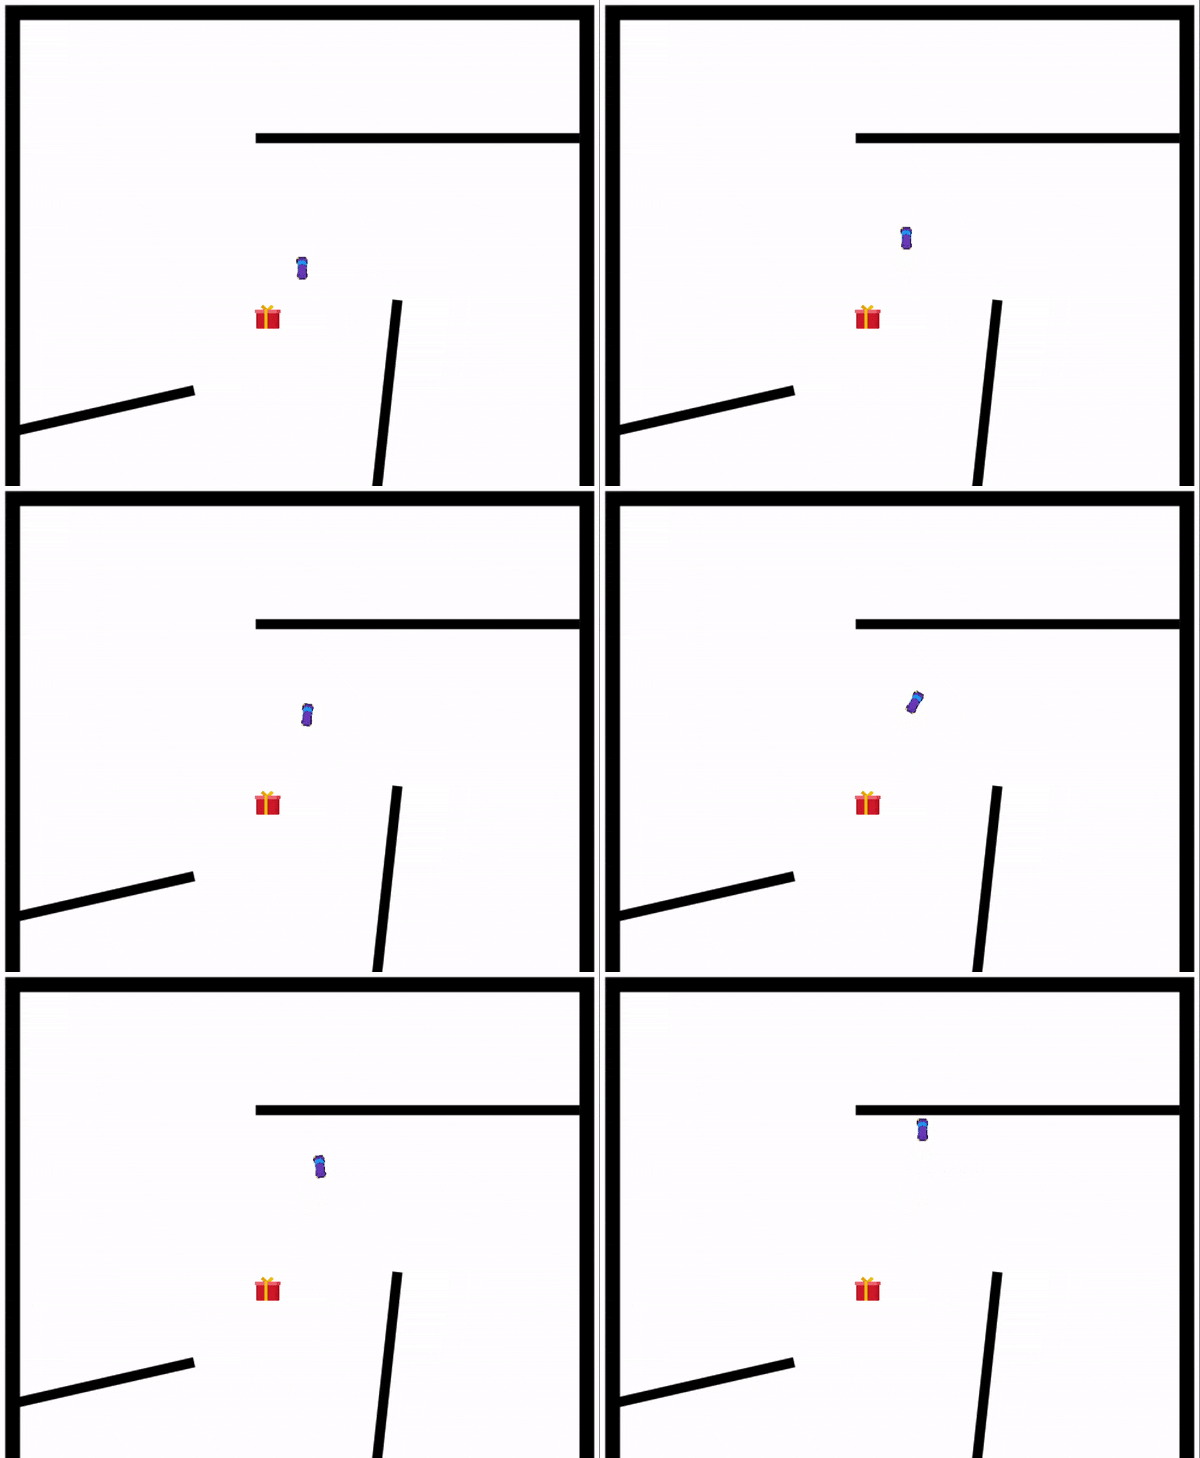
The project started with a reinforcement learning snake game, and then a 2D agent navigating in a indoor map was created as a starting ground for out project. Both environment was developed in pygame, the agents use Deep-Q-Learning to train and navigate. This can be easily recreated by following the steps below. The snake agent takes around 1 hour to completely train and by using a deeper and much complex model it can navigate better. But to make this section easily reproduceble a faster and much efficient model is used. The car agent which is much complex uses a deeper model and has few glitches, this repo will be continously updated to fix issues since this is a on going research. Also note that this experiments run in Windows, Mac and Ubuntu.
This game is the starting point from which the project was developed, this gives a easy representation of the problem we are solving. This part of the code is easy to recreate and gives result real time, since we will be working on a much smaller model and simpler environment. You will be able to see the agent training and getting better in minutes.
Simply clone the repo cd into the right directory and run agent using the below commands. Step-by-Step instructions given below
-
Clone the repository using
git clone https://github.com/taiyipan/drlevn
-
cd into the directory rl_snake_game
cd rl_snake_game -
Recommended: create a conda environment
# We require python>=3.7 conda create -n rl_visual_agents python=3.7 numpy matplotlib conda activate rl_visual_agents -
Install opencv-python version 4.5.5
conda install -c conda-forge opencv
-
Install pygame
pip install pygame
-
Install pyTorch (CPU verison). Please refer pytorch website to get right version for GPU.
# https://pytorch.org/get-started/locally/ conda install pytorch torchvision torchaudio cpuonly -c pytorch -
Run
agent.pyfrom this directory and from inside this environmentpython agent.py
-
To run the environment without Reinforcement Agent and the agent controllable by WASD keys
python snake_game.py
 This game gives much better understanding of how complex the project becomes as soon as we start adding elements. This agent is why we pivoted to habitat sim, and their tools for futer continuation of the project. In this environment the agent can see only a small section around the agent. The agent will learn and remember the environment. Note this is still a Experimental Version and might not run with certain hardware and configurations.
Simply clone the repo cd into the right directory and run agent using the below commands. Step-by-Step instructions given below. Most of the steps are similar to the previous agent above, simply change the directory and run agent.py from the directory RL_car_game. Skip step 1 and 3 if the previous snake agent was reproduced.
-
Clone the repository using
git clone https://github.com/taiyipan/drlevn
-
cd into the directory rl_snake_game
cd RL_car_game -
Recommended: create a conda environment
# We require python>=3.7 conda create -n rl_visual_agents python=3.7 numpy matplotlib conda activate rl_visual_agents -
Install opencv-python version 4.5.5
conda install -c conda-forge opencv
-
Install pygame
pip install pygame
pip install IPython
-
Install pyTorch (CPU verison). Please refer pytorch website to get right version for GPU.
# https://pytorch.org/get-started/locally/ conda install pytorch torchvision torchaudio cpuonly -c pytorch -
Run
agent.pyfrom this directory and from inside this environmentpython agent.py
-
To run the environment without Reinforcement Agent and the agent controllable by WASD keys
python baseline_game.py
This project is not supported in windows. Habitat sim is not available for Windows and is available only on Mac OS and Linux. The procedure for running this experiment in Mac OS is slightly different but the steps are the same. The link for Habitat-sim is given below along with the supported OS.
Also please note that these results cannot be performed in a virtual machine. The dependencies and the path conflicts and will not work in a virtual machine with any verison of Ubuntu or Linux distributions.
To reproduce the experiment and to facilitate faster training the use of super computer cluster with good graphics card is required. We have trained our model in NYU's HPC (High Performance Computing) platform. follow the PDF instructions given below to run experiments remotely in a super computer cluster.
To reproduce the results and to run the experiment follow the instructions in this section.
-
Update Local Package Manager
sudo apt-get update
-
If your system doesn’t have
curl, install it by entering:sudo apt-get install curl
-
Retrieving the Latest Version of Anaconda. Copy paste the below link in a web browser and right click the download button and copy the url
https://www.anaconda.com/distribution/
-
Create a Temporary Directory, and download anaconda using curl. make sure to change the url to the one copied from the above step
mkdir tmp cd /tmp curl –O https://repo.anaconda.com/archive/Anaconda3-2020.02-Linux-x86_64.sh -
Running the Anaconda Script. Press yes, accept the terms and aggrements and install anaconda after pasting the below line.
bash Anaconda3-2019.03-Linux-x86_64.sh -
Activating Installation
source ~/.bashrc
-
Install Pip
sudo apt install python3-pip
-
Install Git
sudo apt install git
-
Preparing Conda Environment
# We require python>=3.7 and cmake>=3.10 conda create -n habitat python=3.7 cmake=3.14.0 conda activate habitat -
Installing basic package managers for easy installation.
# We need Git and pip to install requirments. Ensure to install inside the environment. sudo apt install python3-pip sudo apt install git -
Create a Directory for all the dependencies and libraries.
cd ~
mkdir drlevn_prj
cd drlevn_prj
- To install habitat-sim with bullet physics (Needed). Should be inside the Environment.
conda install habitat-sim withbullet -c conda-forge -c aihabitat
- To check if the installation of habitat was successful
python > import habitat - Clone the Habitat-sim from the GitHub
git clone https://github.com/facebookresearch/habitat-sim
- Run
example.pyto check that everything is installed correctly.python habitat_sim/examples/examples.py
- Clone a stable version from the github repository and install habitat-lab. And also install habitat_baselines along with all additional requirements using the command below.
git clone --branch stable https://github.com/facebookresearch/habitat-lab.git
cd habitat-lab
pip install -r requirements.txt
python setup.py develop --all # install habitat and habitat_baselines
- Run the example script python
examples/example.pywhich in the end should print out number of steps agent took inside an environment (eg:Episode finished after 18 steps.).python examples/example.py
- Go back to the previous directory
drlevn_prjby usingcd ..cd .. - Clone the SplitNet
git clone https://github.com/facebookresearch/splitnet.git cd splitnet - deactivate the environment and update the enviroment with configuration file
environment.yml. This step will remove all the conflicts and update many libraries. This step might take several minutes.conda deactivate conda env update -n habitat -f environment.yml conda activate habitat
SplitNet Data. We use the data sources linked from the public habitat-api repository. You will need to individually download MP3D, and Gibson from their sources. habitat-sim and habitat-api share the links to the files. We additionally use the Point-Nav datasets from habitat-api, but we also provide a script for generating new datasets.
- Create a symlink to where you downloaded the directory containing the
scene_datasetsasset files for each of the datasets. Call this folderdataln -s /path/to/habitat/data data
- Copy/Move the downloaded datasets into the data folder.
mv downloaded_data/* data
Evaluation can be performed during training using the --eval-interavl flag, but you may also wish to evaluate an individual file on its own. eval_splitnet.sh makes this possible.
-
Edit the
DATASET,TASK, andLOG_LOCATIONin eval_splitnet.sh and any other variables you wish. -
By default, the code restores the most recently modified weights file in the checkpoints folder. If this is not the one you want to evaluate, you will have to edit base_habitat_rl_runner.py
restorefunction to point to the proper file. -
Run
sh eval_splitnet.sh
-
Clone the repo inside(skip if all the above steps are followed)
git clone https://github.com/taiyipan/drlevn.git
-
Follow steps to install habitat sim, habitat lab, and requirements.txt from above.
-
Clone the repo inside the
drlevn_prjdirectorycd drlevn -
Train the agent using
train_drlevn.pypython train_drlevn.py
The proposed framework is validated by utilizing the Habitat scene renderer on scenes from the near photo-realistic 3D room datasets, Matterport 3D and Gibson.
Results indicate that the SplitNet framework outperforms all other baselines when validated for both the datasets (refer Table 1). It achieved a SPL of 0.72 and a success rate of 0.84 in the MP3D setup, and a SPL of 0.70 and a success rate of 0.85 in the Gibson environment. It is not surprising to find that the SPL and success rate of the Random baseline are very low because the agent was unable to anticipate the position of the target and relies on chance. The Blind Goal Follower baseline is better than Random, as the agent can anticipate the position of the target since it is provided with an update goal vector. The blind methods are not provided with visual inputs.
| Results | MP3D | Gibson | ||
|---|---|---|---|---|
| IDK what | SPL | Success | SPL | Success |
| Random | 0.011 | 0.016 | 0.046 | 0.028 |
| Blind Goal Follower | 0.199 | 0.203 | 0.155 | 0.158 |
| E2E PPO | 0.322 | 0.477 | 0.634 | 0.831 |
| E2E BC, PPO | 0.521 | 0.733 | 0.606 | 0.769 |
| SplitNet + BC | 0.45 | 0.73 | 0.44 | 0.66 |
| SplitNet BC + PPO | 0.72 | 0.84 | 0.70 | 0.85 |
Distributed under the MIT License. See LICENSE.txt for more information.
Taiyi Pan - taiyipan@gmail.com
Pratyaksh Prabhav Rao - pr2257@nyu.edu
Sudharsan Ananth - sudharsan.ananth@gmail.com
Project Link: https://github.com/taiyipan/TPSNet
We would like to express our thanks to the people who's discussion helped us through the project. We are grateful to Prof. Siddharth Garg, Prof. Arsalan Mosenia and the teaching assistant Ezgi Ozyilkan for their nonstop support. Lastly, we would like to extend our special thanks to the teaching team for giving us this opportunity to work on these assignments and projects. They were extremely helpful and pertinent to understanding the concepts.


