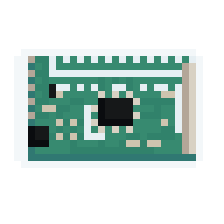
ROS2 node for controlling PWM boards based on the PCA9685 chip with an I²C interface. Primary use is for controlling RC Servos and DC motors via PWM. This is based on ros-i2cpwmboard (OUTDATED) with updates to make it work on ROS2.
When you launch the program, you can now choose your I²C bus. Here's an example:
ros2 run i2c_pwm_board controller 1 # The "1" tells the program to open the i2c-1/ bus, but you can change it to your desired bus.This will be particularly useful for opening several buses between programs, and for easily adapting to the RPi Zero, which has an i2c-0/ bus by default.
# Setting PWM frequency to 50Hz.
ros2 service call /set_pwm_frequency i2c_pwm_board_msgs/srv/IntValue "{value: 50}"

# Configuring two servos.
ros2 service call /config_servos i2c_pwm_board_msgs/srv/ServosConfig "servos: [{servo: 1, center: 333, range: 100, direction: -1},{servo: 2, center: 336, range: 108, direction: 1}]"

# Configuring those two servos on differential mode.
ros2 service call /config_drive_mode i2c_pwm_board_msgs/srv/DriveMode "{mode: differential, rpm: 56.0, radius: 0.0055, track: 0.015, scale: 1.0,servos: [{servo: 1, position: 1}, {servo: 2, position: 2}]}"

# Drive both servos forward using proportional value between [-1; 1].
ros2 topic pub -1 /servos_proportional i2c_pwm_board_msgs/msg/ServoArray "{servos:[{servo: 1, value: 0.40}, {servo: 2, value: 0.40}]}"

# More documentation at the original page of the project (for ROS1) -> https://github.com/mentor-dyun/ros-i2cpwmboard/tree/master/doc or https://gitlab.com/fmrico/ros-i2cpwmboard/-/tree/master/docYou need to have ROS2 installed (of course) and these packages provided by the default desktop installation below :
- rclcpp, std_msgs, std_srvs, geometry_msgs
- rosidl_default_generators, rosidl_default_runtime
- Have
python3-colcon-common-extensionsinstalled - Have
libi2c-devandi2c-toolsinstalled - Have the xmlrpcpp package
You can clone and run this package by copying the command below :
- Note that if you want to run this project, you have to clone the xmlrpcpp packages :
git clone --recursive https://github.com/vertueux/i2c_pwm_board.gitYou can install the i2c library and colcon by running the install scripts located at install_scripts/install_dependencies.sh.
Simply just copy & paste this code :
cd install_script/
chmod +x install_dependencies.sh
./install_dependenciesMake sure that both I²C and SPI are enabled by default. Check the file /boot/firmware/syscfg.txt and see if you have the following lines :
dtparam=i2c_arm=on
dtparam=spi=on
If not, maybe you can append them on /boot/firmware/usercfg.txt and reboot, and hopefully, that works. If that doesn't work, maybe do sudo apt update && sudo full-upgrade -y and see if there are any distro updates needed.
- Refer to this post.
You can also add the following line to /boot/config.txt :
dtparam=i2c_arm=onAs well as this line to /etc/modules :
i2c-dev- Refer to this post.
With raspi-config, you can enable i2c by navigating to Interface Options->Advanced->I²C and then enable it.
Now when you log in you can type the following command to see all the connected devices
sudo i2cdetect -y 1 # Or 0, depends on the device you use.source /opt/ros/humble/setup.bash # With Debian binaries
cd /i2c_pwm_board/
colcon build --packages-select i2c_pwm_board i2c_pwm_board_msgs xmlrpcpp
source install/setup.bash # Do not change directoryIn order to run the project, you just have to perform this command :
ros2 run i2c_pwm_board controller # You can add your I²C bus address as a digit (like 1 to open i2c-1/).