NOTE XAC firmware released in June 2024 maps the joystick hat switch to the XAC dpad. See https://github.com/touchgadget/xac_onehand_controller for details on remapping the XAC dpad to the XAC right joystick. This is a simpler alternative to this project.
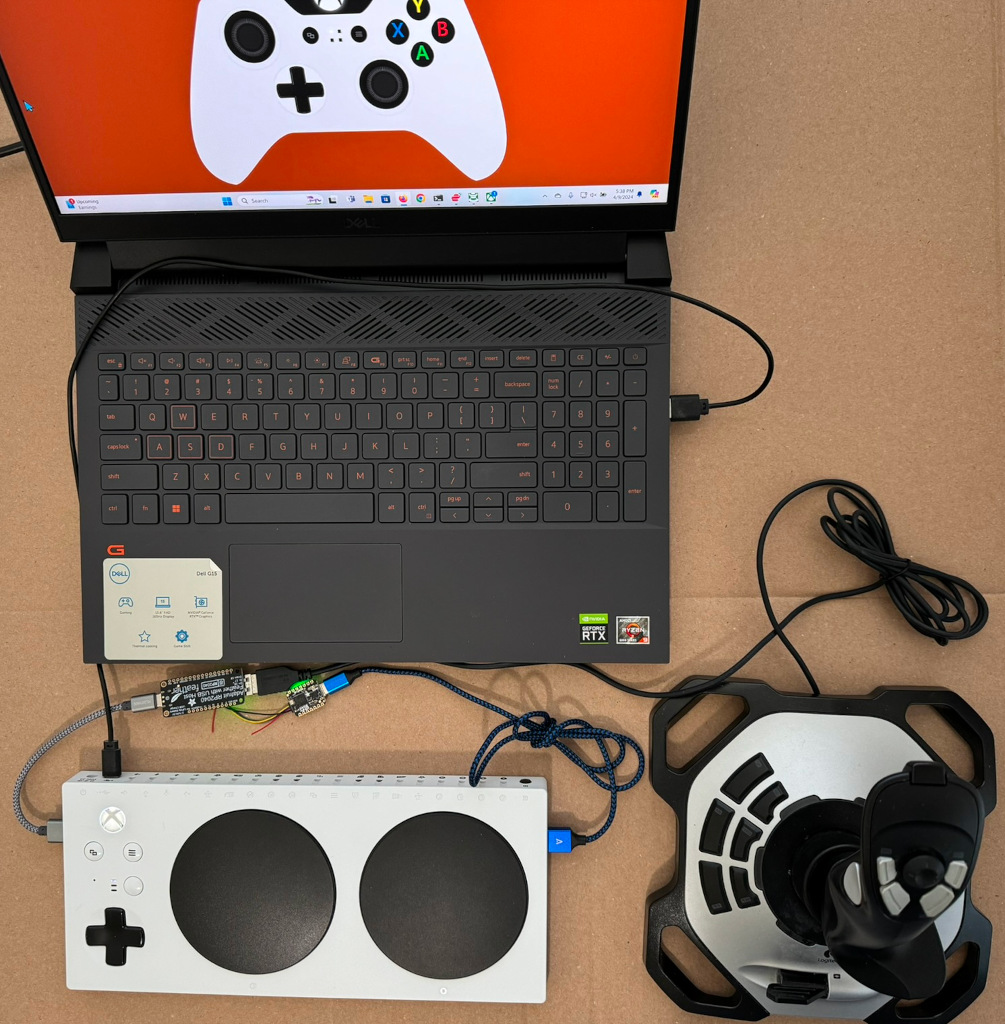
xac_onehand connects a USB flight stick such as a Logitech Extreme 3D Pro to both USB ports on an Xbox Adaptive Controller (XAC). This allows one handed players to play two joystick games.
This project was inspired by an older XAC joystick splitter project. This project uses newer boards and is simplified by using QWIIC/Stemma QT to connect the boards. No soldering is needed for one option.
Note the cut red wire. More below. The wire ends are left flying to make clear in the photo the red wire is cut. The ends should be trimmed closer to connectors.
This works with the Logitech Extreme 3D Pro and the Logitech X52 H.O.T.A.S. joysticks. No soldering. The Thrustmaster joystick does not work with this configuration.
- 1 X Adafruit QT Py RP2040
- 1 X QWIIC/Stemma QT cable
- 1 X Adafruit Feather RP2040 with USB Type A Host
- 1 X Adafruit Case
The Feather RP2040 with USB Type A Host board plugs in to the XAC left USB port. The flight stick X and Y axes control the XAC left thumb stick.
The QT Py RP2040 plugs in to the XAC right USB port. The flight stick Z/twist axis controls the right thumb stick X axis. The flight stick hat switch forward and backward control the right thumb stick Y axis.
The RP2040 USB host sends joystick parameters to the QT Py over the QWIIC/Stemma QT I2C port. The QT Py relays the joystick parameters out its USB port.
This works with the Logitech Extreme 3D Pro, the Logitech X52 H.O.T.A.S. joysticks, and the Thrustmaster T.16000M FCS. The QT Py RP2040 and USB Host BFF must be soldered.
- 2 X Adafruit QT Py RP2040
- 1 X Adafruit QT Py RP2040
- 1 X QWIIC/Stemma QT cable
- 1 X Adafruit Case
The Feather RP2040 with USB Type A Host board plugs in to the XAC left USB port. The flight stick X and Y axes control the XAC left thumb stick.
The QT Py RP2040 plugs in to the XAC right USB port. The flight stick Z/twist axis controls the right thumb stick X axis. The flight stick hat switch forward and backward control the right thumb stick Y axis.
The RP2040 USB host sends joystick parameters to the QT Py over the QWIIC/Stemma QT I2C port. The QT Py relays the joystick parameters out its USB port.
Cut the red wire on the QWIIC cable to avoid damaging the boards. Both boards are sourcing power on the QWIIC red wire. Power outputs should never be connected to each other. Both boards are powered from their USB connectors so there is no need for power from the QWIIC cable.
Burn this UF2 file into the QT Py RP2040.
This explains how to put the board in bootloader mode. When the USB drive RPI-RP2 appears, drag and drop the UF2 file on the drive.
https://learn.adafruit.com/adafruit-qt-py-2040/pinouts#buttons-3091444
This explains how to put the board in bootloader mode. When the USB drive RPI-RP2 appears, drag and drop the UF2 file on the drive.
This is optional because compiled code is available in the uf2/ folder.
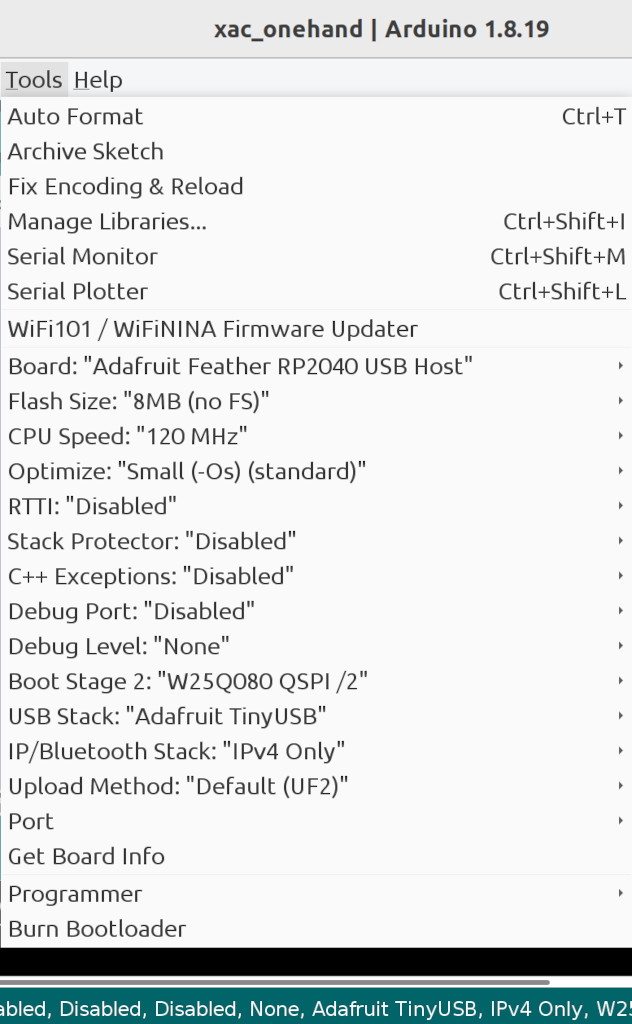
Note the following options must be changed from the default values.
- The "CPU Speed" option is set to "120 MHz".
- The "USB Stack: option is set to "Adafruit TinyUSB".
The Arduino IDE 1.8.19 is used but newer versions should also work.
Install the following libraries using the IDE library manager.
- Adafruit TinyUSB Library
- Pico PIO USB
Install a ZIP file from https://github.com/touchgadget/flight_stick_tinyusb then install the library using the IDE "Install ZIP Library".
https://learn.adafruit.com/case-for-feather-rp2040-usb-host
This can be done on Windows and Xbox console.

