This is the project repo for the final project of the Udacity Self-Driving Car Nanodegree: Programming a Real Self-Driving Car. For more information about the project, see the project introduction here.
It is a solo submission by:
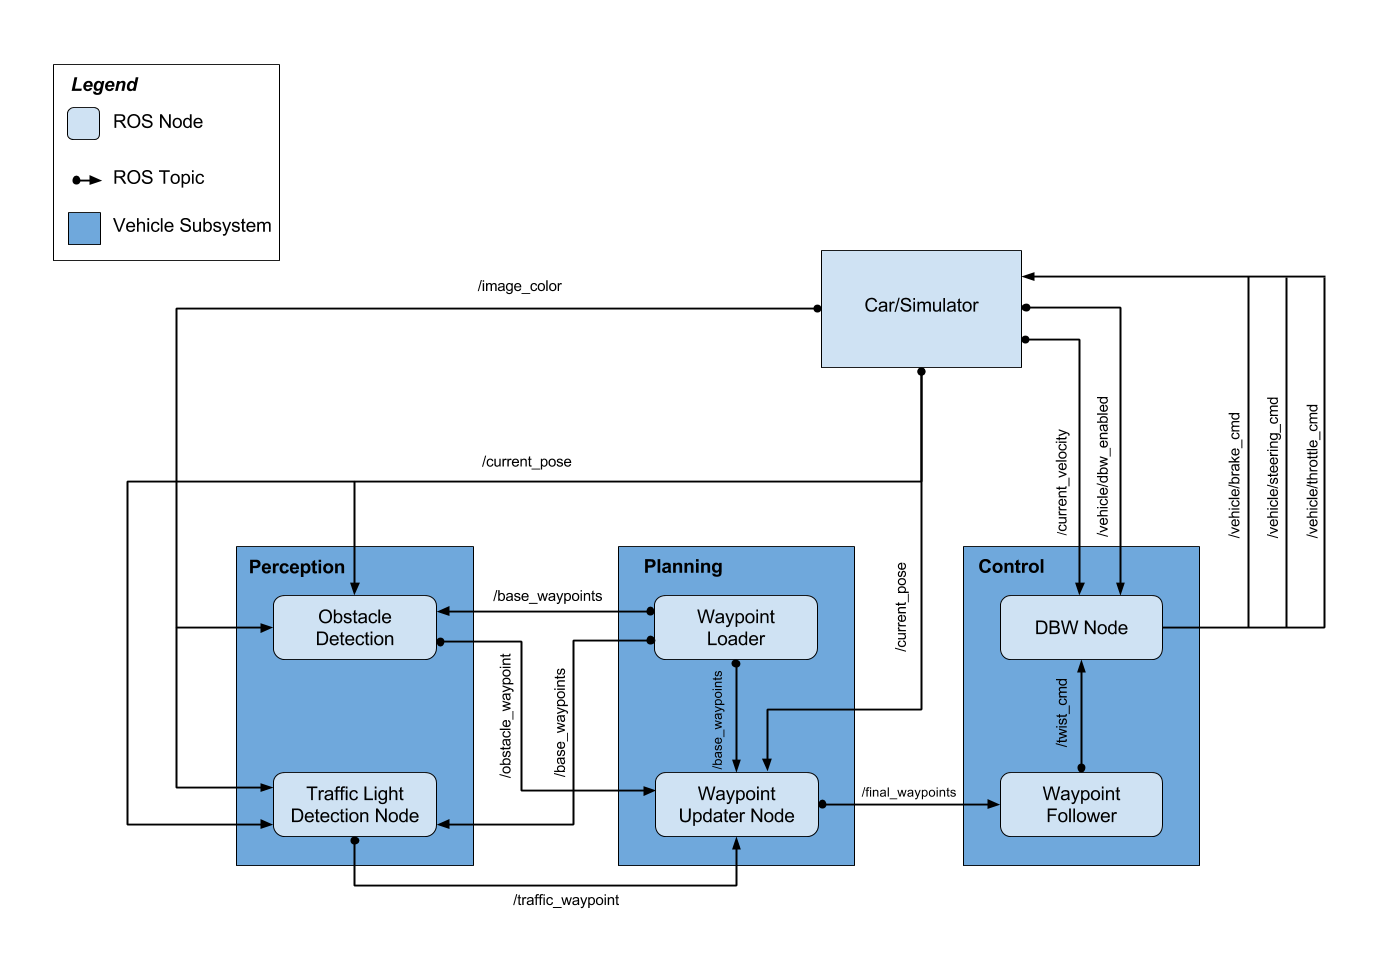
The following is a system architecture diagram showing the ROS nodes and topics used in the project.
For detecting traffic lights from a camera feed a pre-trained on the COCO dataset model ssdlite_mobilenet_v2_coco has been taken from the Tensorflow detection model zoo. The model was selected based on the processing speed as being the fastest among the latest listed. Although the frozen inference graphs were generated using the v1.8.0 release version of Tensorflow and the project required version v1.3.0, the model appeared to be compatible with that version.
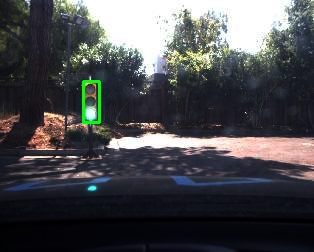
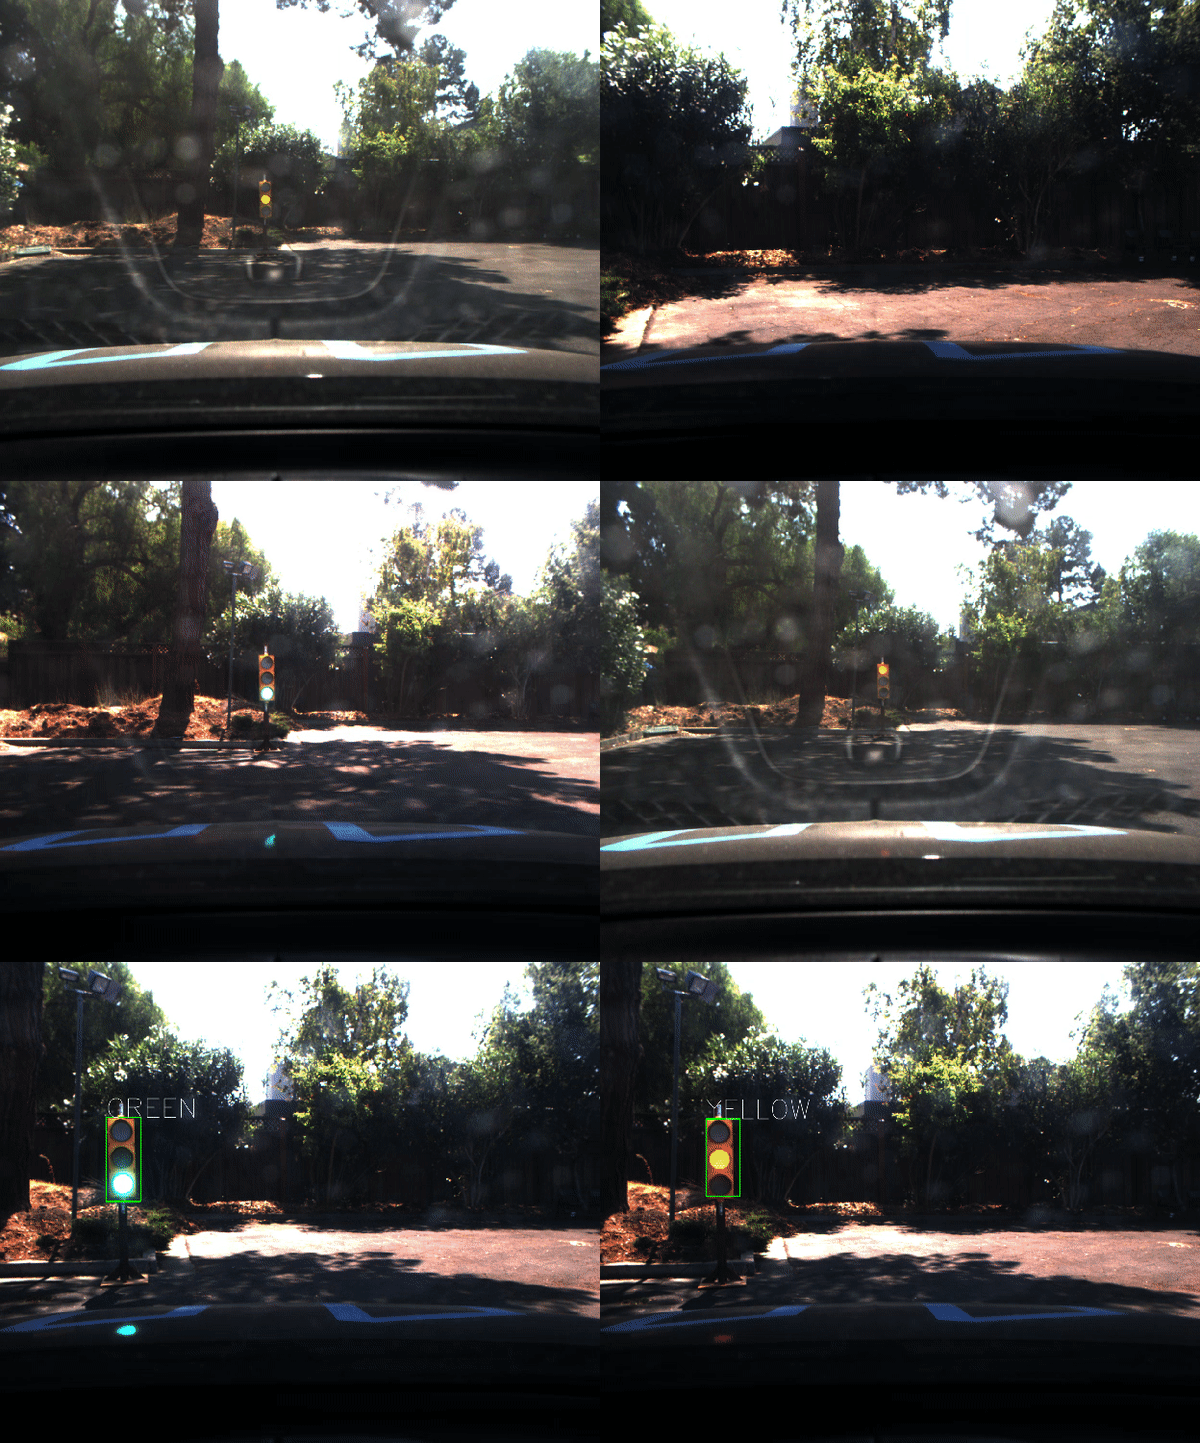
Once the model finds the traffic lights and provides you the boundary boxes, the next step is to crop the traffic light images from the scene based on those boxes and identify the color. The approach is entirely based on image processing:
- Convert the image into LAB color space and isolate the L channel. Good support material can be found here.
- Split the traffic light cropped image onto three equal segments - upper, middle, and lower corresponding to read, yellow, and green lights respectively.
- To identify the color, we need to find out which segment is brighter. Thanks to the LAB color space, L channel gives us exactly that information. All we need to do is to find the sum of all pixels in each of the three segments. The highest score gives us the traffic light color.
The light is GREEN
In the real scenario several filtering methods are applied to give a more reliable estimate.
- Among all the lights detected in a frame, the one with the highest confidence score is selected.
- The respected lights' boundary box is verified based on the aspect ratio. If it doesn't fit into our threshold, that means the image will not be correctly cropped and the color may be wrongly identified.
- Gamma correction was used to enhance too bright images at every second frame.
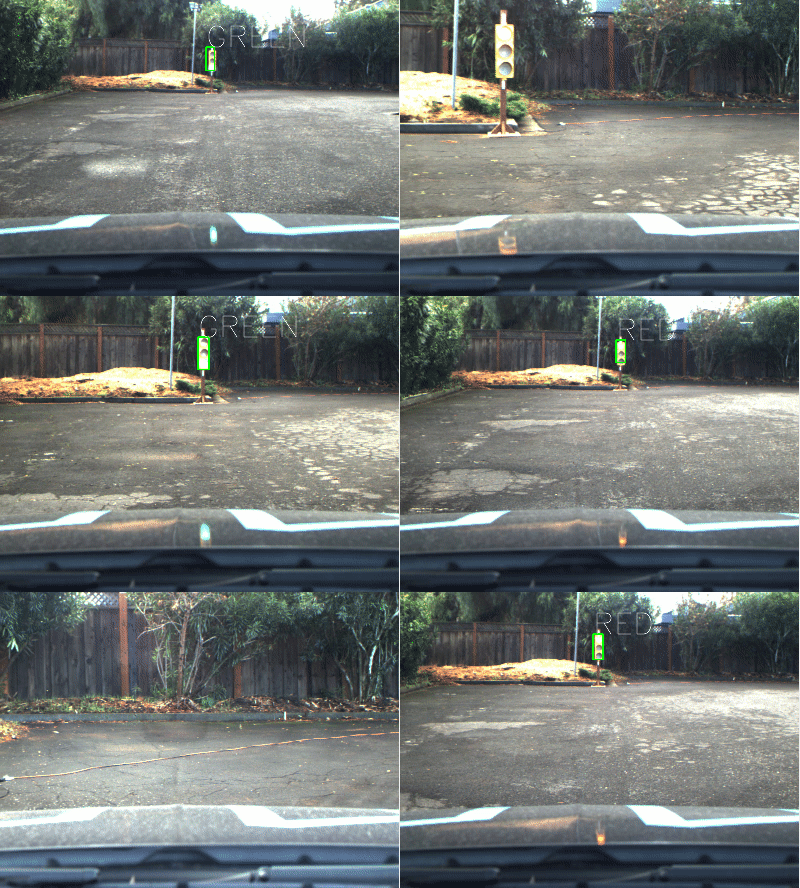
Although the results with the ssdlite_mobilenet_v2_coco model were quite satisfactory, it didn't perform good enough on the traffic_light_training.bag bagfile. To improve the performance, another model was used (ssd_mobilenet_v1_coco_2017_11_17) that was retrained on a dataset kindly shared by one of the Nanodegree's alumni. It was a great help finding a project of another student with a GitHub nickname coldKnight explaining how to re-train the models. But due to the project's requirement to use TensorFlow 1.3 the steps described could not be directly followed since the research models and the tools required to train the models for TensorFlow 1.3 are kindly removed from the earlier releases. The version supported on the date of this writing was 1.8.0.
There are two ways one could still get the older version of the tensorflow/models repo:
- On archive.org:
$ wget https://archive.org/download/github.com-tensorflow-models_-_2017-10-05_18-42-08/tensorflow-models_-_2017-10-05_18-42-08.bundle
$ git clone tensorflow-models_-_2017-10-05_18-42-08.bundle -b master
$ mv -r tensorflow-models_-_2017-10-05_18-42-08 ~/tensorflow/models- By knowing the commit's hash:
$ cd ~/tensorflow/
$ git clone https://github.com/tensorflow/models.git
$ cd models
$ git checkout edcf29f
After that you need to follow a simple installation process described here. In case od doubt you can always find the instruction inside your folder: research/object_detection/g3doc/installation.md.
The last step described there is to test the installation. If it fales, please perform two more simple steps:
$ python setup.py build
$ python setup.py install
At this point the test script should pass.
The result after re-training the model:
-
Be sure that your workstation is running Ubuntu 16.04 Xenial Xerus or Ubuntu 14.04 Trusty Tahir. Ubuntu downloads can be found here.
-
If using a Virtual Machine to install Ubuntu, use the following configuration as minimum:
- 2 CPU
- 2 GB system memory
- 25 GB of free hard drive space
The Udacity provided virtual machine has ROS and Dataspeed DBW already installed, so you can skip the next two steps if you are using this.
-
Follow these instructions to install ROS
- ROS Kinetic if you have Ubuntu 16.04.
- ROS Indigo if you have Ubuntu 14.04.
-
- Use this option to install the SDK on a workstation that already has ROS installed: One Line SDK Install (binary)
-
Download the Udacity Simulator.
Build the docker container
docker build . -t capstoneRun the docker file
docker run -p 4567:4567 -v $PWD:/capstone -v /tmp/log:/root/.ros/ --rm -it capstoneTo set up port forwarding, please refer to the instructions from term 2
- Clone the project repository
git clone https://github.com/udacity/CarND-Capstone.git- Install python dependencies
cd CarND-Capstone
pip install -r requirements.txt- Make and run styx
cd ros
catkin_make
source devel/setup.sh
roslaunch launch/styx.launch- Run the simulator
- Download training bag that was recorded on the Udacity self-driving car.
- Unzip the file
unzip traffic_light_bag_file.zip- Play the bag file
rosbag play -l traffic_light_bag_file/traffic_light_training.bag- Launch your project in site mode
cd CarND-Capstone/ros
roslaunch launch/site.launch- Confirm that traffic light detection works on real life images
