Advanced Lane Finding Project
The steps of this project are the following:
- Compute the camera calibration matrix and distortion coefficients given a set of chessboard images.
- Apply a distortion correction to raw images.
- Use color transforms, gradients, etc., to create a thresholded binary image.
- Apply a perspective transform to rectify binary image ("birds-eye view").
- Detect lane pixels and fit to find the lane boundary.
- Determine the curvature of the lane and vehicle position with respect to center.
- Warp the detected lane boundaries back onto the original image.
- Output visual display of the lane boundaries and numerical estimation of lane curvature and vehicle position.
The code for this step is contained in the file (camera_cal.py).
I start by preparing "object points", which will be the (x, y, z) coordinates of the chessboard corners in the world.
Here I am assuming the chessboard is fixed on the (x, y) plane at z=0, such that the object points are the same for each calibration image.
Thus, objp is just a replicated array of coordinates, and objpoints will be appended with a copy of it every time I successfully detect all chessboard corners in a test image. imgpoints will be appended with the (x, y) pixel position of each of the corners in the image plane with each successful chessboard detection.
Below is the a chessboard image with detected corners.
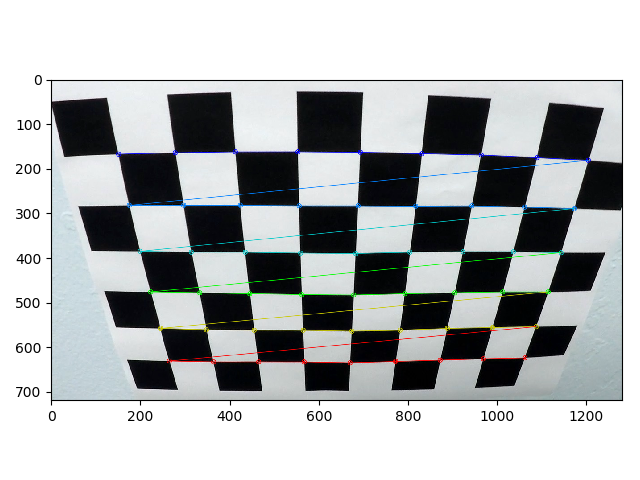
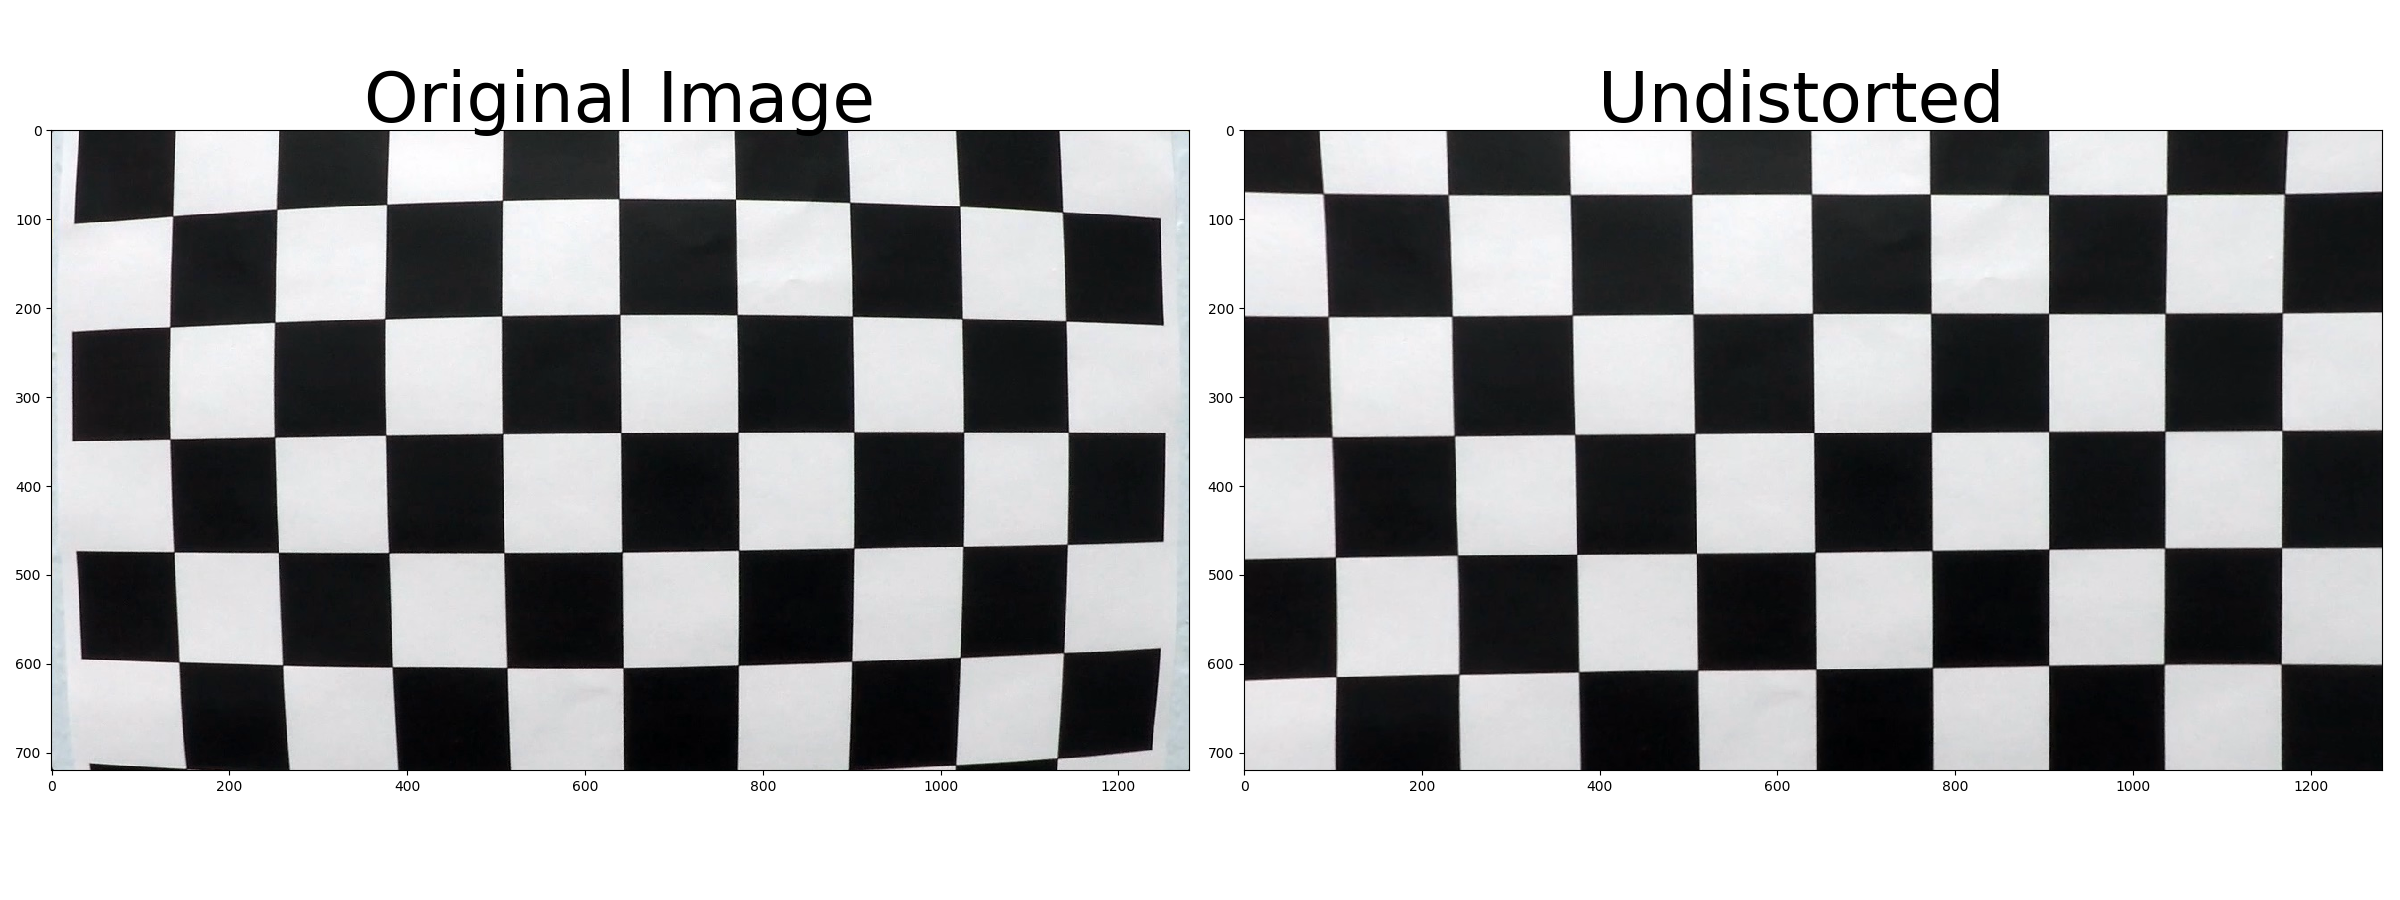
I then used the output objpoints and imgpoints to compute the camera calibration and distortion coefficients using the cv2.calibrateCamera() function. I applied this distortion correction to the test image using the cv2.undistort() function and obtained this result:
Finally, I saved the camera matrix and distortion coefficient into a pickle file (calibrated_camera_info.p) for future use.
By using cv2.undistort function with camera matrix and distortion coefficient retrieved from previous step,
we can easily see the difference(areas around the corners) of the undistorted image with its original one like the following comparison:
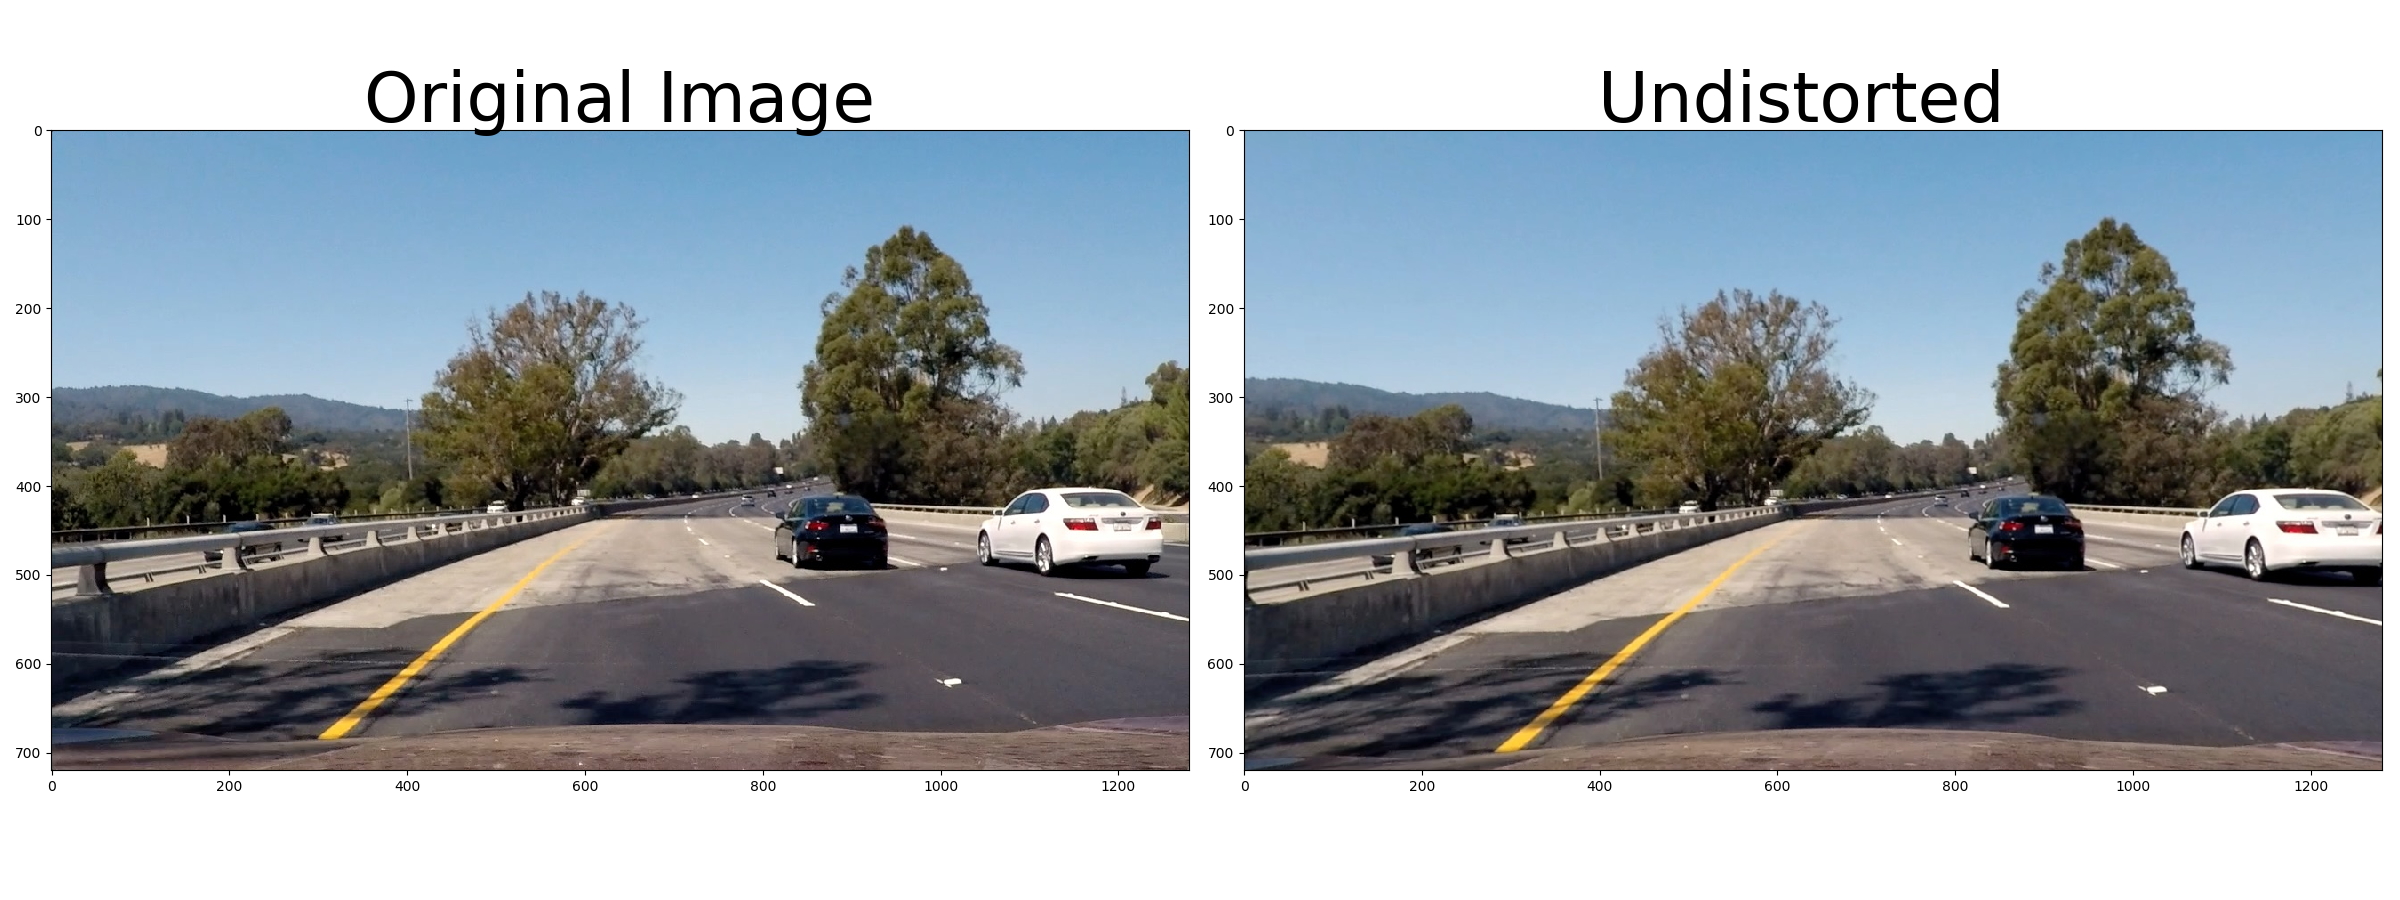 Therefore, we can see the distortion has been removed sucessfully and we can start to work on the next procedure.
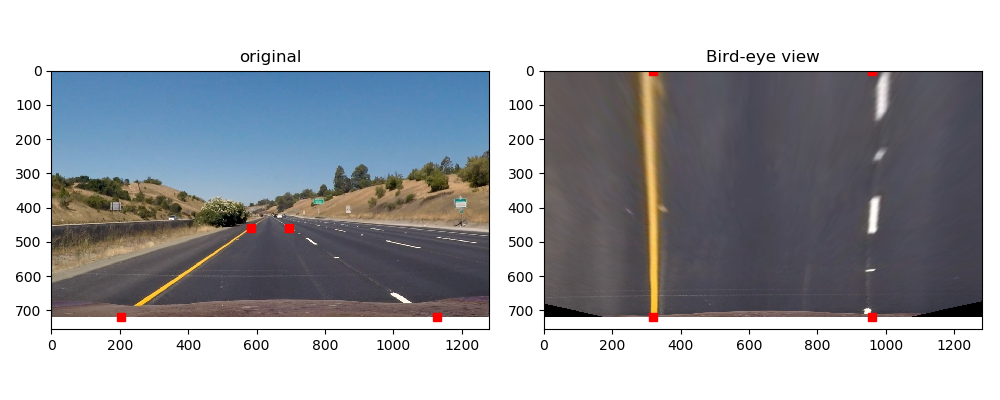
The code for my perspective transform includes a function called get_warped_img(), which appears in the file helpfunctions.py
The get_warped_img() function takes as inputs an image (img).I chose the hardcode the source and destination points in the following manner:
 src = np.float32(
        [[(img_size[0] / 2) - 55, img_size[1] / 2 + 100],
         [((img_size[0] / 6) - 10), img_size[1]],
         [(img_size[0] * 5 / 6) + 60, img_size[1]],
         [(img_size[0] / 2 + 55), img_size[1] / 2 + 100]])
dst = np.float32(
        [[(img_size[0] / 4), 0],
         [(img_size[0] / 4), img_size[1]],
         [(img_size[0] * 3 / 4), img_size[1]],
         [(img_size[0] * 3 / 4), 0]])
I verified that my perspective transform was working as expected by drawing the src and dst points onto a test image
and its warped counterpart to verify that the lines appear parallel(kind of) in the warped image.
In this step:
- I combined three sobel methods
'hls_select(directional gradientabs_sobel_thresh, gradient magnitudemag_thresh, gradient directiondir_threshold). - Then I picked S channel from HLS color space(
LAB_select), L channel from LUV space(LUV_select), B channel from Lab color space (LAB_select)to get fairly good lane detection results after a lot of tests(color_channel_combined). - Finally, I combined all results from sobel combined and color combined, as we can see by combining all methods' results, we get
a fairly good and acceptable results for next steps.
The function I mentioned above can be found in
helpfunctions.py. Here's an example of my output for this step.
I implemented a method called find_lane_pixels(), which does following work:
- Find the left line and right line x coordinates by looking at the binary histogram
- Generate 9 sliding windows and get two lines' x, y values
- fit the left lane and right lane into a (
fit_poly()).
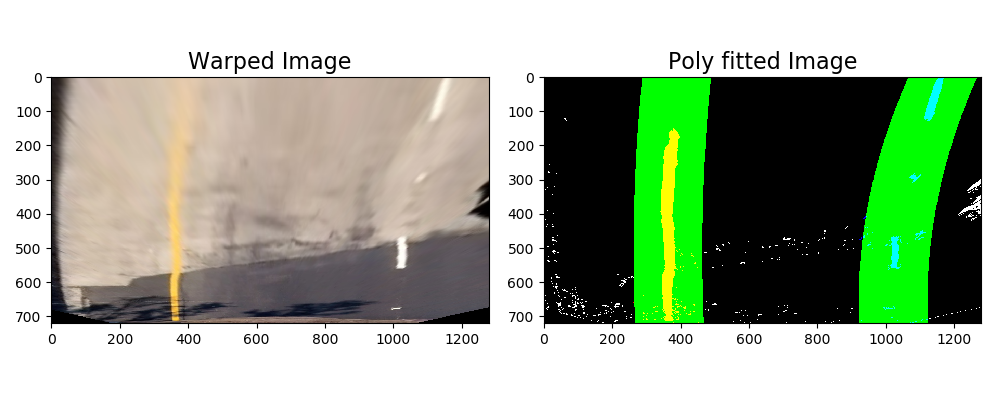 The function I mentioned above can be found in
 helpfunctions.py.
5.Calculation of the radius of curvature of the lane and the position of the vehicle with respect to center
I implemented a method called measure_curvature_pixels(), which does following work:
Following codes calculated curvature of left and right line(left_curverad ,right_curverad ) to get meters of curvature and
distance to vehicle center('center_diff')
 ym_per_pix = 30 / 720  # meters per pixel in y dimension
 xm_per_pix = 3.7 / 700  # meters per pixel in x dimension
  # Calculation of R_curve (radius of curvature)
left_curverad = ((1 + (2 * left_fit_cr[0] * ym+ left_fit_cr[1]) ** 2) ** 1.5) / np.absolute(
    2 * left_fit_cr[0])
right_curverad = ((1 + (2 * right_fit_cr[0] *ym + right_fit_cr[1]) ** 2) ** 1.5) / np.absolute(
    2 * right_fit_cr[0])
center_car = xm_per_pix*img_shape[1]/2
center_lane = ((right_fit_cr[0] * ym ** 2 + right_fit_cr[1] * ym + right_fit_cr[2])+(left_fit_cr[0] * ym ** 2 + left_fit_cr[1] * ym + left_fit_cr[2]))/2
center_diff = center_lane-center_car
The codes can be found in helpfunctions.py
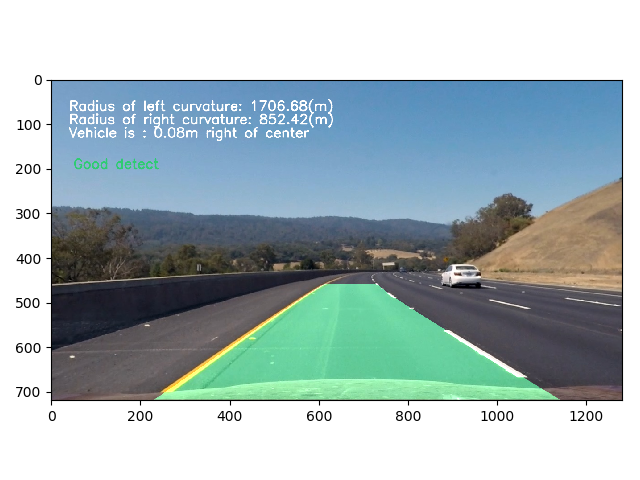
I implemented this step in lines # through # in my code in helpfunctions.py in the function draw_lanes(). Here is an example of my result on a test image:
-
For frame without previous best fit info or has accumulated failures over 10 times(failed to pass sanity check), use
find_lane_pixels()to restart search lanes -
If there is good fit in previous frames, it will just search the surrounding portion of previous best fit (
search_around_poly()) -
If the fit of this frame cannot pass sanity check, it will use last 5 frames' averaged fit to draw lanes.
-
Project Video
- Challenge Video
- Here's a link to project video result
- Here's a link to challenge video result
- My hard challenge video is not usable(results are way to bad) but here is the link:link to hard challenge video result
- My pipeline works pretty well in 'Project_video' but doesn't work performs well in the 'challenge_video' as the lines are hard to be detected in the same settings like 'Project_video'. The detected lines are much lighter lighter in the 'challenge_video'. I tried to adjust some parameters in color channel binary and sobel binary but still didn't get better and stable results. I think there should be some other methods to pick lanes better?
- Nevertheless, the output video results are still very sensitive to road quality, shadows, overexposed video image, sharp curvature(hard_challenge_video). We need to fine tune the parameters to make sure the pipe line works better in a certain situation but it most likely will not work well in the another situation.
- Due to limited time, I didn't get a chance to find some latest research on lane detection but I would like to learn more robust lane detection techniques in following studies.
