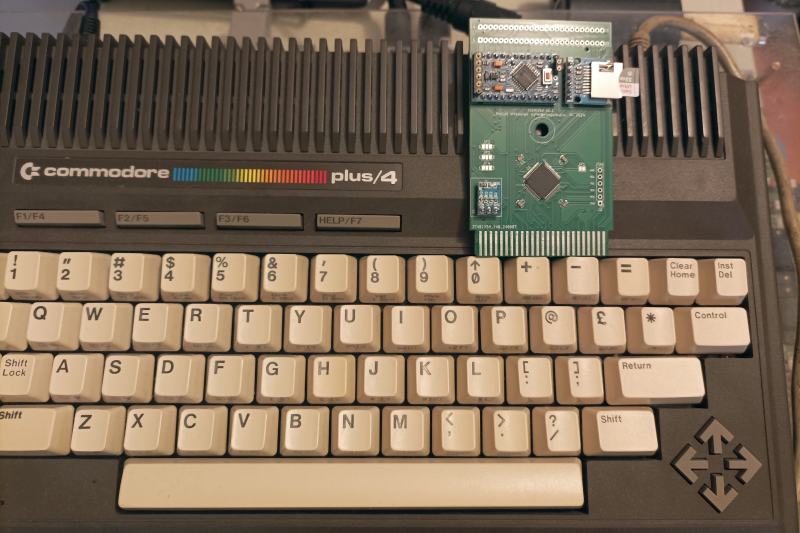
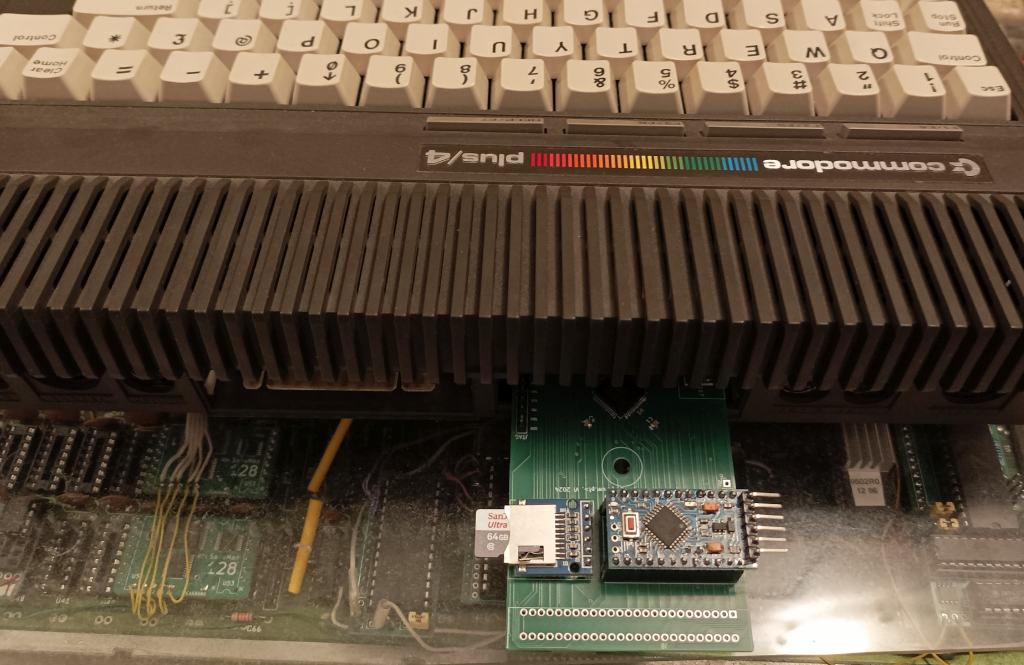
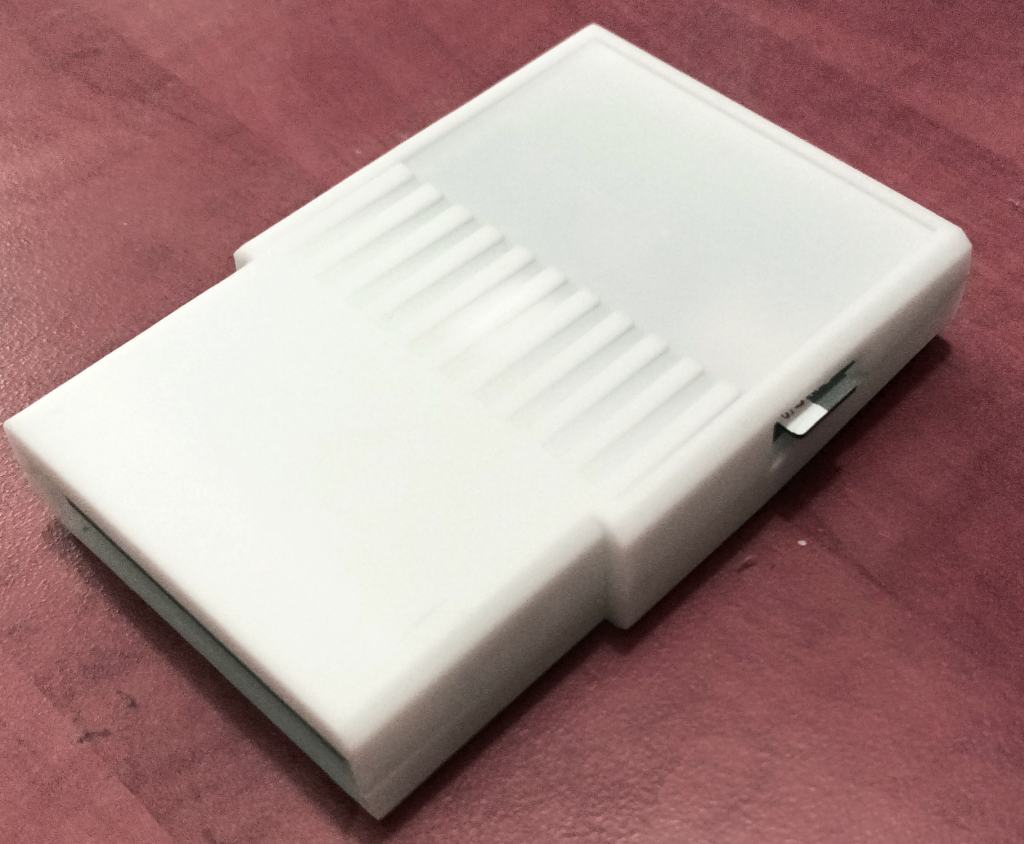
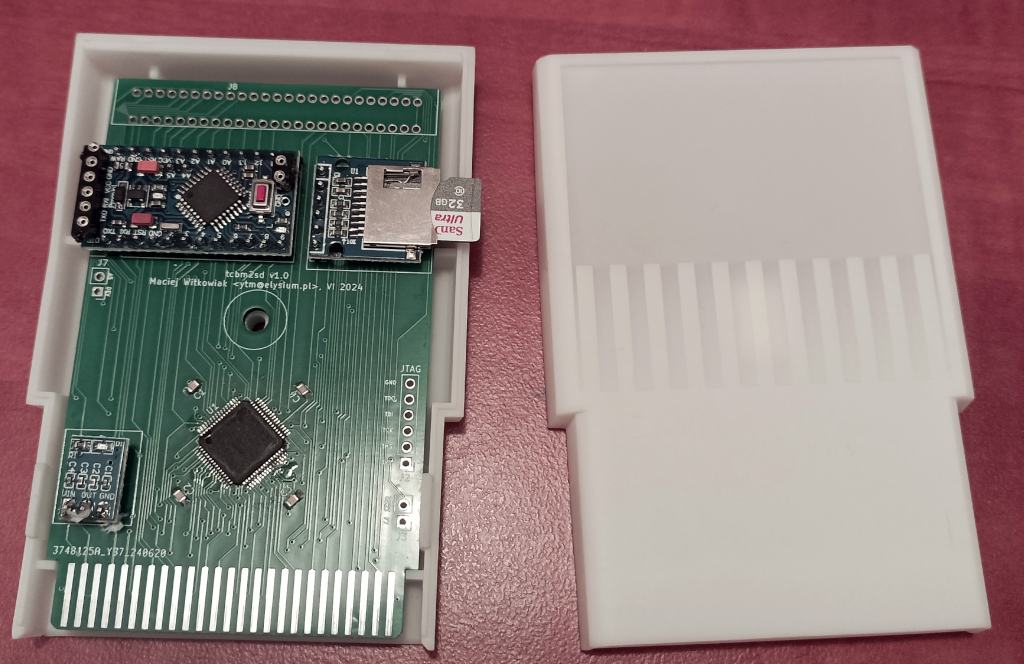
CBM 1551 paddle replacement and/or mass storage using an SD card interfacing with the Commodore C16/116/Plus4 simulating a TCBM bus 1551 disk drive
It's enough to quickly and easily load file-based programs though it is not as feature rich as sd2iec.
It's fast - with patched Directory Browser you can load 220 blocks within 6 seconds(!). That's speed comparable with DolphinDOS
Patched Directory Browser is embedded into flash and available at all times by trying to load * file or using SHIFT+RUN/STOP key combination.

Click for video

Click for video
NOTE: I don't own a 1551. This circuit should be able to replace original 1551 paddle and work with a real 1551 drive, but it's untested
- PLA 251641-3 and 6523T (28 pin triport) integrated into a single CPLD
- low part count: CPLD, 3.3V voltage regulator and four capacitors
- improved PLA equations make the paddle occupy only 8 I/O addresses
- FEF0-FEF7 for device 8
- FEC0-FEC7 for device 9
- passthrough for all 50 signals of the expansion port
- DLOAD and DSAVE support
- read-only support for disk images (D64, D71, D81) as subdirectories
- standard Kernal transfer at about 3100b/s (a little bit less than JiffyDOS 1541, twice as fast as 1551 (1600b/s))
- fastload at about 9300b/s (23x as fast as 1541, about 6x as fast as 1551), with patched Directory Browser v1.2; on par with DolphinDOS
- fastload booter embedded in the flash, available at all times as
*file will load and runBOOT.T2SDfile from root directory - Directory Browser patched with fastload protocol, save it as
BOOT.T2SDon your SD card - device number stored permanently in EEPROM
- disk commands:
- change dir
CD<directory>,CD<disk.d64>,CD<leftarrow>orCD..,CD/ - remove file
S:<filename>(will remove only the first matching file), BASICSCRATCH - rename file
S:<new>=<old>, BASICRENAME ... TO ... - create dir
MD<directory> - remove dir
RD<directory> - change device number:
U0>+chr$(<devnum>)with<devnum>= 8 or 9 - initialize disk:
I(reinitialize SD interface after card eject/insert)
- change dir
- limited support for full paths (when filename starts with
/)- you can DLOAD a file from root folder from anywhere in the filesystem, e.g. file browser:
DLOAD"/FB16; this works as long as the path is not too long - disk commands will accept full paths, e.g.
S:/GAMES/D/DONALD DUCK
- you can DLOAD a file from root folder from anywhere in the filesystem, e.g. file browser:
- compatible with file browsers: FileBrowser 1.6 and Directory Browser 1.2
- case insensitve, all filenames converted to lowercase
- paths up to 72 characters long
- fallback to DOS 8.3 filename for entries with names longer than 16 characters
- wildcard matching
*and?
The paddle part has all TCBM bus signals exposed and can be used as the basis for future developments porting existing projects to TCBM bus, like:
- sd2tcbm - sd2iec port to TCBM bus
- Pi1551 - realtime, cycle-exact 1551 emulator
The information published here has everything required to manufacture PCB (gerber files) and program firmware. Check out the 'Releases' section on the right.
If you want a completed unit for yourself please drop me a message (you will find email on top of loader/loader.asm). I might have some units to sell. Please include your country name.
You can also order completed hardware part of the project from PCBWay. This is PCB only, it still requires flashing CPLD and soldering Arduino Mini Pro (or TCBM connector) and voltage regulator:
If a proper sd2iec port to TCBM bus ever appears it should be named sd2tcbm.
This project is named tcbm2sd because it is not a sd2iec port, just a simple 1551 simulator. There is no support for disk images. This is more like Tapecart - a loader for file-based programs rather than sd2iec.
Another microcontroller must be used for sd2tcbm because ATmega328 from Arduino Micro Pro doesn't have enough flash space for sd2iec port. For development another daughterboard (or a ready to use uC module) can be used. All the signals of TCBM bus, 3.3V power and SPI connection to SD card are exposed in Micro Pro footprint.
Project files for Kicad 6.0 are in this folder.
A PDF plot of schematic is available here: tcbm2sd/plots/tcbm2sd.pdf for preview.
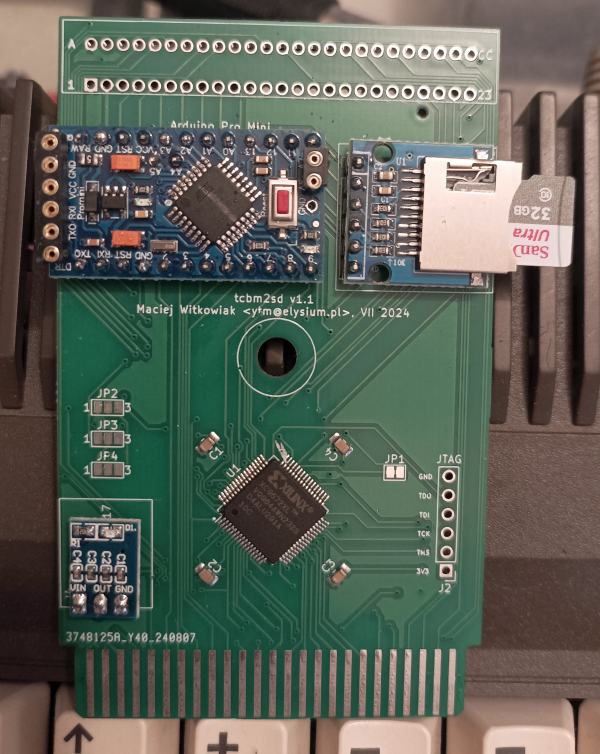
The first revision of PCB was meant primarily as a MVP demonstration and a development platform for software, so it relies on cheap, ready to use modules
Gerber files for manufacturing are in tcbm2sd/plots/ folder.
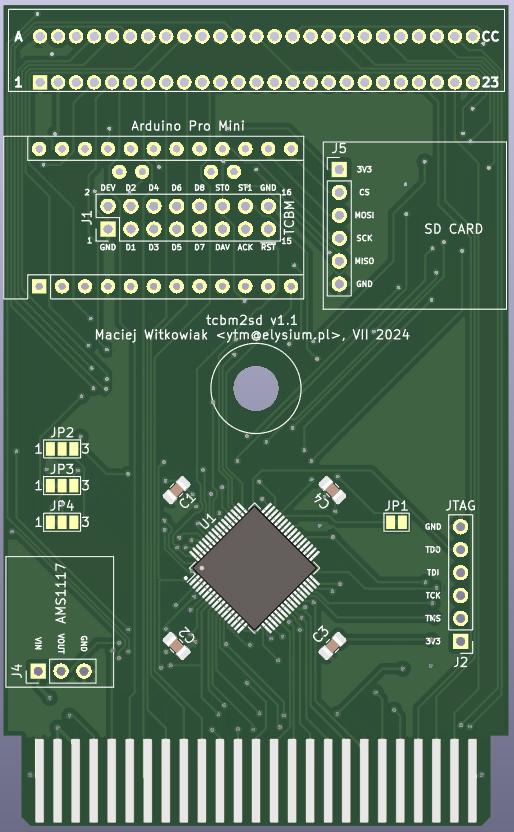
| Jumper | default | Description |
|---|---|---|
| JP1 | closed | if closed, then pass computer reset to Arduino |
| JP2 | n/c | choose hardware device number by shorting (2-3) for #8 or (1-2) for #9 |
| JP3 | (1-2) | choose software device number from Arduino A4 (1-2) or RXD/D1 (2-3) |
| JP4 | (1-2) | choose device number in software (1-2) or hardware (2-3) |
JP1, JP3 and JP4 default values are shorted by a thin trace under soldermask. If you want to change any of these settings you have to cut between the pads until connection is gone.
JP3 is meant for Arduino Mini Pro clones that would have A4 line missing or in a completely different place. Note that you have to change the definitions on the top of the sketch code too.
Parts to be soldered directly:
- 1x XC9572XL-VQ64 CPLD
- 4x 0.1uF capacitor (0805 footprint)
- (optional) 50 pin edge connector, with 2.0mm pitch, straight or right angle (this part is unobtanium)
Modules:
- AMS1117 3.3V power supply module with 3 pins, such as this often labeled as HW764; it usually comes with soldered angled pins, you need to replace them with straight ones
- SD card 3.3V adapter (3.3V VCC, with no level shifters) like this one
- Arduino Mini Pro with ATmega328P 3.3V or its clone, e.g. SparkFun DEV-11114; unnamed clones usually have 'The Simple' text on bottom soldermask
If all you want is a paddle replacement then only the power supply module is needed.
Clones of Arduino Mini Pro may have different placement of A4/A5/A6/A7 pins. We use only A4.
On some clones A4 may be labeled as SDA (then A5 is SCL). This is fine.
If A4/A5 pins were moved from the inside row to a different place then solder a short piece of wire between module's A4 and PCB pad marked DEV (next one to A5). A4 is the only one used.
If A4 is not available at all then you can modify the sketch to use D1 (RXD) instead for DEV line and change JP3 jumper.
If you don't need software device number setting, you can premanently set the device number using JP2 and JP4.
This cartridge has a passthrough connector. All 50 pins are connected, even the three normally unused ones. You can solder a 50-pin edge connector.
If it's a right-angle one then the next cartridge is positioned normally with label on the top.
If it's a straight one, then the next cartridge label must point towards computer (so that you can see it).
This is purely theoretical as I couldn't find any source of supply that would sell edge connectors with 2.00mm pitch.
Thanks to the improved PLA equations only 8 actually used I/O addresses are used at a time.
Verilog source code can be found in hdl folder. Apart from .v files there are also project files for Xilinx ISE 14.7.
If you want to modify them and rebuild .jed file, I highly recommend using Linux version, even with Windows WSL it's much easier to install and with fewer install/startup issues than the Windows version.
The code implements 4 parts:
- PLA 251641-3 logic equations, updated to activate 6523T port only within 8 bytes indicated by the device input line
- 8-bit, bidirectional port A of 6523T
- 2-bit, bidirectional port B of 6523T (bits 0 and 1 - status from the drive)
- 2-bit, bidirectional port C of 6523T (bit 7 (input from the drive) and bit 6 (output to the drive))
The 6523T is a trimmed-down copy of Fake6523.
The remaining, unused, bits of Ports B and C will probably behave in a different way than with a real 6323T. So far I didn't find it as an issue though.
JEDEC file with CPLD fimware is here: hdl/Fake6523.jed.
You don't need any special equipment to flash it. A Raspberry Pi and some jumper wires will be enough. If you can hold them more or less steady there is no need to solder any pin headers for JTAG connector.
| Signal | GPIO Header Pin | GPIO Name |
|---|---|---|
| GND | 6 or 9 or 14... | GND |
| TDO | 13 | GPIO 27 |
| TDI | 15 | GPIO 22 |
| TCK | 11 | GPIO 17 |
| TMS | 7 | GPIO 4 |
| 3.3V | 1 | 3.3V |
Command to test the connection and list JTAG devices (our XC9572 will be most likely device 0):
xc3sprog -c matrix_creator
Command to flash the firmware to device on position 0 (-p 0)
xc3sprog -c matrix_creator -v -p 0 Fake6523.jed
There is an excellent reference about programming XC9500XL via JTAG with Raspberry Pi. Please read it for more details.
The source code of Arduino Mini Pro sketch is in tcbm2sd_arduino/tcbm2sd/ folder.
In Arduino IDE settings choose board Arduino Mini w/ Atmega328 (3.3V).
The only dependency (other than Arduino IDE) is SDFat 2.2.3 library (this code was developed when 2.2.3 was the latest available version). It's available directly from Arduino IDE library manager.
The disk image handling code is a trimmed down 'diskimage' library from CGTerm, by Per Olofsson.
A basic USB-serial dongle (CH340G or similar) with 6 pins is enough to flash the firmware. Mind the pin labels (order may be reversed), but the connection is usually one to one (without any crossings) with one of the pins left unconnected. This is the only time, when the 6 pins on the short side of Arduino Mini Pro board will be used.
| USB dongle pin | Arduino Mini pin |
|---|---|
| DTR | DTR (next to RAW label) |
| RXD | TX0 |
| TXD | RX0 |
| VCC | VCC |
| CTS | GND (not connected) |
| GND | GND |
UPLOAD PROBLEMS
Many Ardunio Mini Pro clones are sold with old bootloader flashed. That was the case for me. (They are also unable to use 115200 serial speed, but that's another story). If you have trouble uploading the compiled code check if changing the upload speed from 115200 (new bootloader) to 57600 (old bootloader) helps.
Close the IDE and find you Arduino boards.txt settings file. On Windows it will be in C:/Users/<user name>/AppData/Local/Arduino15/packages/arduino/hardware/avr/1.8.6/boards.txt
Find there a line:
mini.menu.cpu.atmega328.upload.speed=115200
and change it to
mini.menu.cpu.atmega328.upload.speed=57600
Reopen the Arduino IDE and try again.
WARNING
- Be sure to setup you USB dongle to 3.3V operation. They usually have a switch for that.
- For development I have been reflashing Arduino code while cartridge was still connected to the computer. For this case make sure to disconnect the VCC line.
If the filename is a single '*' (like after pressing SHIFT+RUN/STOP) then a small loader will be sent to the computer. This loader will try to load and run file BOOT.T2SD from the SD card's root folder.
I recommend [loader/boot.t2sd](Directory Browser 1.2 (TCBM2SD)) patched for fast loading of the files.
The source code for the loader is in loader/loader.asm folder. You need KickAssembler to rebuild it.
This code also serves as an example how to handle fastloader protocol.
The provided Makefile doesn't do much but it shows the order of commands:
Assemble the code:
java -jar Kickass.jar loader.asm
This saves loader.prg. To embed that binary into Arduino Micro flash we need to convert it to a C-style array and put into Arduino sketch folder:
xxd -i loader.prg ../tcbm2sd_arduino/tcbm2sd/loader.h
Then the Arduino code has to be recompiled and uploaded to the device.
Thanks to Géza Eperjessy, the author of 'Directory browser', I got access to its source code and I could change the code directly to support fast protocol when TCBM2SD is detected in response to UI command.
The fast protocol is used for loading the directory listing and the files.
The binary is here loader/boot.t2sd.
To make that file your default browser that will startup every time you load and run * file save it on the SD card's root folder as 'BOOT.T2SD`.
tcbm2sd is compatible with standard TCBM protocol as implemented by Commodore in Plus/4 ROM. However the hardware is capable with much more. I took Directory Browser v1.2 and I patched it to use a faster protocol, a bit similar to Warpload 1551. The only difference is that since Arduino Micro Pro is much faster than Plus/4 (8MHz vs 1MHz) it would be hard to rely on the timing, so in my version of the fast protocol both sides need to test if the other end has confirmed receiving the data.
Fast protocol is enabled when everything is prepared like for load (OPEN channel 0 and send the filename) but after the TALK call as a secondary address we send 0x70 instead of 0x60 - talk on channel 16 rather than 0. There is no check if the remote device is a tcbm2sd and actually supports this protocol.
Check out also the other files from loader/ folder. I can't publish full source code (it's not mine), but you will find pieces of code I altered in 't2s-...' files.
(This serves as an example of directly patching a binary file)
The source code for the patch is in loader/db12patch.asm file. You need KickAssembler to rebuild it.
Assemble the patch and apply it over the binary
java -jar Kickass.jar db12patch.asm
This saves db12b.prg patched directory browser that can be put on an SD card to be DLOADed and executed.
You might be also interested in a cartridge case. It should fit inside this one although would require cutting a slot for SD card.
This project wouldn't be possible without documentation provided by others:
- Fake6523 and Fake6523 HW proved that I took and trimmed down from full 6523 implementation down to 6323T
- Commodore TCBM bus and protocol description
- c264-magic-cart and C264Cart which were my template for PCB dimensions
- LittleSixteen where I found KiCad expansion port footprint and symbol, also helped me to understand how Plus/4 expansion port works
- kicad-lib-arduino
- @eper973 for Directory Browser source code
- Per Olofsson for
diskimage.cD64/71/81 handling code
