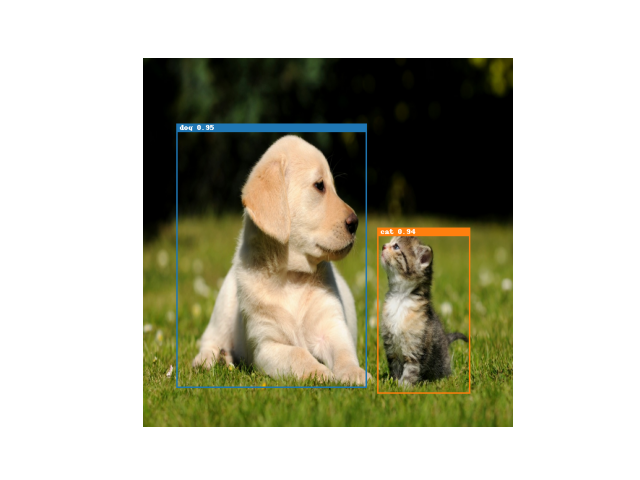
Custom implementation of EfficientDet using tensorflow 2.
Just run pip install.
$pip install git+https://github.com/Guillem96/efficientdet-tf
Currenty this EfficientDet implementation supports training with 2 data formats:
-
labelme format. This format corresponds to the labelme annotations outputs.
-
VOC2007 format. The format corresponds to the one described here.
You can specify the data model on the training command.
$ python -m efficientdet.train --help

Usage: train.py [OPTIONS]

Options:
  --efficientdet INTEGER          EfficientDet architecture. {0, 1, 2, 3, 4,
                                  5, 6, 7}
  --bidirectional / --no-bidirectional
                                  If bidirectional is set to false the NN will
                                  behave as a "normal" retinanet, otherwise as
                                  EfficientDet
  --freeze-backbone / --no-freeze-backbone
                                  Wether or not freeze EfficientNet backbone
  --epochs INTEGER                Number of epochs to train the model
  --batch-size INTEGER            Dataset batch size
  --grad-accum-steps INTEGER      Gradient accumulation steps. Simulates a
                                  larger batch size, for example if
                                  batch_size=16 and grad_accum_steps=2 the
                                  simulated batch size is 16 * 2 = 32
  --learning-rate FLOAT           Optimizer learning rate. It is recommended
                                  to reduce it in case backbone is not frozen
  --w-scheduler / --wo-scheduler  With learning rate scheduler or not. If left
                                  to true, --learning-rate option will act as
                                  max lr for the scheduler
  --print-freq INTEGER            Print training loss every n steps
  --validate-freq INTEGER         Print COCO evaluations every n epochs
  --format [VOC|labelme]          Dataset to use for training  [required]
  --train-dataset DIRECTORY       Path to annotations and images  [required]
  --val-dataset DIRECTORY         Path to validation annotations. If it is
                                  not set by the user, validation won't be
                                  performed
  --images-path DIRECTORY         Base path to images. Required when using
                                  labelme format  [required]
  --n-classes INTEGER             Number of important classes without taking
                                  background into account  [required]
  --classes-names TEXT            Only required when format is labelme. Name
                                  of classes separated using comma.
                                  class1,class2,class3
  --checkpoint PATH               Path to model checkpoint
  --save-dir DIRECTORY            Directory to save model weights  [required]
  --help                          Show this message and exit.
The command below is the one that we should use if we want to train the model with the data coming from here.
$ python -m efficientdet.train \
    --efficientdet 0 \
    --bidirectional \
    --no-freeze-backbone \

    --format labelme \
    --train-dataset test/data/pokemon \
    --images-path test/data/pokemon \
    --classes-names treecko,greninja,mewtwo,solgaleo,psyduck \
    --n-classes 5 \

    --epochs 20 \
    --batch-size 8 \
    --w-scheduler \
    --learning-rate 1e-2 \
    --grad-accum-steps 2 \

    --save-dir models/pokemon-models/
The command below is the one that we should use if we want to train the model with the data coming from here.
$ python -m efficientdet.train \
    --efficientdet 0 \
    --bidirectional \
    --no-freeze-backbone \

    --train-dataset test/data/VOC2007 \
    --format VOC \
    --n-classes 20 \

    --epochs 20 \
    --batch-size 8 \
    --learning-rate 0.16 \
    --w-scheduler \

    --save-dir models/voc-models/
$ python -m efficientdet.eval --help

Usage: eval.py [OPTIONS]

Options:
  --format [VOC|labelme]          Dataset to use for training  [required]
  --test-dataset DIRECTORY        Path to annotations and images  [required]
  --images-path DIRECTORY         Base path to images. Required when using
                                  labelme format  [required]
  --checkpoint PATH               Path to model checkpoint  [required]
  --help                          Show this message and exit.
import tensorflow as tf
import efficientdet

effdet = efficientdet.EfficientDet.from_pretrained('...')

im_size = model.config.input_size
images  = tf.random.uniform((3, im_size, im_size, 3)) # 3 Mock images

boxes, labels, scores = effdet(images, training=False)

# labels -> List of tf.Tensor of shape [N,]
# boxes -> List of tf.Tensor of shape [N, 4]
# scores -> Confidence of each box
for im_boxes, im_labels in zip(boxes, labels):
    # Process boxes of a specific image
    ...
For more on how to use pretrained model see the inference example here 📝.
How to use pretrained models:
- Choose your favorite badge. For example:
- Load the model referencing the badge (use the white and blue text) as shown below.
from efficientdet import EfficientDet

badge_name = 'D0-VOC'
# With pretrained classification head
model = EfficientDet.from_pretrained(badge_name)

# With custom head
# Note: This will initialize a random classifier head, so it requires
# fine tuning
model = EfficientDet.from_pretrained(chckp_path,
                                     num_classes=<your_n_classes>)
Transfer learning using the CLI.
$ python -m efficientdet.train *usual-parameters* \
  --from-pretrained <badge_reference> # For example, D0-VOC
This will automatically append a custom classification head to a pretrained model, and start training.
The road map is ordered by priority. Depending on my feelings this can go up and down, so don't take it as something that will be done immediately.
- Migrate anchors code to Tensorflow
- Define as many tf.functions as possible (Now the training is 7 times faster than without
tf.function) - Define COCO input pipeline using
tf.data - Distribute training over multiple GPUs
- Learning rate schedulers to speed up and enhance training
- Proper evaluation using COCO mAP
- Reproduce similar paper results
- Visualization utils
- Define a custom data-format to train with own datasets
- Data augmentation pipelines
[2] EfficientDet: Scalable and Efficient Object Detection - {tanmingxing, rpang, qvl}@google.com
[3] Keras Retinanet

