DNAda is a web application that integrates the j5 DNA assembly software with robotic liquid handlers.
J5 is a powerful DNA assembly software that can be used to design and optimize DNA assembly protocols. However, it is not directly compatible with robotic liquid handlers. DNAda is a web/command-line application that integrates j5 with robotic liquid handlers by converting a j5 assembly design into a series of liquid handler compatible instructions. This enables a user without progamming experience to design DNA assembly protocols on a user-friendly canvas, DeviceEditor, and then convert the design using J5 and subsequently DNAda into a series of instructions that can be executed on a liquid handler .
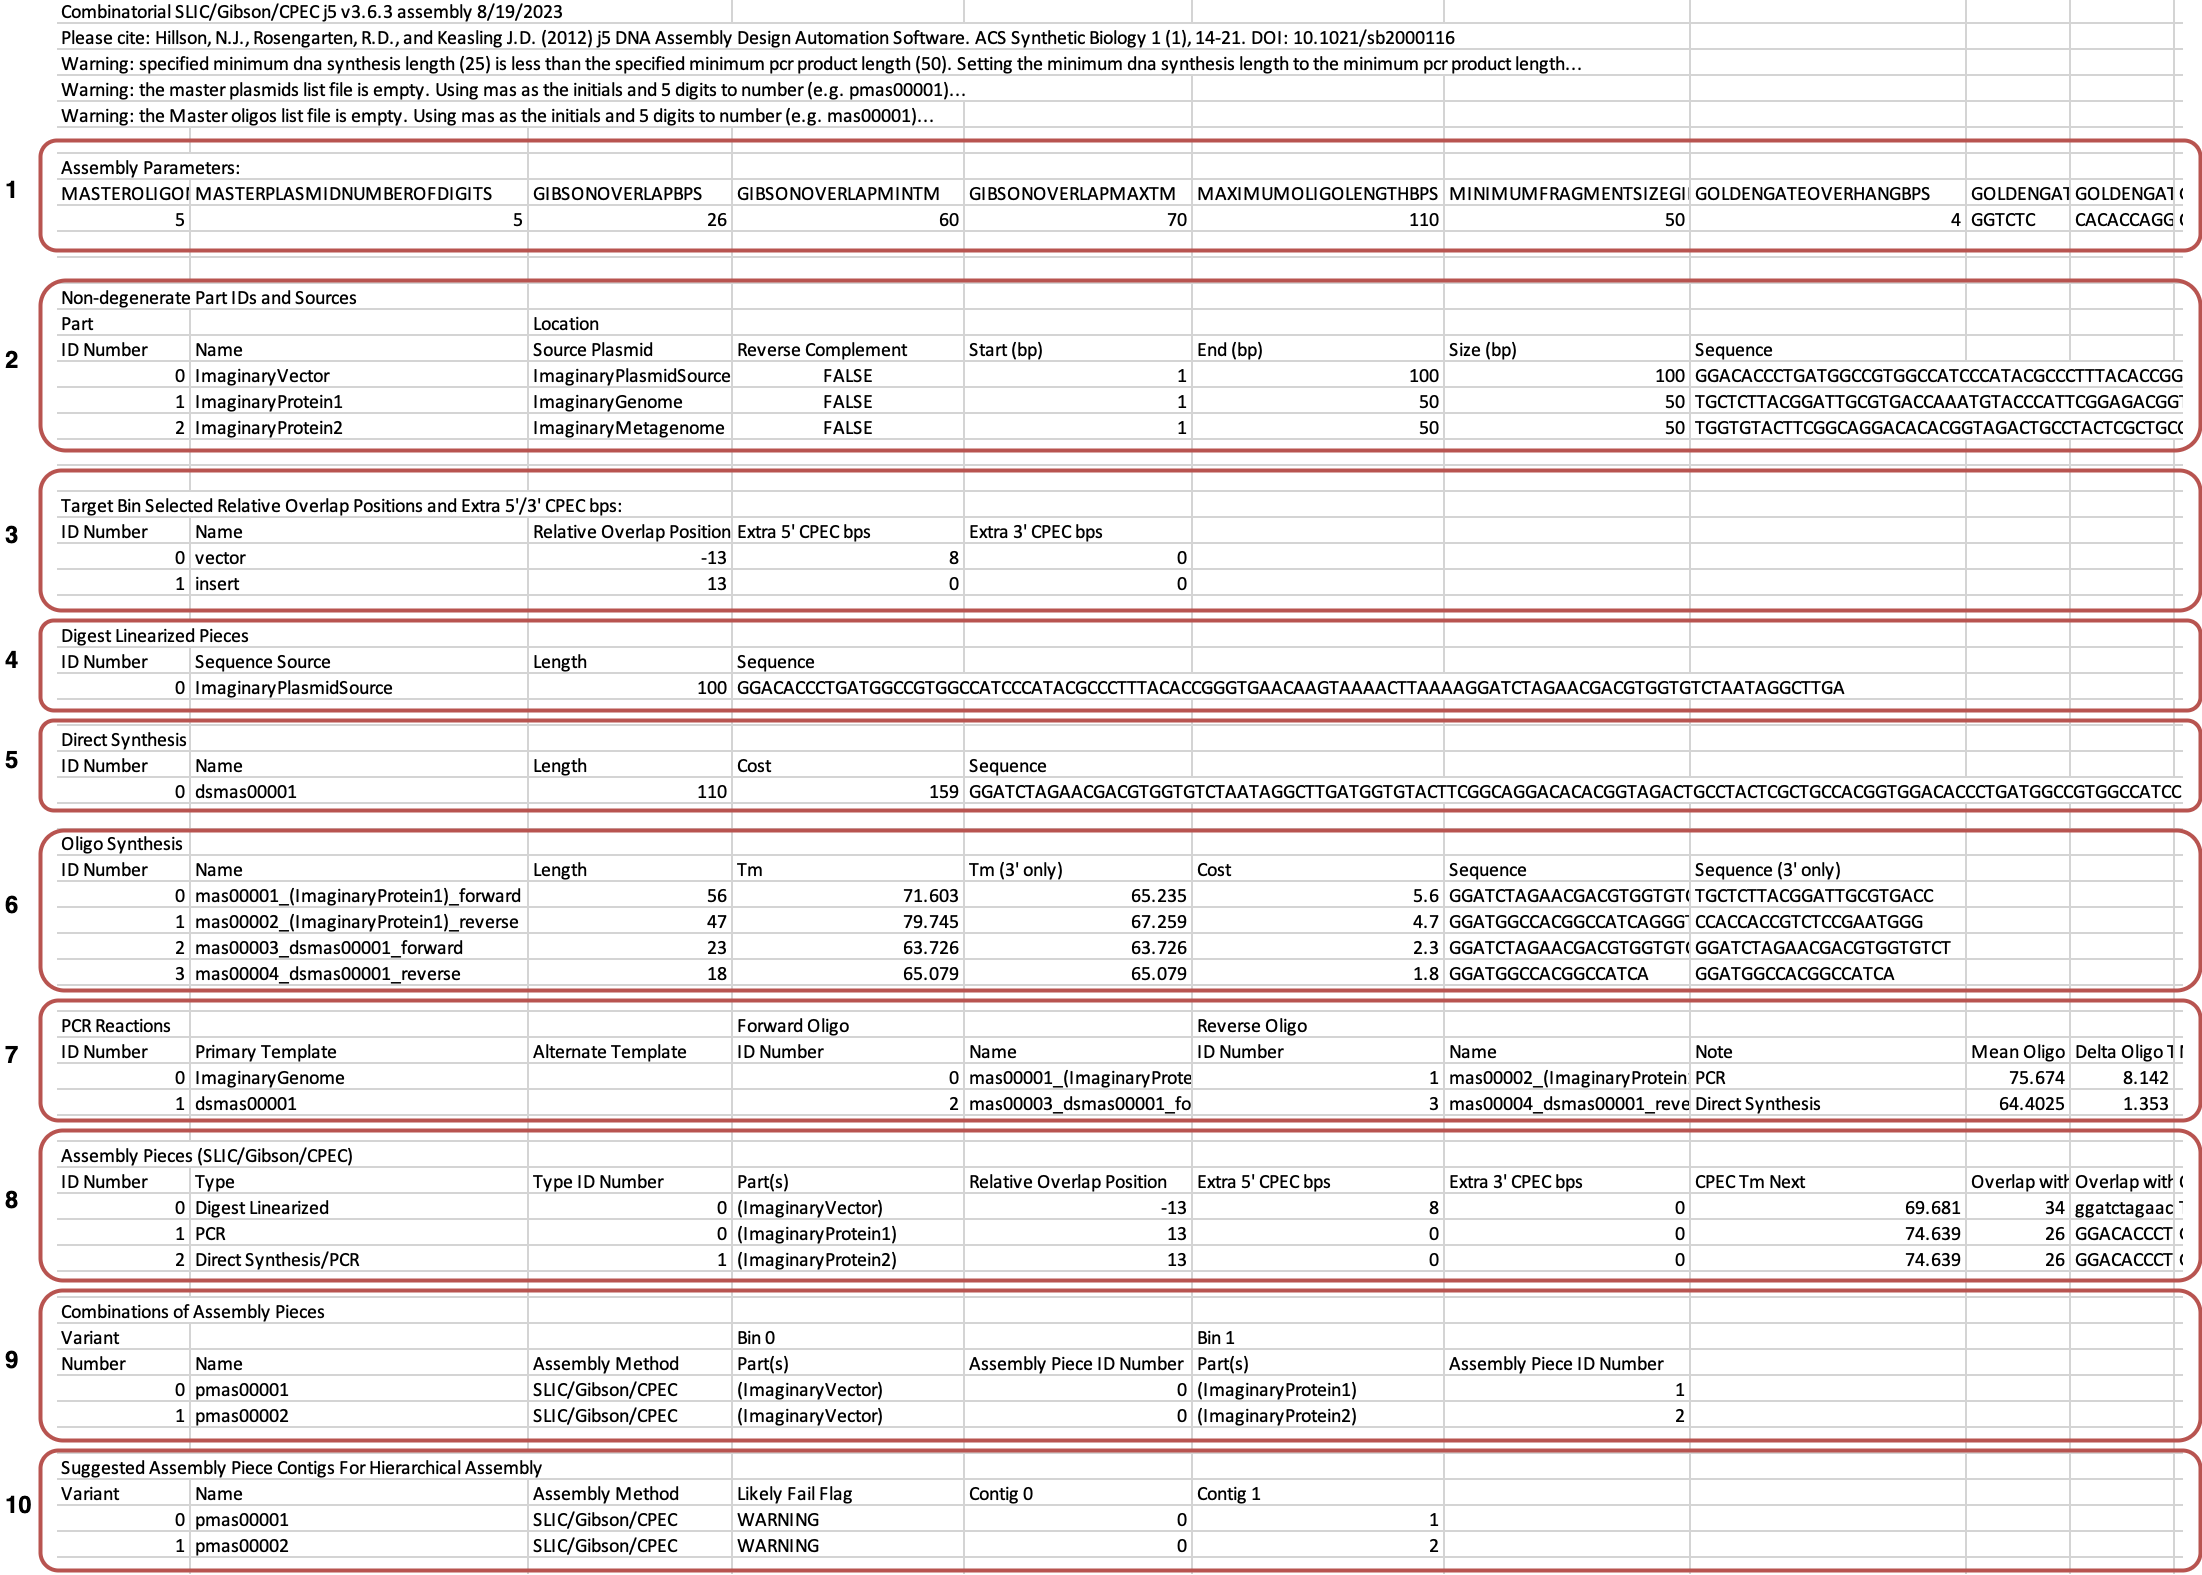
As a simple demonstration, the J5 output of this simple DNA assembly is provided
in the examples/ directory of this repository:
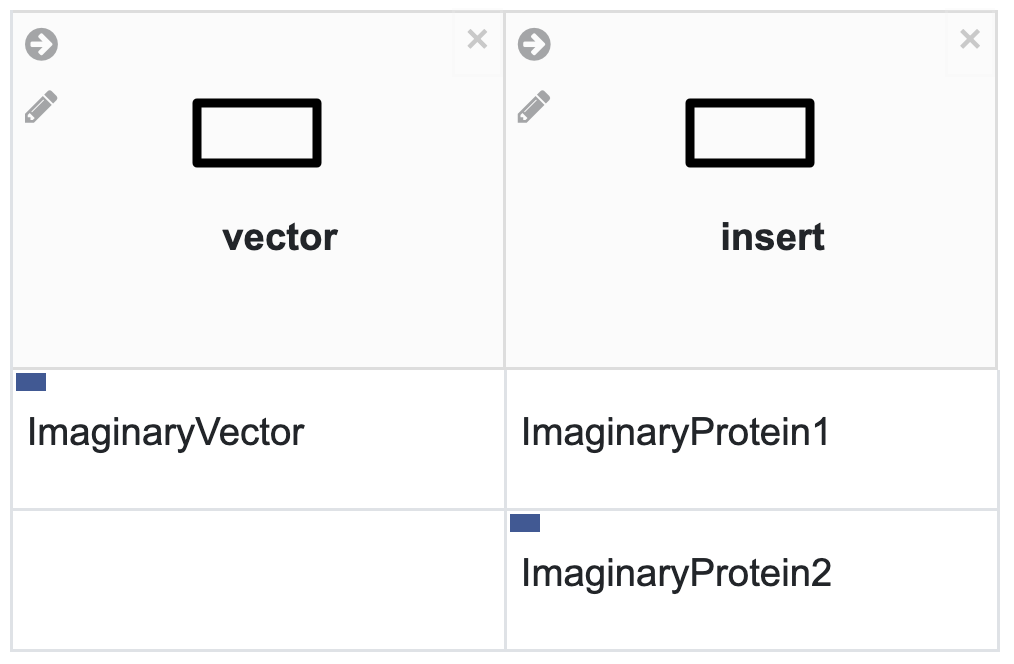
In this design, we want to insert two imaginary proteins into an imaginary vector. We are assuming that we get a stock of the imaginary vector from a 3rd-party service such as Addgene and that we want to prepare/linearize this vector using restriction enzymes (denoted by the blue box in the left-hand corner of the ImaginaryVector box). We are amplifying ImaginaryProtein1 off of the genome of some organism that we have access to. And lastly we genome mined ImaginaryProtein2 from a metagenomic database and thus don't have access to source genetic material, which means we will have to synthesize a DNA fragment containing its sequence (denoted by the blue box in the left-hand corner of the ImaginaryProtein2 box).
We used J5 to create Gibson assembly instructions for these two plasmids using default
parameters with the exception of the Minimum Gibson Fragment Size BPs and
Minimum DNA Synthesis Length bps which we reduced to 50 bps to enable this toy
example.
The J5 design generates many design files, you are directed to view the j5 documentation for a more thorough explanation of each file's purpose. The files most relevant to DNAda are:
- pmas00001.gb and pmas00002.gb: Genbank-formatted final plasmid maps
- pmas00001_combinatorial.csv: Combinatorial design file serving as main input to DNAda
The combinatorial csv combines instructions for assembling each plasmid in the design into a single file.
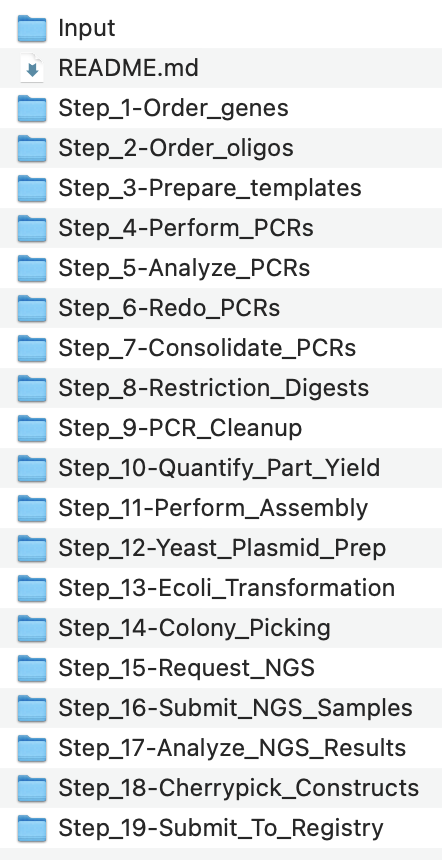
All that is missing is physical instantiations of each object to enable sample tracking and automated robotic manipulation. DNAda provides that by first optionally consolidating multiple J5 designs into a single design that is then used to generate step-by-step liquid-handler compatible instructions.
The DNAda CLI is the quickest way to generate automation instructions. See below for installation instructions.
dnada_cli.py examples/example_j5_output.zipNote, it is highly recommended to use a virtual environment to install the dependencies.
For example,
wget "https://github.com/conda-forge/miniforge/releases/latest/download/Mambaforge-$(uname)-$(uname -m).sh"
bash Mambaforge-$(uname)-$(uname -m).sh
source ~/mambaforge/bin/activate
mamba create -y -n dnada
conda activate dnada
mamba install -y python==3.11.4
pip install dnadaAlternatively, setup from the source code by running
git clone https://github.com/JBEI/dnada.git
cd dnada/backend/app
python setup.py install
After installation, you should have dnada-cli.py in your path:
Usage: dnada_cli.py [OPTIONS] FILES...

  Condense j5 design zip files into single design then create customized
  automation instructions for J5 Design.

Arguments:
  FILES...  [required]

Options:
  --output PATH                   Path to save the output file.  [default:
                                  automation_instructions.zip]
  --install-completion [bash|zsh|fish|powershell|pwsh]
                                  Install completion for the specified shell.
  --show-completion [bash|zsh|fish|powershell|pwsh]
                                  Show completion for the specified shell, to
                                  copy it or customize the installation.
--help Show this message and exit.Copy .env.template to .env and replace variables with appropriate values.
Then start the stack with Docker Compose:
docker compose up -dNow you can open your browser and interact with these URLs:
| Service | Description | URL |
|---|---|---|
| Frontend | built with Docker, with routes handled based on the path | http://localhost |
| Backend | JSON based web API based on OpenAPI | http://localhost/api/ |
| Swagger documentation | Automatic interactive documentation from the OpenAPI backend | http://localhost/docs |
| ReDoc documentation | Alternative automatic documentation from the OpenAPI backend | http://localhost/redoc |
| Flower | administration of Celery tasks | http://localhost:5555 |
| Traefik UI | to see how the routes are being handled by the proxy | http://localhost:8090 |
Note: The first time you start your stack, it might take a minute for it to be ready. While the backend waits for the database to be ready and configures everything. You can check the logs to monitor it.
To check the logs, run:
docker-compose logs --followTo check the logs of a specific service, add the name of the service, e.g.:
docker-compose logs backend --followSince the source code is mounted as a volume within the backend app container during development , you can run tests on the live-reloading code:
docker-compose exec backend /app/tests-start.shThat /app/tests-start.sh script just calls pytest after making sure that the rest of the stack is running. If you need to pass extra arguments to pytest, you can pass them to that command and they will be forwarded.
For example, to stop on first error:
docker-compose exec backend bash /app/tests-start.sh -xAs during local development your app directory is mounted as a volume inside the container, you can also run the migrations with alembic commands inside the container and the migration code will be in your app directory (instead of being only inside the container). So you can add it to your git repository.
Make sure you create a "revision" of your models and that you "upgrade" your database with that revision every time you change them. As this is what will update the tables in your database. Otherwise, your application will have errors.
- Start an interactive session in the backend container:
$ docker-compose exec backend bash-
If you created a new model in
./backend/app/app/models/, make sure to import it in./backend/app/app/db/base.py, that Python module (base.py) that imports all the models will be used by Alembic. -
After changing a model (for example, adding a column), inside the container, create a revision, e.g.:
$ alembic revision --autogenerate -m "Add column last_name to User model"-
Commit to the git repository the files generated in the alembic directory.
-
After creating the revision, run the migration in the database (this is what will actually change the database):
$ alembic upgrade head- Enter the
frontenddirectory, install the NPM packages and start the live server using thenpmscripts:
cd frontend
npm install
npm run serve
Then open your browser at http://localhost:8080
Notice that this live server is not running inside Docker, it is for local development, and that is the recommended workflow. Once you are happy with your frontend, you can build the frontend Docker image and start it, to test it in a production-like environment. But compiling the image at every change will not be as productive as running the local development server with live reload.
Check the file package.json to see other available options.
You can deploy the stack to a Docker Swarm mode cluster with a main Traefik proxy, set up using the ideas from DockerSwarm.rocks, to get automatic HTTPS certificates, etc.
Briefly, after setting up a docker swarm there are 2 main steps:
- Build app images
- Deploy stack
Here are the steps in detail:
- Build app images
- Set these environment variables, right before the next command:
TAG=prodFRONTEND_ENV=production
- Use the provided
scripts/build.shfile with those environment variables:
TAG=prod FRONTEND_ENV=production bash ./scripts/build.sh- Deploy stack
- Set these environment variables:
DOMAIN=dnada.ioTRAEFIK_TAG=dnada.ioSTACK_NAME=dnada-ioTAG=prod
- Use the provided
scripts/deploy.shfile with those environment variables:
DOMAIN=cloudenzymes.com \
TRAEFIK_TAG=cloudenzymes.com \
STACK_NAME=cloudenzymes-com \
TAG=prod \
bash ./scripts/deploy.shThere is a main docker-compose.yml file with all the configurations that apply to the whole stack, it is used automatically by docker-compose.
And there's also a docker-compose.override.yml with overrides for development, for example to mount the source code as a volume. It is used automatically by docker-compose to apply overrides on top of docker-compose.yml.
These Docker Compose files use the .env file containing configurations to be injected as environment variables in the containers.
They also use some additional configurations taken from environment variables set in the scripts before calling the docker-compose command.
The .env file is the one that contains all your configurations, generated keys and passwords, etc.
Depending on your workflow, you could want to exclude it from Git, for example if your project is public. In that case, you would have to make sure to set up a way for your CI tools to obtain it while building or deploying your project.
One way to do it could be to add each environment variable to your CI/CD system, and updating the docker-compose.yml file to read that specific env var instead of reading the .env file.
DNAda was in part based on this repository and depends on the following separate libraries and packages:
- Alembic
- Biopython
- Celery
- Fastapi
- k_means_constrained
- Matplotlib
- Numpy
- Pandas
- Pandera
- Psycopg2-binary
- Pydantic
- Requests
- Scipy
- Seaborn
- SQLAlchemy
- VueJS
We thank all their contributors and maintainers!


