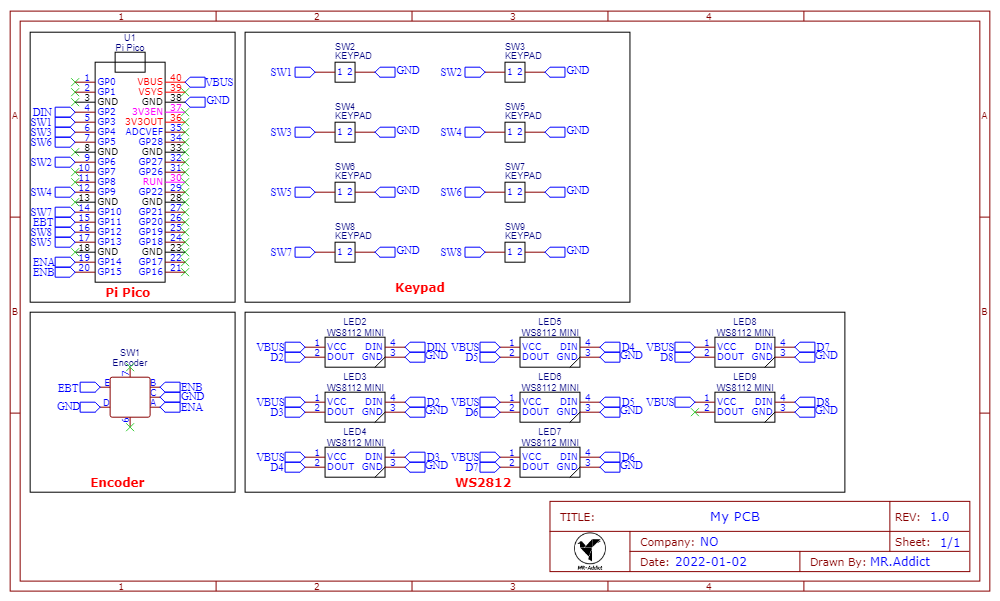
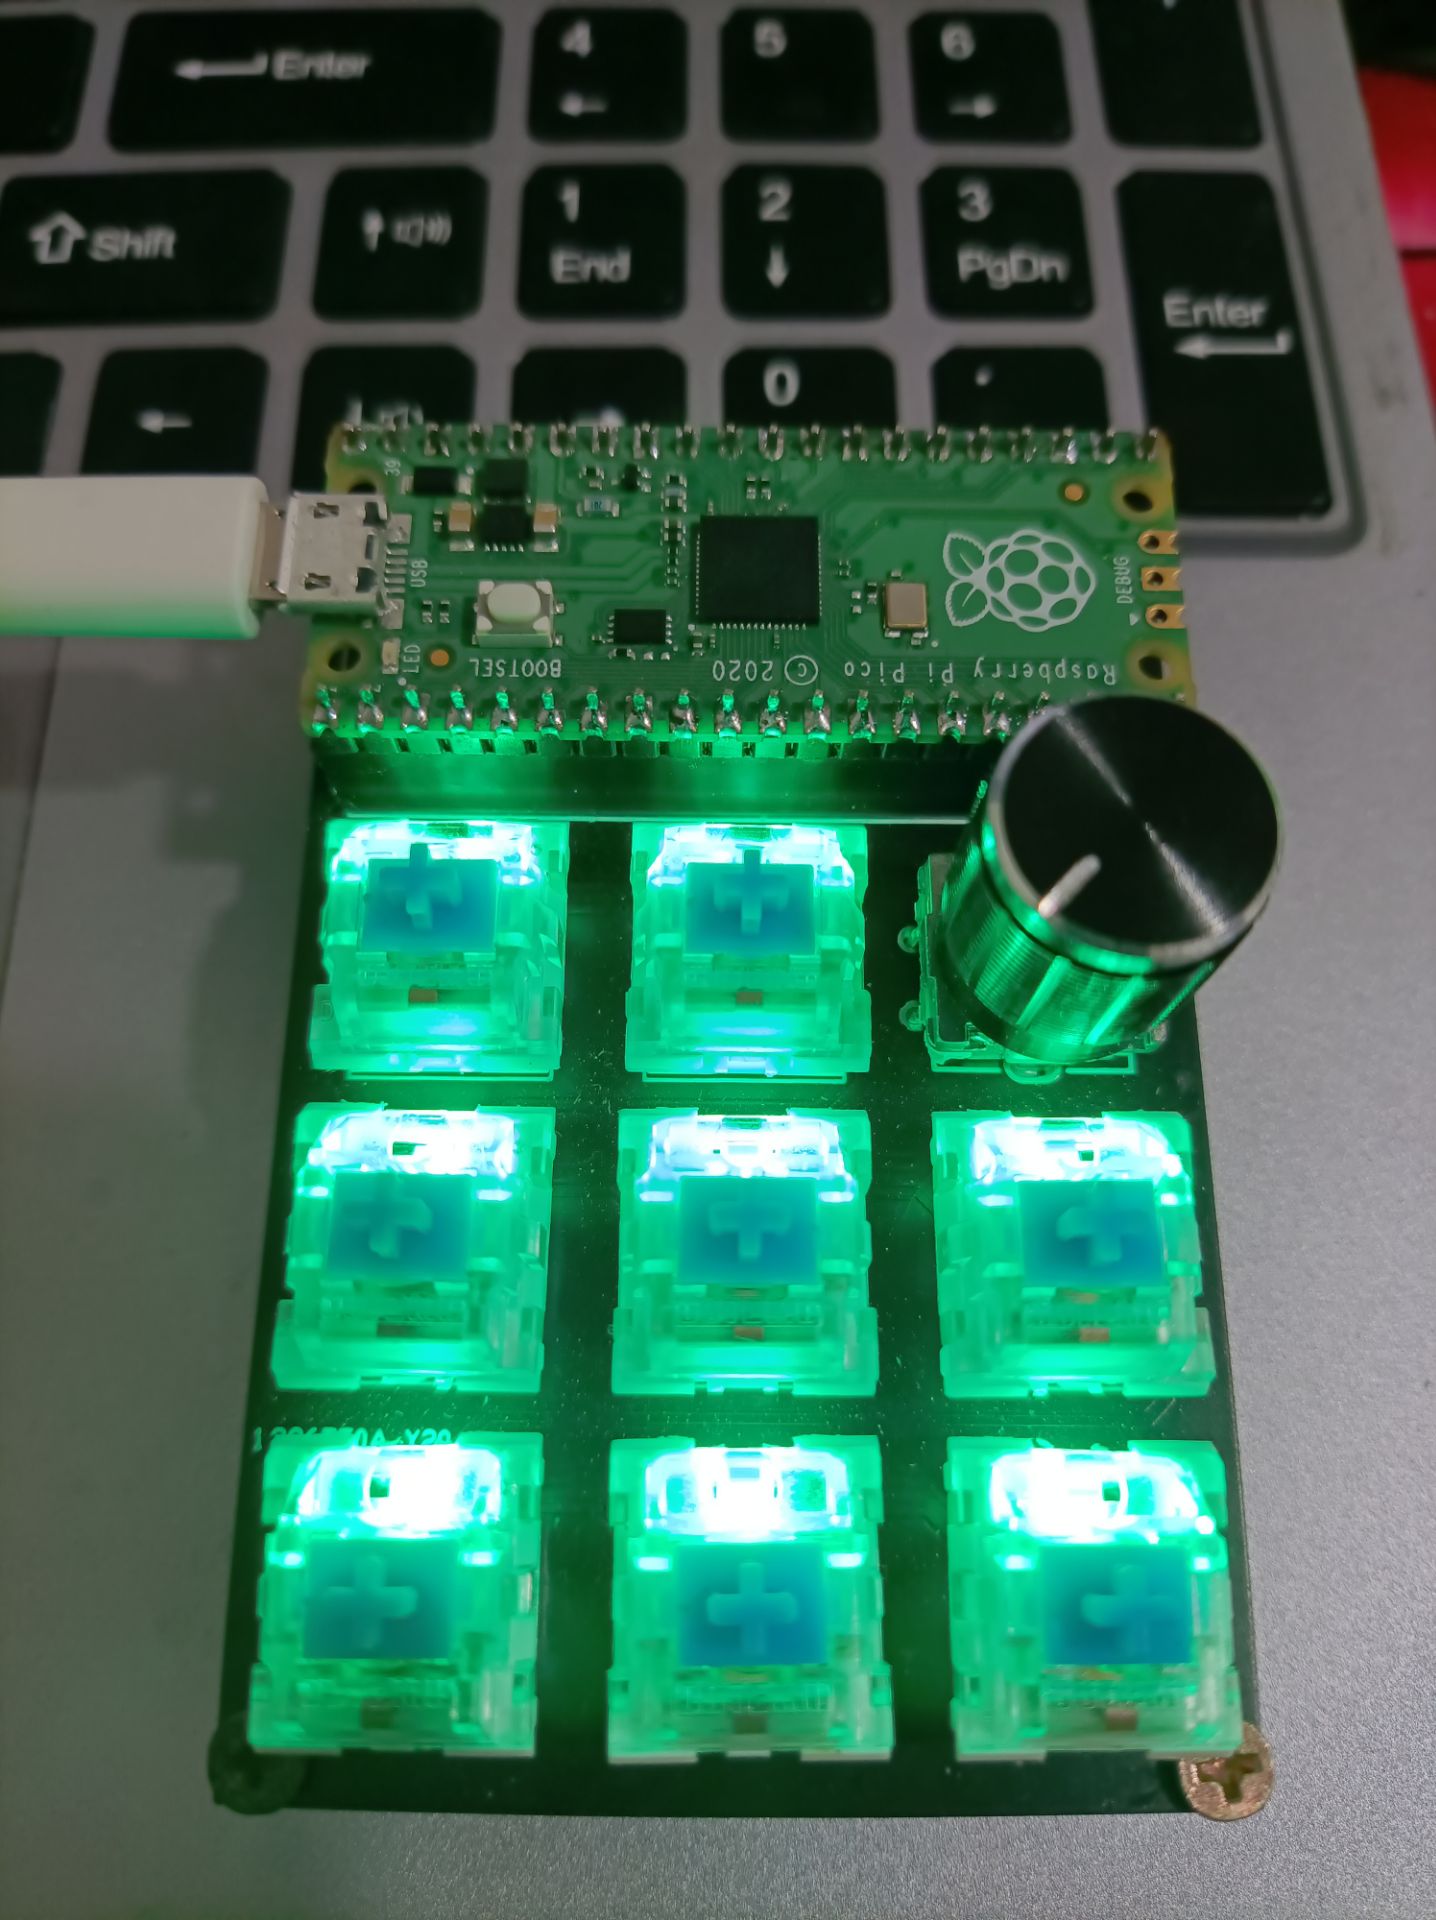
This a DIY Pi Pico MacroPad based on C/C++ SDK.
If you like C/C++ development instead of MacroPython, you must have a look on my project.
- Pi Pico Board x1
- Rotary Encoder x1
- Mechanical Key x8
- Mini WS2812 x8
- DIY MacroPad board x1
You can find Gerber in pcb folder.

In this projects, almost all of the components wee need to driver ourselves, thus it's a good chance to improve our skill on investigating and coding.
Next, I gonna to talk about detailed process about how to drive them.
Though it's mechanical Key, but it's just some buttons which are more nice and expensive. Here is an example.
int main() {
    Button button(11);
    Encoder encoder(14, 15);
    stdio_init_all();
    int8_t count = 0;
    while (true) {
        int8_t encoder_dir = encoder.getDirection();
        if (encoder_dir == 1) {
            count++;
            printf("%d,Encoder rotated CK!\n", count);
        } else if (encoder_dir == -1) {
            count--;
            printf("%d,Encoder rotated CCK!\n", count);
        }
        if (button.isPressed()) {
            count = 0;
            printf("%d,Button Pressed!\n", count);
        }
    }
    return 0;
}
You can find my library in src/lib/Encoder folder.
Note that this folder contains both button and encoder code.
Due to WS2812 is a timing sensitive component, so I use PIO(Programmable Input/Ouput) which Pi Pico features.
I learned a lot about PIO and how to use, and search a lot information about how to drive WS2812.
And I think it's really really not easy to use them. You can follow bellow articals and code examples.
-
A closer look at Raspberry Pi RP2040 Programmable IOs (PIO) By Jadhav
-
Raspberry Pico: Programming with PIO State Machines By Sebastian
And I suggest directily use my library or ForsakenNGS's library, that's would be an easy way. Just like below.
RGB leds[LED_LENGTH];
WS2812 LEDStrip(leds, LED_PIN, LED_LENGTH);
You can find my library in src/lib/WS2812 folder.
Write C/C++ to make hid interface come true would be a nightmare, but luckily TinyUSB support RP2040, and there's an offical example in pico-sdk examples.
You can have a look here Pi Pico Offical TinyUSB example.
But it's easy to use TinyUSB, you just need to initilize by calling two fuctions, call tud_task() all the time and use tud_hid_keyboard_report() to report keyboard event to your host like below.
void hid_task(void) {
    if (tud_hid_ready()) {
        if (button.isPressed()) {
            uint8_t keycode[6] = {0};
            keycode[0] = HID_KEY_A;
            tud_hid_keyboard_report(REPORT_ID_KEYBOARD, 0, keycode);
        } else
            tud_hid_keyboard_report(REPORT_ID_KEYBOARD, 0, NULL);
    }
}

int main(void) {
    board_init();
    tusb_init();
    while (true) {
        tud_task();
        hid_task();
    }
    return 0;
}
And you can find it in my src/lib/tinyusb folder.
Using FreeRTOS, you can manage multi tasks and similarily run them at the same time.
You can creat a task like this and even more tasks.
void led_task(void* parameter) {
    while (true) {
        LEDStrip.fillSolid(CHSV(colorIndex++, 255, 255));
        LEDStrip.show();
        vTaskDelay(100 / portTICK_PERIOD_MS);
    }
}

int main(){
    xTaskCreate(led_task, "led_task", 128, NULL, 1, NULL);
    vTaskStartScheduler();
    return 0;
}
But you are not necessarily to use FreeRTOS in your project, if you are interested in how to setup FreeRTOS on raspberry pi pico, you can go to my another project FreeRTOS on Raspberry Pi Pico.
I custom 8 keys on my macropad, and you can change it in buttonkey arrey.
uint8_t buttonkey[LED_LENGTH] = {
    HID_KEY_S,      HID_KEY_Z,
    HID_KEY_C,      HID_KEY_X,      HID_KEY_V,
    HID_KEY_HOME,   HID_KEY_DELETE, HID_KEY_END
};
That's all.Happy kacking!
