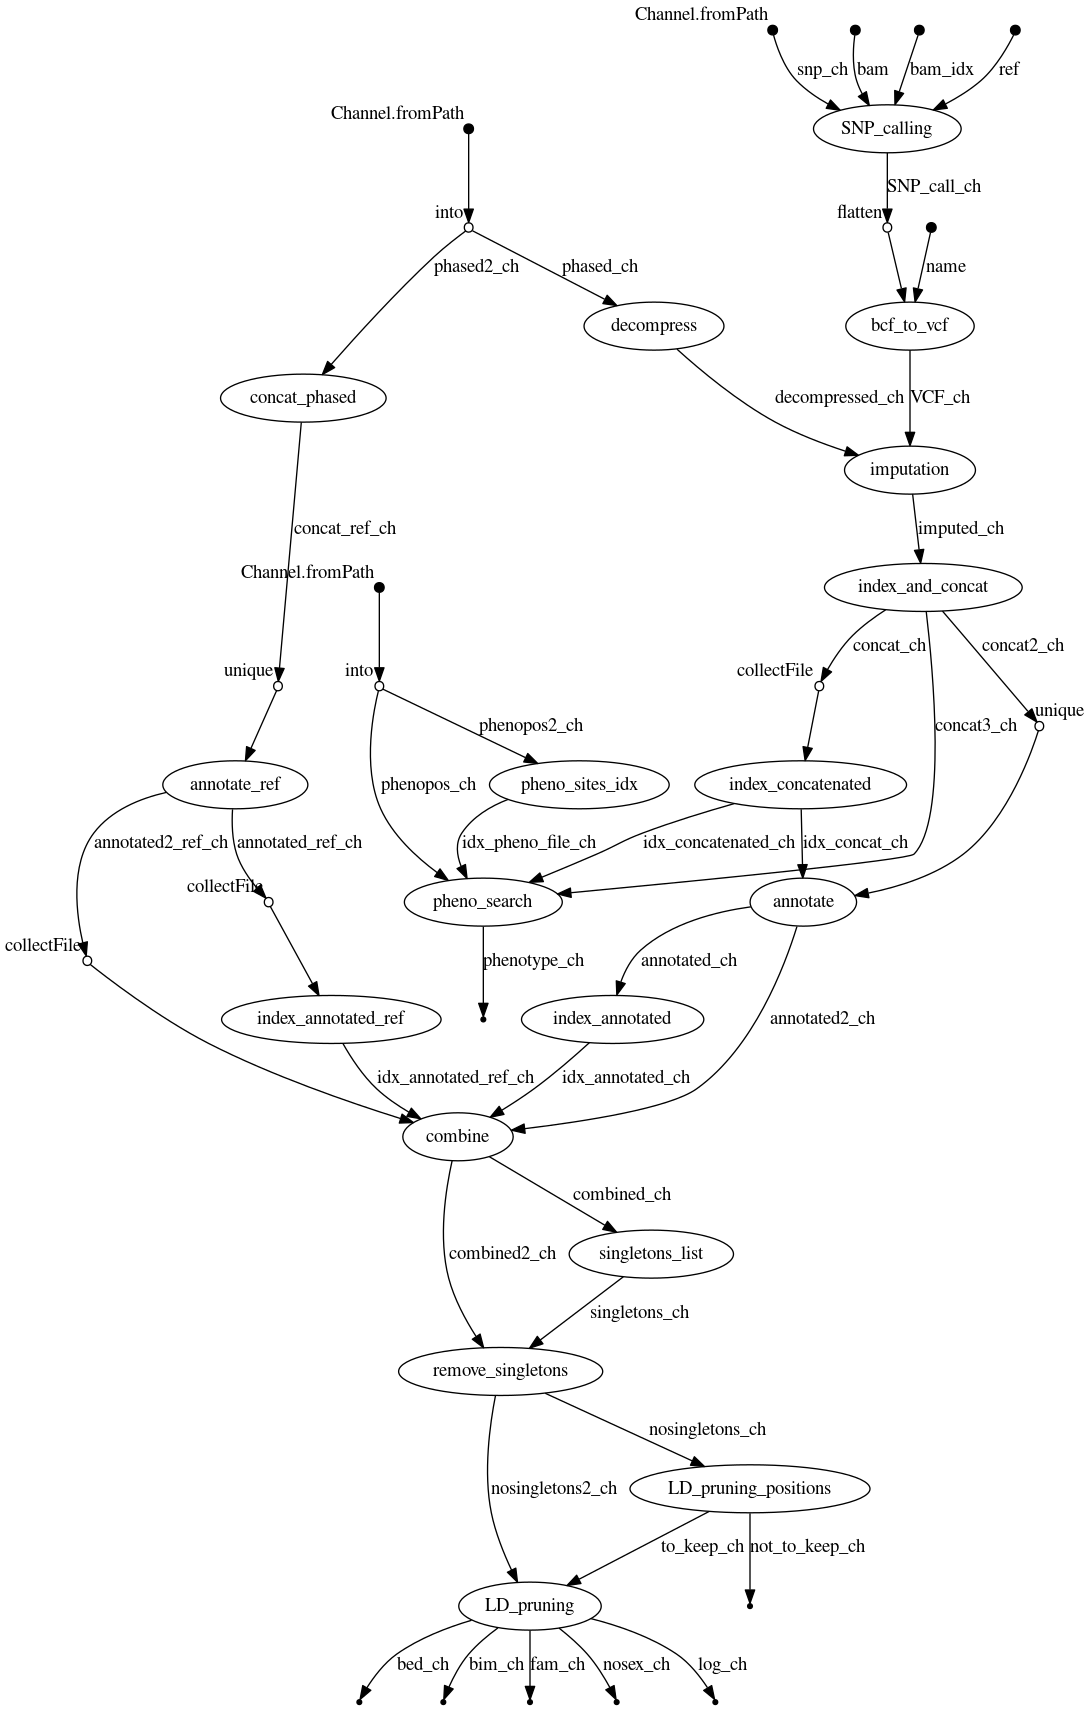
This pipeline allows mapping and imputation of non-human samples sequenced at low-coverage.
It uses Nextflow as the execution backend. Please check Nextflow documentation for more information.
- Unix-like operationg system (Linux, MacOS, etc)
- Java 8
- Singularity engine
-
Install Nextflow by using the following command:
curl -s https://get.nextflow.io | bash -
Download singularity images on /singularity directory:
sh set-up-images.sh -
Add the input parameters in the /data directory. For more details look at the dedicated section below.
NOTE: the very first time you execute it, it will take a few minutes to download the pipeline from this GitHub repository and the associated Singularity images needed to execute the pipeline.
Singularity is the preferred container engine for running the pipeline in an HPC environment. In order to minimize the amount of issues that could arise we recommend the use of Singularity version 3.0 or higher. In my case I used Singularity version 3.6.1. The singularity images used were obtained from docker hub and singularity hub.
Before you deploy the mapping pipeline, make sure you have the raw reds file in fq.gz format in the data/raw_reads/ directory and the reference genome sequence of your species in the ref_genome/ directory. Edit the name of your files as appropriate in the sample_map.nf script.
Before you deploy the imputation pipeline, the input files you need to have in your code directory are the following:
- the mapped bam (.bam) file and its index file (.bai) in the data/merged/ directory (this is the output of the mapping pipeline, but you can add your own files and change the name accordingly in the sample_imputation.nf script)
- the reference genome sequence of your species in the ref_genome/ directory.
- a list of SNP calls in each chromosome of the reference panel (one file per chromosome). This can be obtained with the following line of code and the bioinformatic tool vcftools given you have all the reference's phased vcf.gz for each chromosome in your current directory.
vcftools --gzvcf chr$NUM.out.gt.vcf.gz --out chr$NUM.filtered --site-quality

##generate SNP sites list in a format compatible with ANGSD
awk 'NF{NF-=1};1' <chr$NUM.filtered.lqual >chr$NUM.sites
sed '1d' chr$NUM.sites > chr$NUM.txt
- the phased genotype calls of the reference panel divided by chromosome in the data/chr_phased_ref/ directory;
- a list of mendelian and QTL traits of interest in the format: chr start end if you are interested in finding whether your sample's genotype for some traits of interest. If you are not interested in this analysis, please comment out the process named "pheno_search" before running the pipeline;
- the name you want to use to identify your sample in a text file in the data/samplename directory.
- the mapped reads in the data/mapped directory
- a merged and processed file (deduplicated and overlapping read pairs clipped) in the data/merged directory. If you want to intermediate files you can add the "publishDir" command as I show in the following example:
process	merge {
    label 'samtools'
    publishDir params.merged, mode:"copy" //this line publishes the output of the "merge" process in the data/merge directory

    input:
        path(input) from quality_filtered2.collect()
        path(index) from sam_indexed

    output:
        path "merged.bam" into sam2_merged

    script:
    """
    samtools merge -f merged.bam $input
    """
}
- a combined vcf file (with variants from both the reference panel and the horse sample) in the results/combined directory;
- this file converted in a Plink and Admixture compatible format: .bed, .bim and .fam files in the results/ancestry directory;
- a vcf file with the genotypes for the SNPs of interest found in the horse sample.
The nextflow.config file present in this repo is designed to be run on an HPC cluster that uses PBS Pro as job scheduler.
If you are using a different job scheduler or you are running the code on a different cloud provider such as AWS, you can create your own nextflow.config in your current working directory with something like:
process {
    executor = 'sge'
    queue    = 'my-queue'
    penv     = 'smp'
}
Check Nextflow executors for more details on the type of executors that Nextflow supports.
To execute the mapping pipeline simply enter the following command on your terminal:
nextflow run sample_map.nf
You do not need to add the flag "-with-singularity" if you are using the nextflow.config file provided as the use of singularity is already defined in the Nextflow configuration file.
To run the imputation pipeline simply enter the following command on your terminal:
nextflow run sample_imputation.nf
You do not need to add the flag "-with-singularity" if you are using the nextflow.config file provided as the use of singularity is already defined in the Nextflow configuration file.
The versions of the tools that have been tested with the pipeline are the following:


