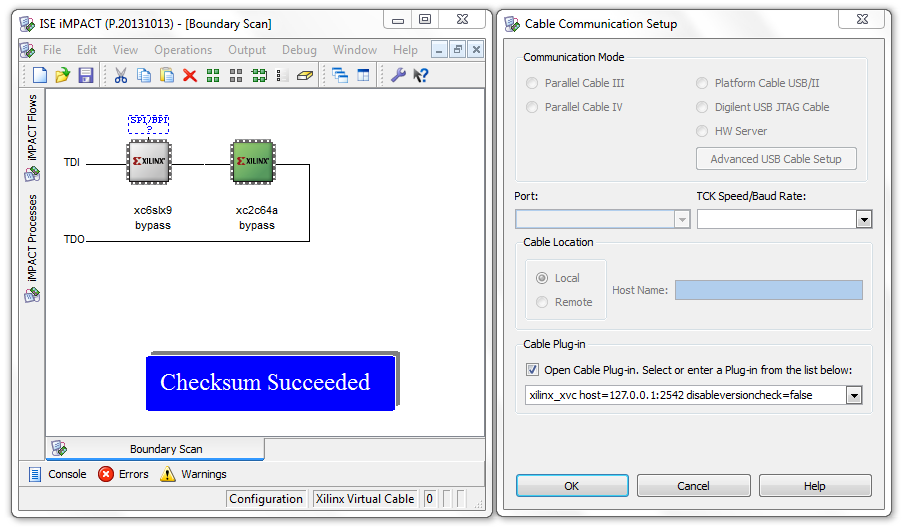
This project implements a bare-bones Xilinx Virtual Cable server on an Arduino Uno / Leonardo, based on the specification posted in Xilinx/XilinxVirtualCable.
Make sure that the device's JTAG output-high voltage does not exceed the Arduino's maximum input voltage!
Connect your Arduino Uno to the JTAG port of the target device:
| Arduino Pin | JTAG Pin |
|---|---|
2 (OD output) |
TCK |
3 (OD output) |
TMS |
4 (OD output) |
TDI |
5 (input) |
TDO |
GND |
GND |
The Arduino's pins are configured as open drain outputs to automatically adjust to the target's JTAG I/O voltage. External pull-up resistors aren't required, as Xilinx PLDs provide them internally.
So far, this project has been tested successfully using ISE 14.7 and iMPACT.
An additional program is required to translate the serial port to a TCP socket, e.g. pyserial: tcp_serial_redirect.
- Start the tcp-to-serial bridge application to serve the Arduino's Serial VCP to
localhost:2542. Use baudrate115200and8N1mode.
python tcp_serial_redirect -P 2542 COMx 115200
- Open iMPACT and start the Boundary Scan flow
- Open the Cable Setup dialog (either via right-click or the Output menu)
- Mark the checkbox under Cable Plug-In
- Enter the following into the combobox below:
xilinx_xvc host=127.0.0.1:2542 disableversioncheck=false
Set disableversioncheck to false for iMPACT to parse the getinfo version string and maximum packet size.
- The PLD should now show up and be identified correctly when you run Initialize Chain.
JTAG transfers are limited to a clock frequency of ~100 kHz, leading to excessive programming times for large FPGA bitfiles.
| Device | File size | Programming time |
|---|---|---|
| XC2C64A | 27 kiB | 10 Seconds |
| XC6SLX9 | 333 kiB | 5 Minutes |
