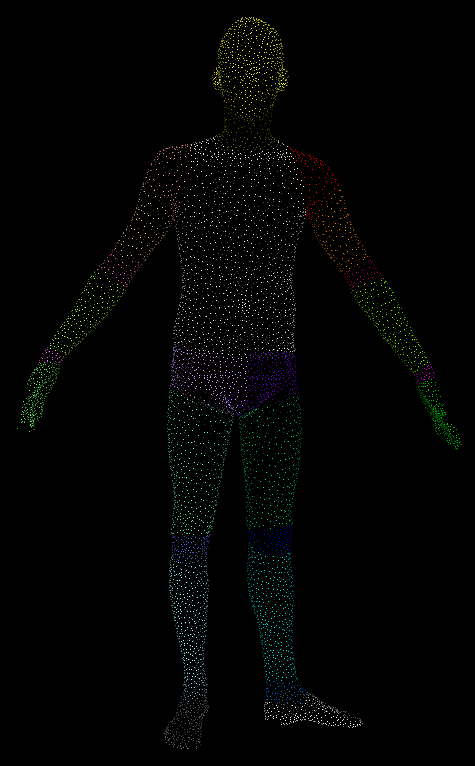
This repo provides the PCD annotation guideline of 3D human meshes in .obj format
It includes the processing algorithm of annotation files for machine learning
Use the pip to install dependencies, you may use conda instead
pip install numpy
pip install pymeshlab
pip install open3d
pip install pandasIf your data is saved with .obj format, you may use obj_to_pcd.py to convert the meshes into .pcd format
To convert the meshes, please create the directories as following:
├── input_obj
│   ├── 1_139.obj
│   ├── 1_141.obj
├── output_pcd
└── obj_to_pcd.pyIf there are too many vertices in the input meshes, you may use mesh_reduce.py to reduce the vertices into 10000 vertices
Please create the directories as following:
├── mesh_data
│   ├── 1_139.obj
│   ├── 1_141.obj
├── output_mesh
└── mesh_reduce.pyThis repo is using Semantic Segmentation Editor as labeling tool.
It support .pcd file as input and output .txt file as annotation.
- Follow the original page to install the Semantic Segmentation Editor
- Access to semantic-segmentation-editor-master
- Replace the original settings.json with our settings.json
- Create the folders "img_folder" and "pc_folder"
- In settings.json, change the path of "images-folder" and "internal-folder" to the path of img_folder and pc_foler respectively
- Put all the input .pcd files in "img_folder"
- Start the application by:
cd semantic-segmentation-editor-x.x.x
meteor npm start- You are ready to annotate the point cloud, for detail tutorial of using Semantic Segmentation Editor, please refer to original page
Our algorithm currently support .obj mesh files.
To convert the annotation txt file into simplified data structure, please create the directories as below:
├── input_obj
│   ├── a.obj
│   ├── b.obj
├── input_annotated_txt
│   ├── a.txt
│   ├── b.txt
├── output_txt
├── ply_without_color
├── ply_with_color
├── apply_color_to_ply.py
└── annotation_output.py
Put all the annotated .txt files into "input_annotated_txt" and .obj files into "input_obj". Then run annotation_output.py
The .ply with RGB color files are stored in "ply_with_color" folder
It will be saved in ascii format with following properties:
x y z red green blueThe simplified .txt annotation files are stored in "output_txt" folder
It will be saved as x y z label format:
x y z labelThe result ply will be like this:

You may add/remove body parts and change the color in settings.json
For each ply file generated, there maybe some spaces randomly generated by the library. It may cause the ply file cannot be read.
To remove the spaces, please run following code with terminal inside the folder:
sed -i 's/[ \t]*$//' *.ply