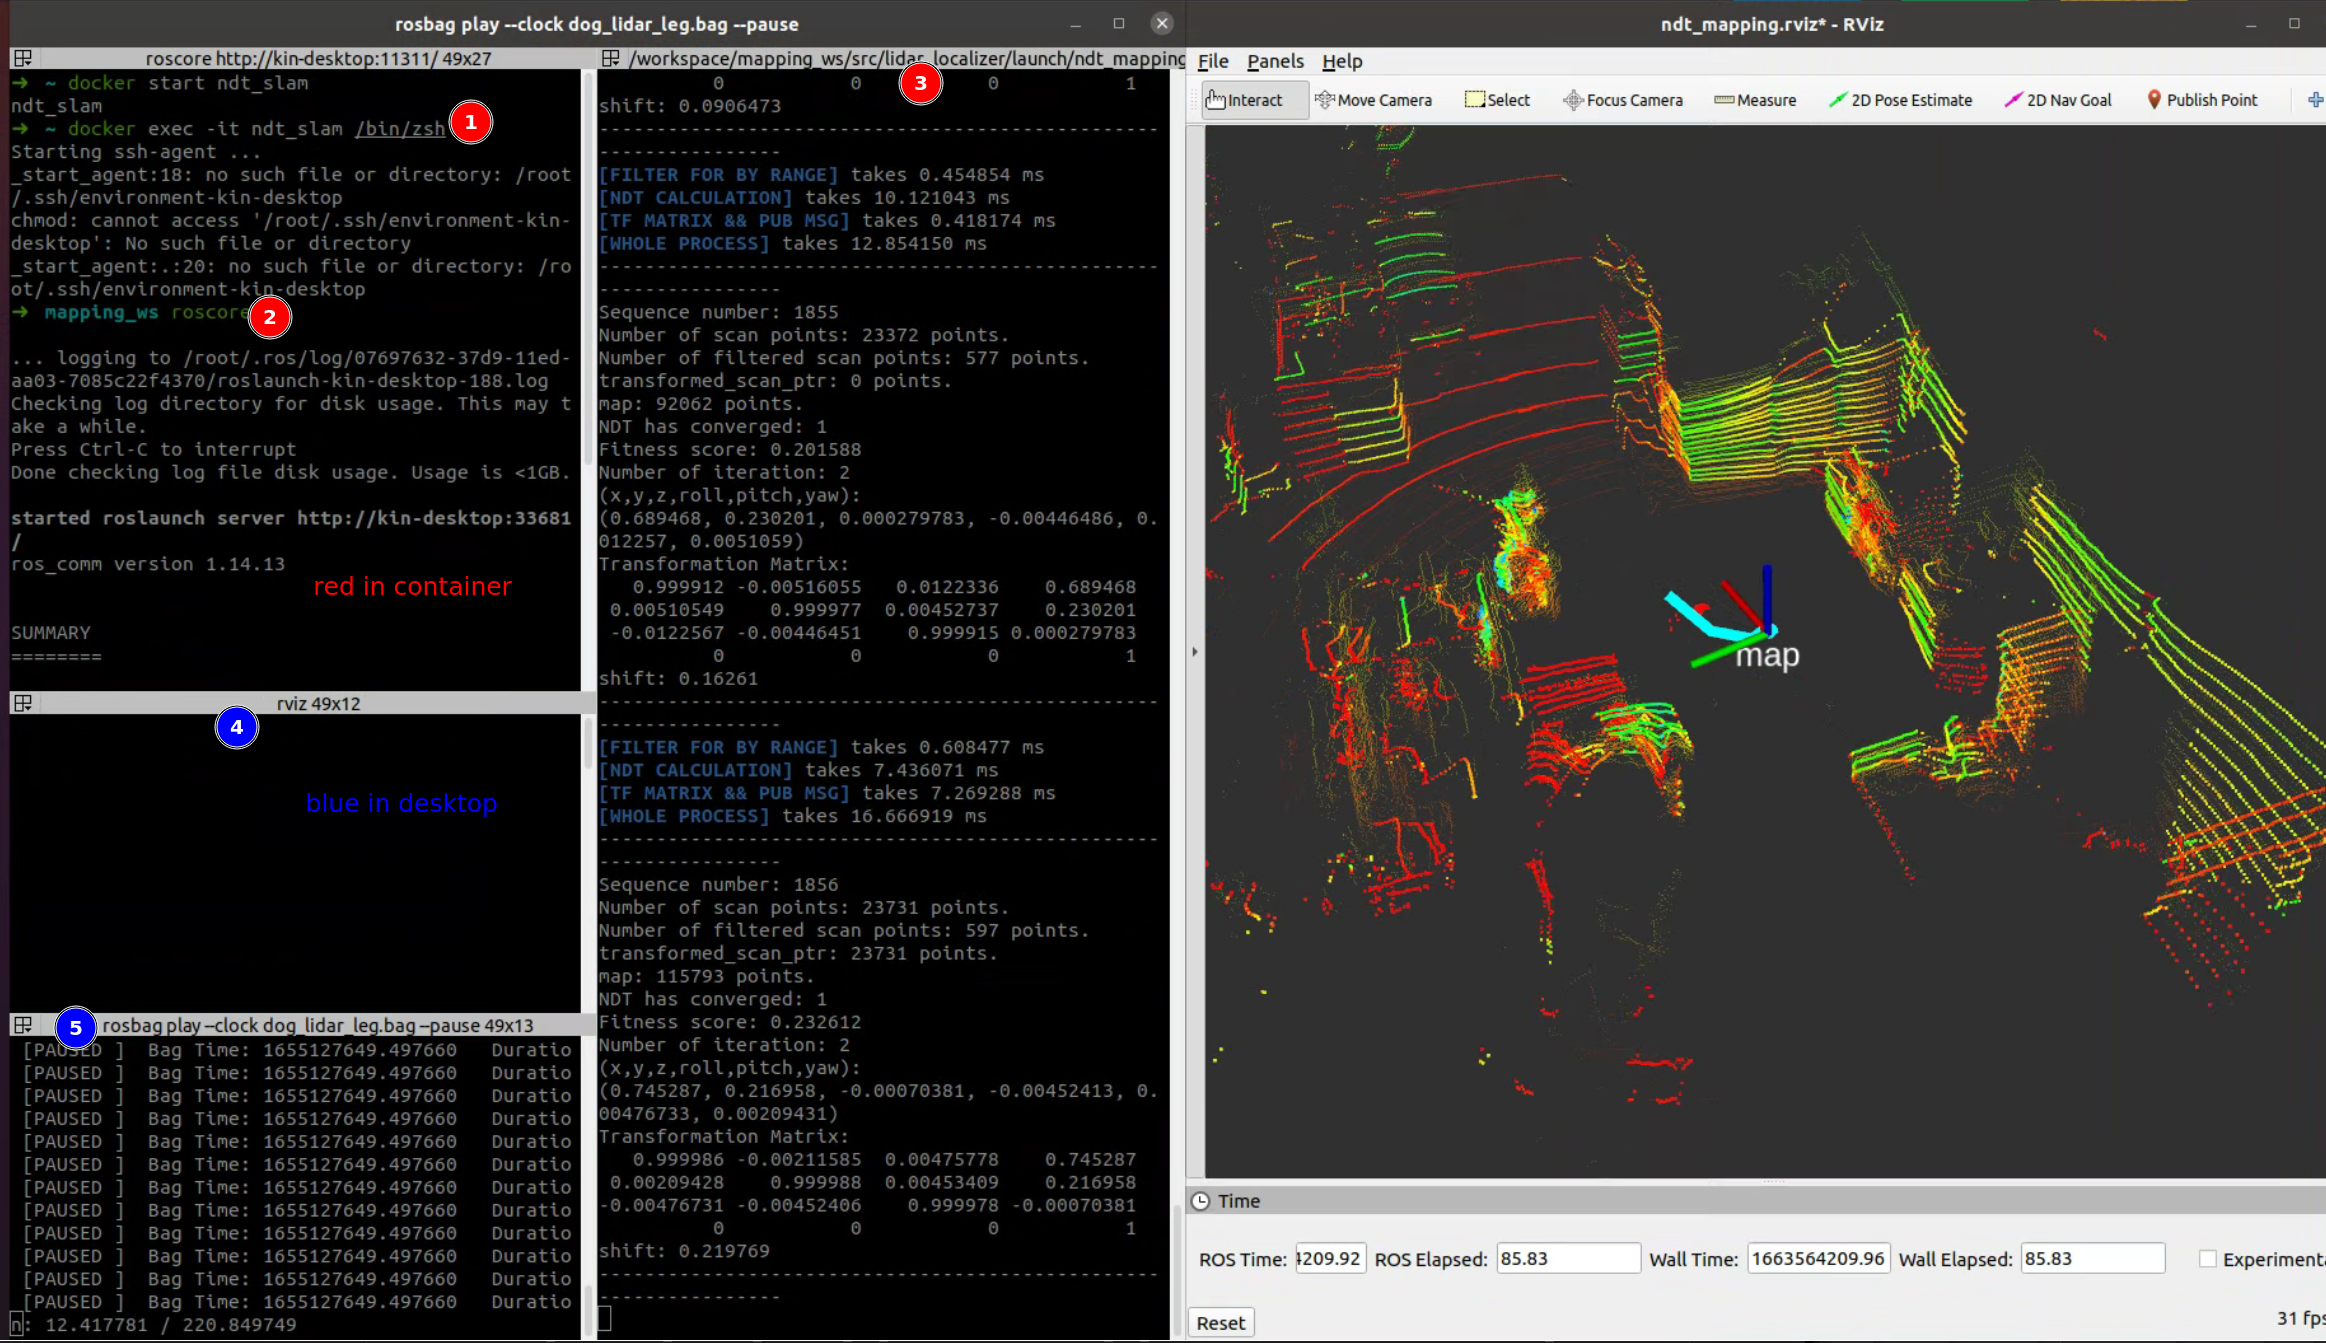
This package is extracted from autoware.ai 1.14.0 version, but with debug fixed, re-factor and speed up.
- fix the empty tf problem, check the related pull request
- speed up the whole package, more efficient than previous one, could run 10hz stably in 4-core CPU
Package Usage, using one LiDAR to do SLAM, no IMU no camera needed, of course sometime the result may not good enough, These Ubuntu 16.04-20.04 system with ROS can all run this package:
- Localization
- Mapping
- Dynamics points remove, check our benchmark repo
CHANGE LOG:
- 2023/05/21: Update to Dynamic Removal Benchmark link. This repo can provide the dataset format from rosbag to required format.
- 2022/12/2: For more people to use this package, Change README to English version. Here is a chinese readme before
- 2022/10/19: Update: download test Kitti dataset bag: onedrive link: kitti_sequence11_half.bag and follow building steps, modify the bag path in
ndt_mapping_kitti.launchand roslaunch it.
Real robots/dataset I tried:
-
1x1m Small cars (Velodyne-16)
-
quadruped robot (Robosense-16), check our paper website, for our work on Real-time Neural Dense Elevation Mapping for Urban Terrain with Uncertainty Estimations
-
KITTI dataset (Velodyne-64), teaser bag try onedrive link: kitti_sequence11_half.bag only 876Mb
-
HKUST dataset (Ouster-128), check our dataset webiste
-
RS-LiDAR-M1 (special LiDAR but have points cloud is enough for simple_ndt)
Test on following system: Ubuntu 20.04 noetic, 18.04 melodic, 16.04 kinetic
Can run at any computer if using the docker (as my experience, but please try on real computer if you are running on the real robot)
expand to see the docker usage
Provide the docker also:
# pull or build select one
docker pull zhangkin/simple_ndt

docker build -t zhangkin/simple_ndt .
Running inside:
docker run -it --net=host --name ndt_slam zhangkin/simple_ndt /bin/zsh
cd src && git pull && cd ..
catkin build -DCMAKE_BUILD_TYPE=Release
roscore

# open another terminal
docker exec -it ndt_slam /bin/zsh
source devel/setup.zsh
roslaunch lidar_localizer ndt_mapping_docker.launchClone and running in your computer
mkdir -p ~/workspace/mapping_ws/src
cd ~/workspace/mapping_ws/src
# please remember to --recurse-submodules !!!!
git clone --recurse-submodules https://github.com/Kin-Zhang/simple_ndt_slam
Install some dependences (glog, gflag)
cd simple_ndt_slam
sudo chmod +x ./assets/scripts/setup_lib.sh
sudo ./assets/scripts/setup_lib.sh
Opne lidar_localizer/config/ndt_mapping.yaml, modify the topic name based on your robot setting:
lidar_topic: "/velodyne_points"if you are running on the bag, remember to modify the bag path in the launch
<arg name="bag_file" default="/home/kin/bags/kitti/semantickitti_sequence11.bag" />
<node pkg="rosbag" type="play" name="bag_play" args="$(arg bag_file) --clock -r 0.8" required="false"/>
Build and run, please remember modify the config to point out correct topic name
cd ~/workspace/mapping_ws
catkin build -DCMAKE_BUILD_TYPE=Release
source devel/setup.zsh # or source devel/setup.bash
roslaunch lidar_localizer ndt_mapping.launch
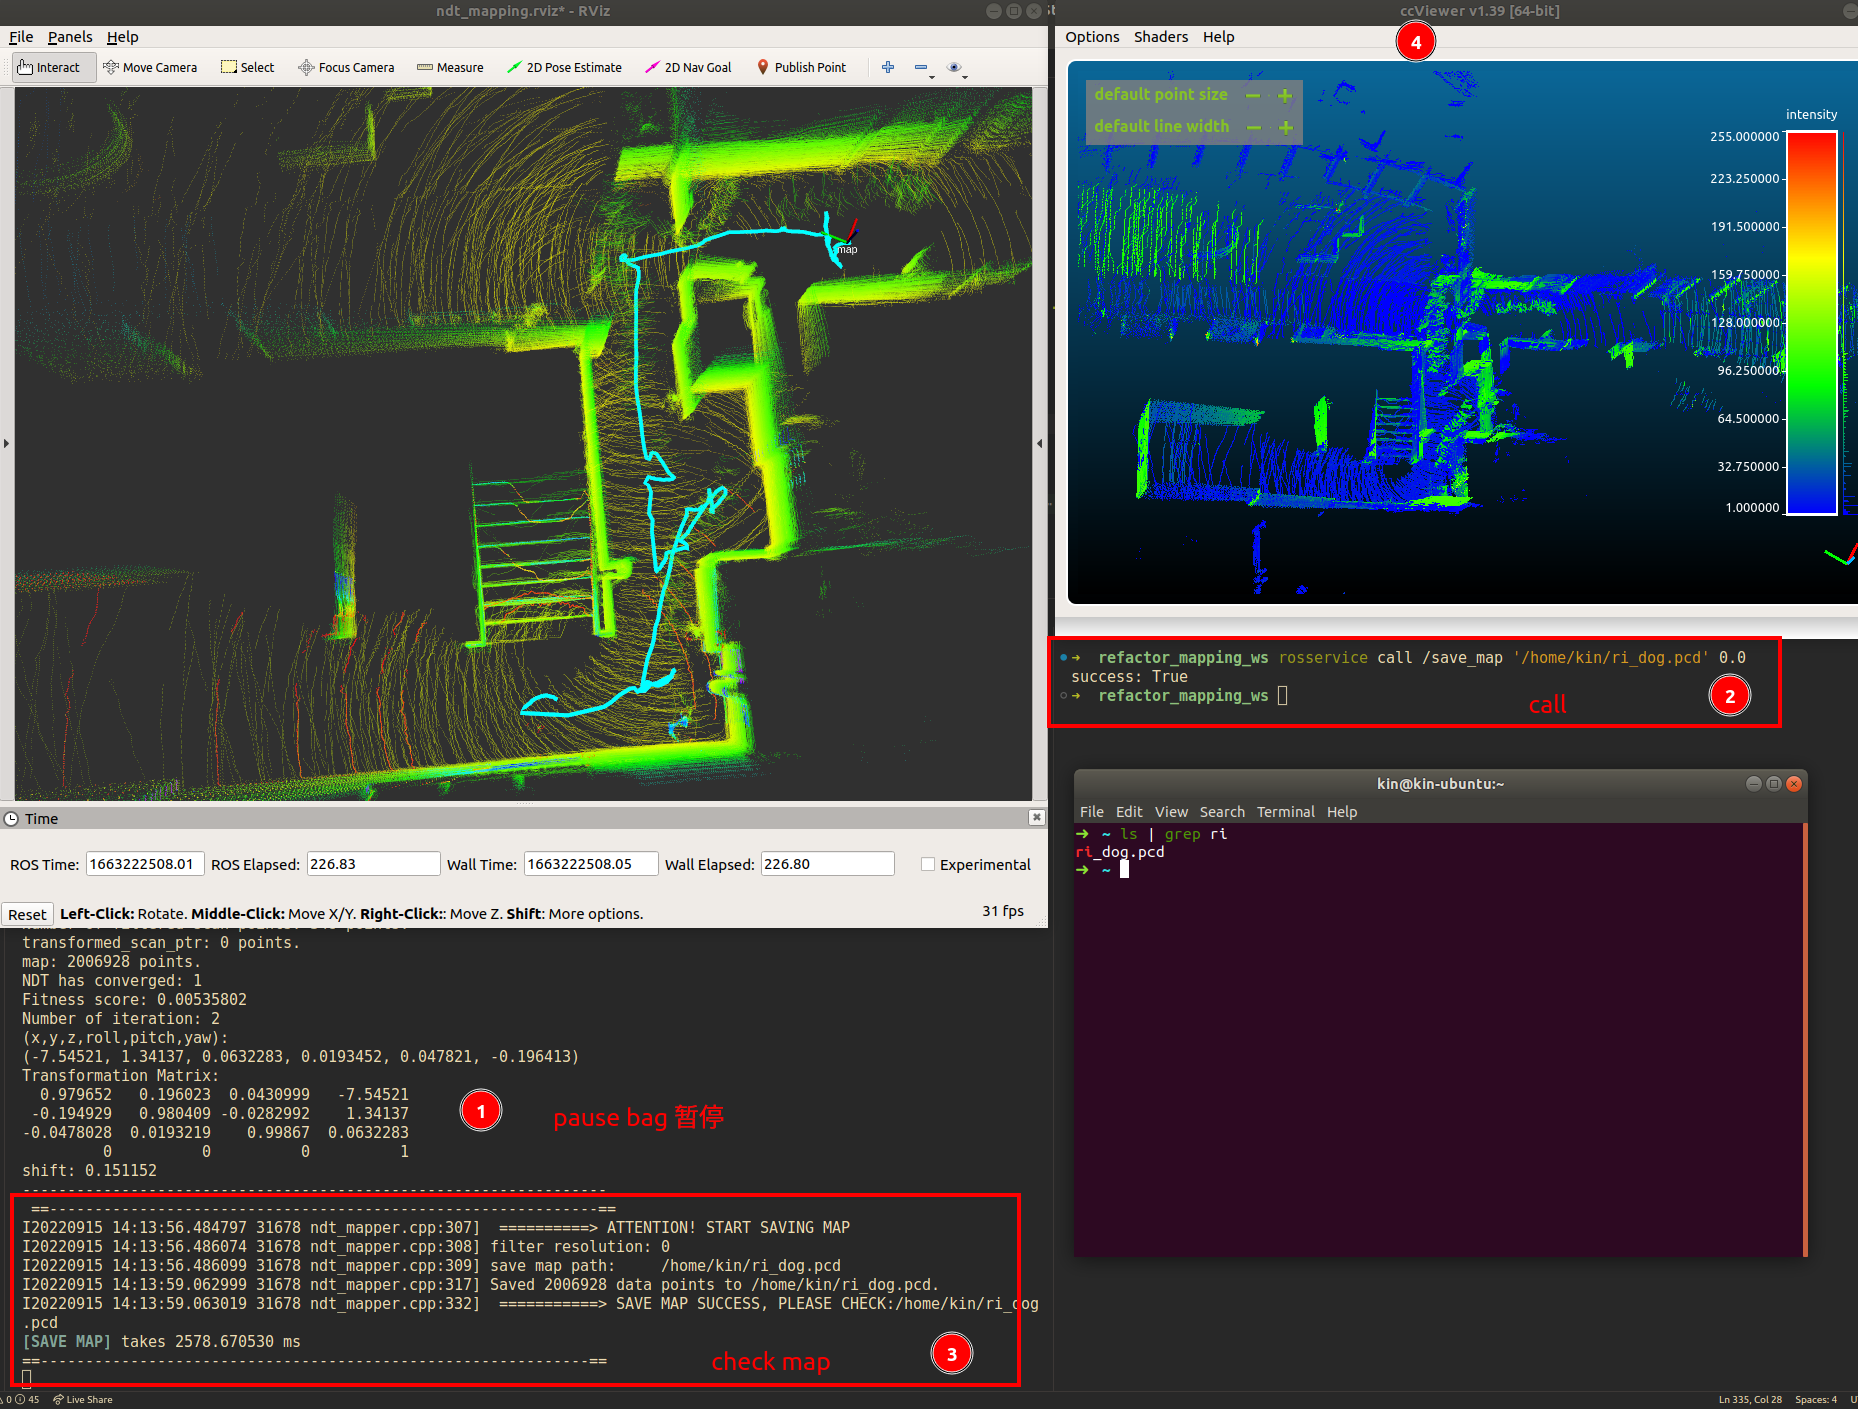
Running image with save map, 0-1 means filter rate, 0 means save all points, normally we will save 0.02-0.1 based how many points in the map
# open another terminal
source devel/setup.zsh # or source devel/setup.bash
rosservice call /save_map '/home/kin/bags/autoware/cones_people.pcd' 0.0
rosservice call /save_map '/home/kin/ri_dog.pcd' 0.2 # save around 20cm filter voxel-
需要根据不同的建图场景进行调节,主要调节计入的最大最小距离等
# Ignore points closer than this value (meters) (default 5.0)
min_scan_range: 1.0
# Ignore points far than this value (meters) (default 200.0)
max_scan_range: 50.0
# Minimum distance between points to be added to the final map (default 1.0)
min_add_scan_shift: 0.5
-
如果无需建图,可开启保存一定数量的点云进行运算,把旧时刻的清除
save_frame_point: 10
This part are optional!! Depends on your interest. You can also ignore these part and only use simple-ndt. Here are multiples.
Following steps are the post-processing to make odom more accurate (loop-closure) and to make global map better (remove dynamic, ghost points)
TODO Function: post-processing Loop closure after saving the poses and pcd
Check our benchmark repo.
-
First run your bag with simple_ndt_slam with
rosbag recordline in the launch file<node pkg="rosbag" type="record" name="bag_record" args="--output-name $(arg record_bag) /auto_odom /repub_points /tf /tf_static" />
-
Then run the tools to get the pcd folder to required format for DynamicMap Benchmark One more thing to note, if your poincloud msg is xyzrgb remember change the code
using PCDPoint = pcl::PointXYZRGB;etc.cd tools cmake -B build && cmake --build build # format ./bag2pcd_tf <rosbag_path> <save_pcd_folder> <pc2_topic_name> <world_or_map_frame_id> # example ./bag2pcd_tf /home/kin/pointclouds.bag /home/kin/Tmp /camera/rgb/points world
Then you will have the
/home/kin/Tmp/pcdfolder with all the pcd files include the pose and already transform to world frame. -
Run the DynamicMap Benchmark. Check the methods in the
methodsfolder, all methods in this repo can run the dataset you just generated. For example:./octomap_run ${data_path} ${config.yaml} -1 ./dufomap_run ${data_path}
You will get the clean map in the data folder. Here is the effect: [TODO add compared img]
博文及视频补充 Chinese only
相关参数介绍均在博客中进行了详细介绍:
-
CSDN: 【Autoware】之ndt_mapping理论公式及代码对比
这篇全文比较长,如果想简单使用而已,可以直接点链接看参数即可
相关使用视频:
后续继续补充时,也会更新相关博文或视频进行说明
- 参考开源包,后续加入回环(g2o/gtsam方式) -> But you can try directly to A-LOAM, LEGO-LOAM, LIO-SAM (+IMU) etcs
- 做一个建图的GUI以方便大家使用,提供安装包直接安装 无需源码编译版 -> don't except that too much
-
Autoware.ai core_perception: core_perception
-
Style Formate: https://github.com/ethz-asl/linter
cd $YOUR_REPO
init_linter_git_hooks # install
linter_check_all # run

init_linter_git_hooks --remove # remove
✨✨Stargazers, positive feedback

