Udacity Self-Driving Car Nanodegree - PID Control project
This project implements a PID controller to control a car in Udacity's simulator(it could be downloaded here). The simulator sends cross-track error, speed and angle to the PID controller(PID) using WebSocket and it receives the steering angle ([-1, 1] normalized) and the throttle to drive the car. The PID uses the uWebSockets WebSocket implementation. Udacity provides a seed project to start from on this project (here).
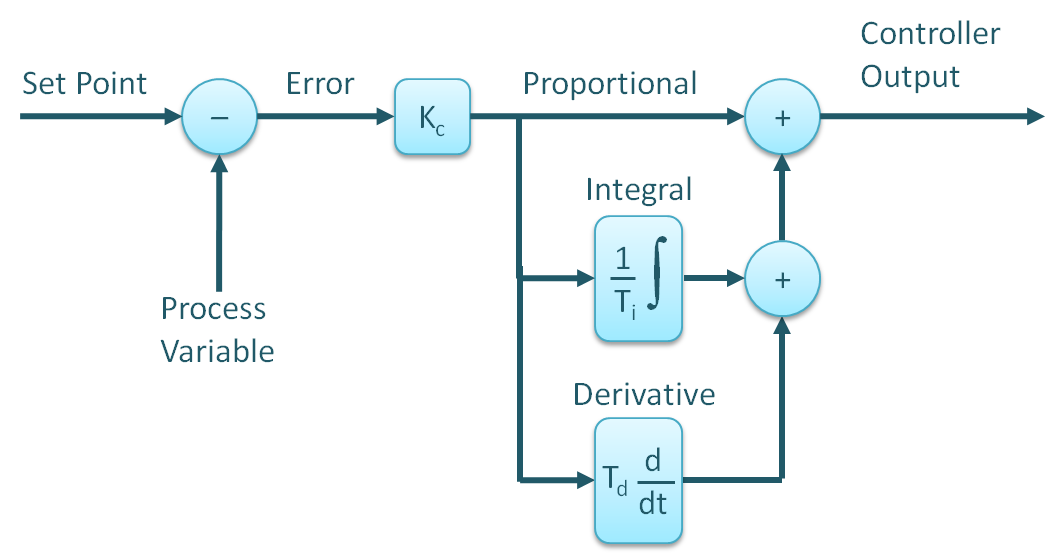
PID controllers are named after the Proportional, Integral and Derivative control modes they have. IT's basically a control loop feedback mechanism. As the name suggests, PID algorithm consists of three basic coefficients: proportional, integral and derivative which are varied to get optimal response.
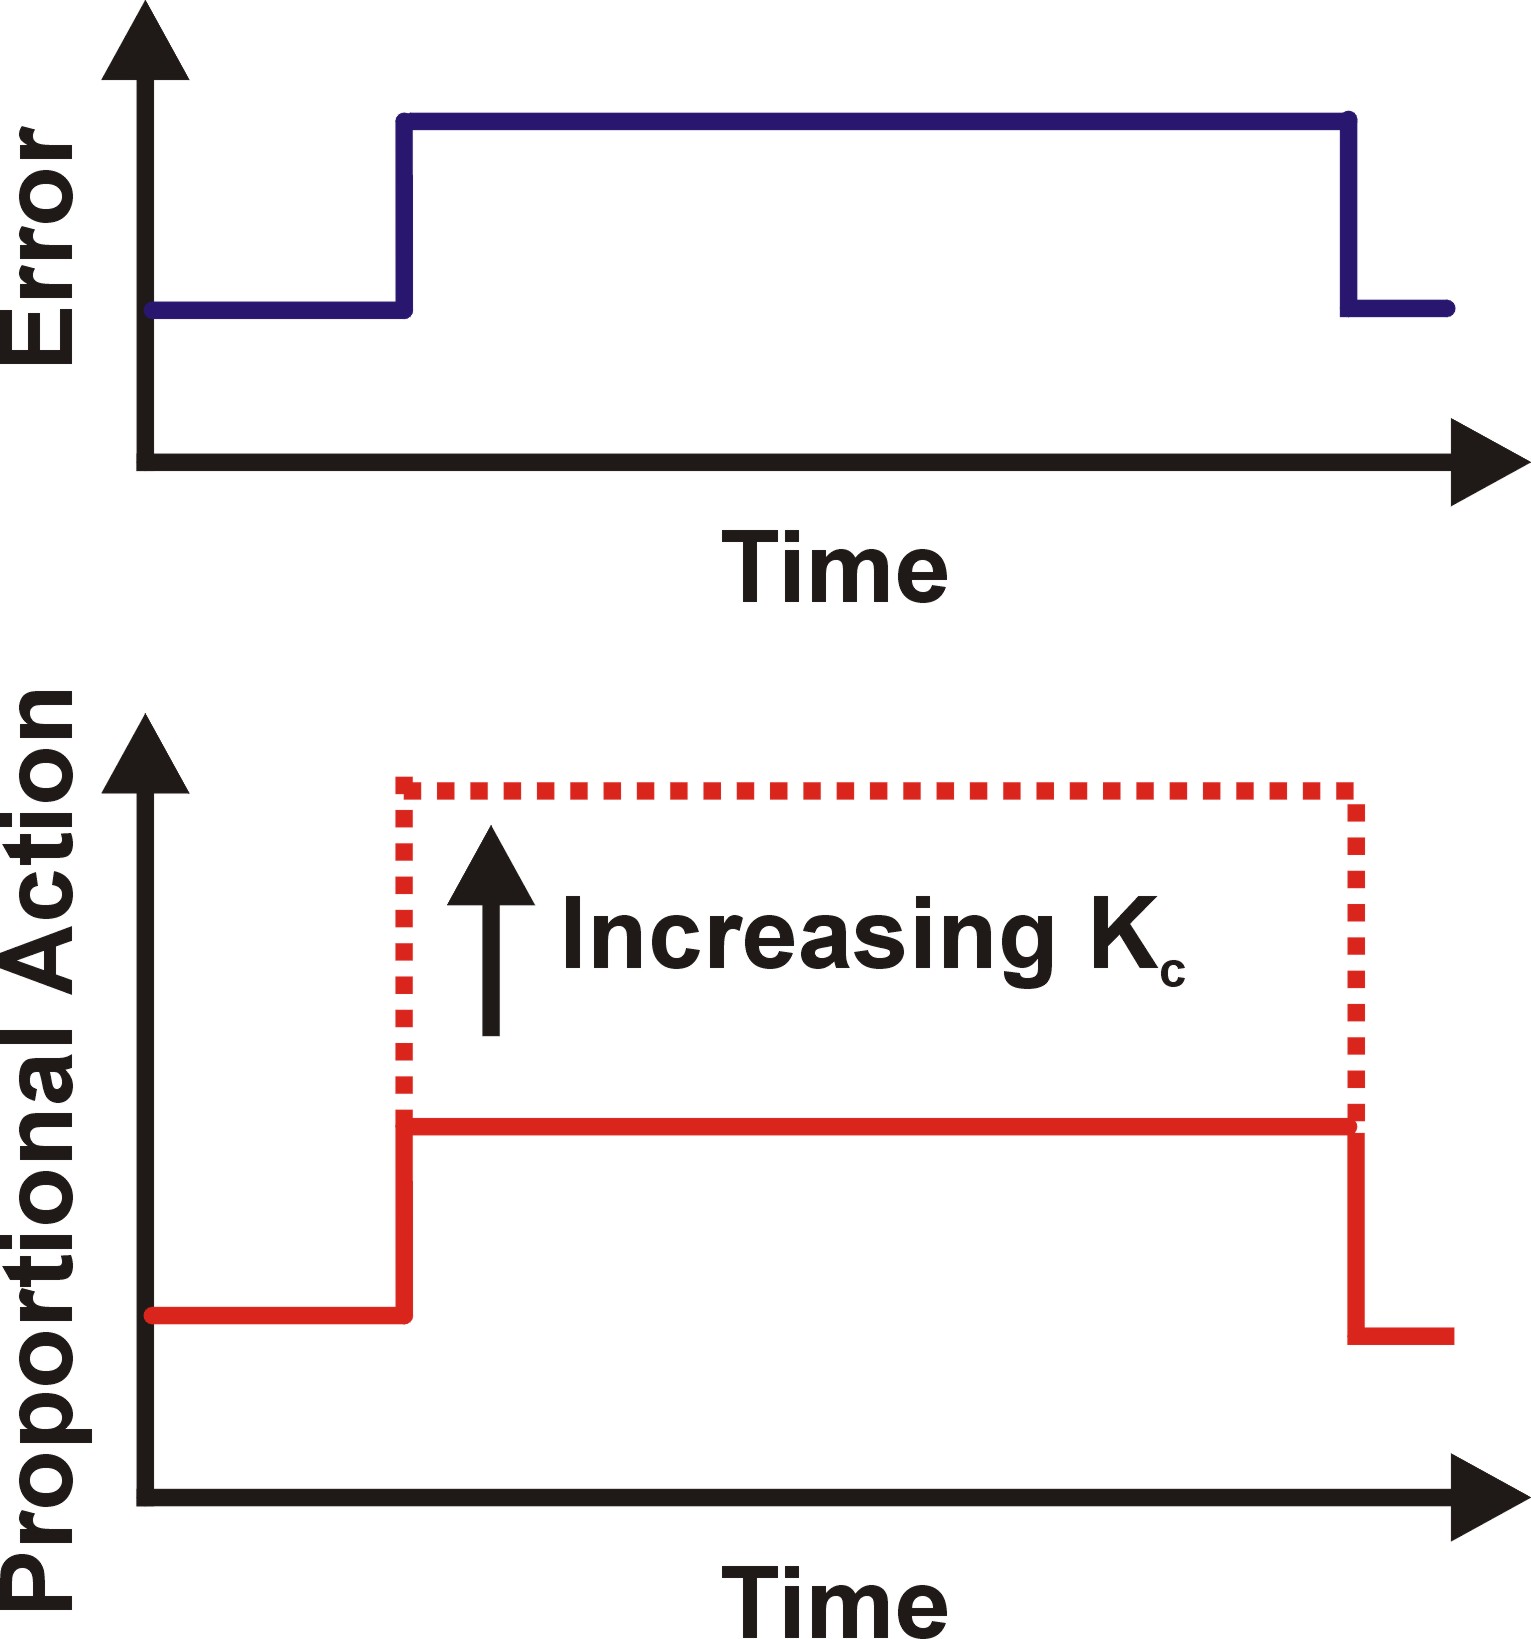
The proportional control mode is in most cases the main driving force in a controller. It changes the controller output in proportion to the error. If the error gets bigger, the control action gets bigger. This makes a lot of sense, since more control action is needed to correct large errors. The adjustable setting for proportional control is called the Controller Gain (Kp). A higher controller gain will increase the amount of proportional control action for a given error. If the controller gain is set too high the control loop will begin oscillating and become unstable. If the controller gain is set too low, it will not respond adequately to disturbances or set point changes.
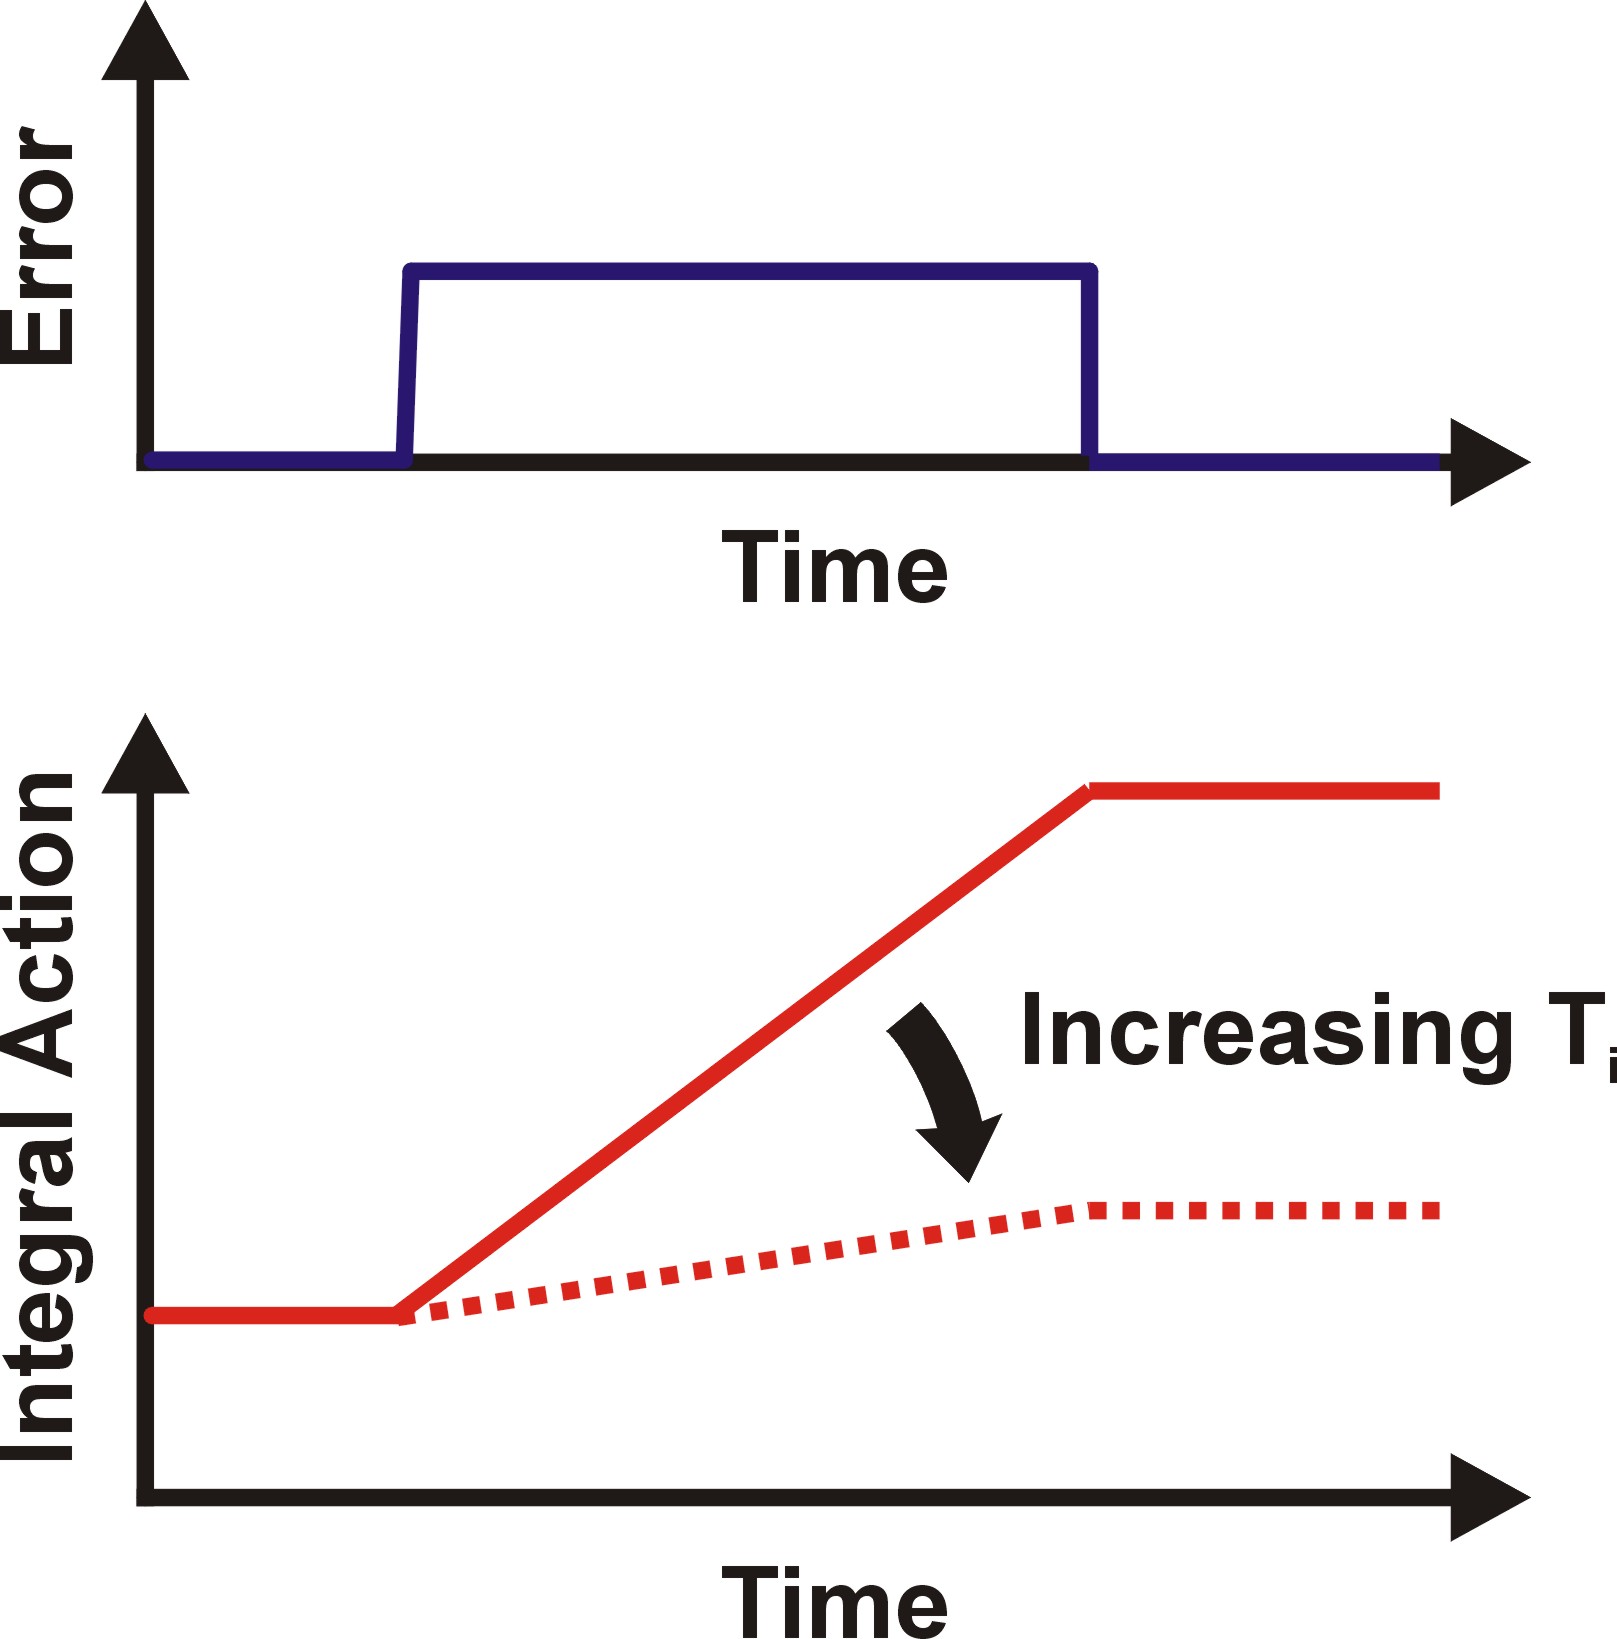
As long as there is an error present, the integral control mode takes into account the integral of error over past time, it will continuously increment or decrement the controller’s output to reduce the error. Given enough time, integral action will drive the controller output far enough to reduce the error to zero. If the error is large, the integral mode will increment/decrement the controller output fast, if the error is small, the changes will be slower.
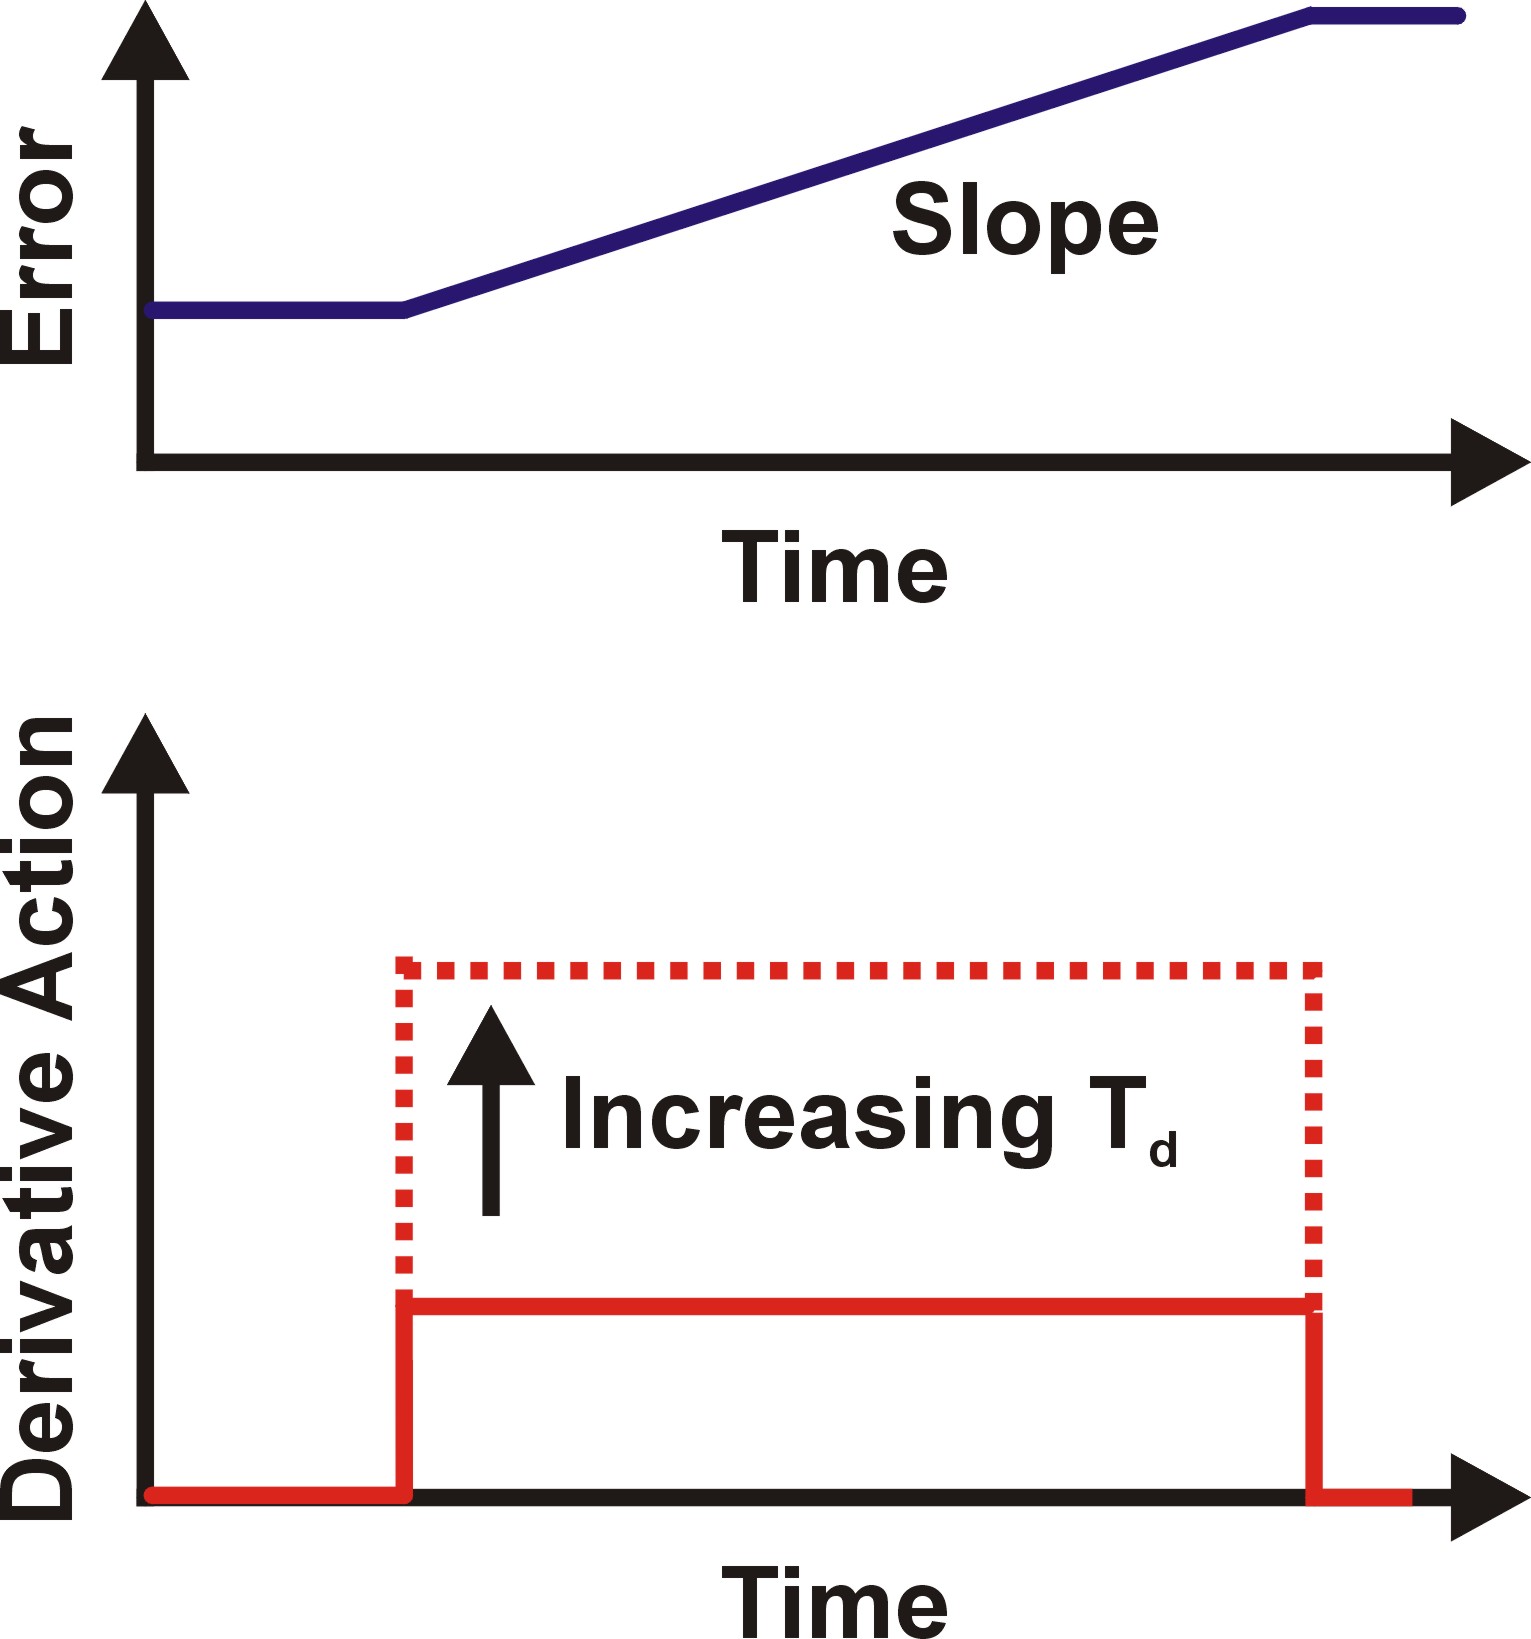
The third control mode in a PID controller is derivative. Using the derivative control mode of a controller can make a control loop respond a little faster than with PI control alone. The derivative control mode produces an output based on the rate of change of the error. The derivative mode produces more control action if the error changes at a faster rate. If there is no change in the error, the derivative action is zero.
PID controller output is made up of the sum of the proportional, integral, and derivative control actions. PID control provides more control action sooner than what is possible with P or PI control. This reduces the effect of a disturbance, and shortens the time it takes for the level to return to its set point.
Hyperparameters were further tuned manually by try-and-error process.
The project has the following dependencies (from Udacity's seed project):
- cmake >= 3.5
- make >= 4.1
- gcc/g++ >= 5.4
- Udacity's simulator.
- Clone this repo.
- Make a build directory:
mkdir build && cd build - Compile:
cmake .. && make- On windows, you may need to run:
cmake .. -G "Unix Makefiles" && make
- On windows, you may need to run:
- Run it:
./pid
From the build directory, execute ./pid. The output should be:
Listening to port 4567
Connected!!!
-
Now the PID controller is running and listening on port 4567 for messages from the simulator. Next step is to open Udacity's simulator.
-
Using the right arrow, you need to go to the Project 4: PID Controller project.
-
Click the "Select" button, and the car starts driving. You will see the debugging information on the PID controller terminal.


